Looking for a Contractor?

Alchatek Blog

REMINDER: Geotech & Leak Seal Training (May 2nd - 4th, 2023)

Posted by Kreg Thornley on Mar 21, 2023 10:00:00 AM

Banner - Geotech & Leak Seal Training - Spring 2023-Reminder

Alchemy-Spetec HQ in Tucker, GA

AS Geotech Training Spring 2023 - RegistrationMay 2nd - May 4th
$745 Registration Fee

$665 for each additional participant from
the same company.

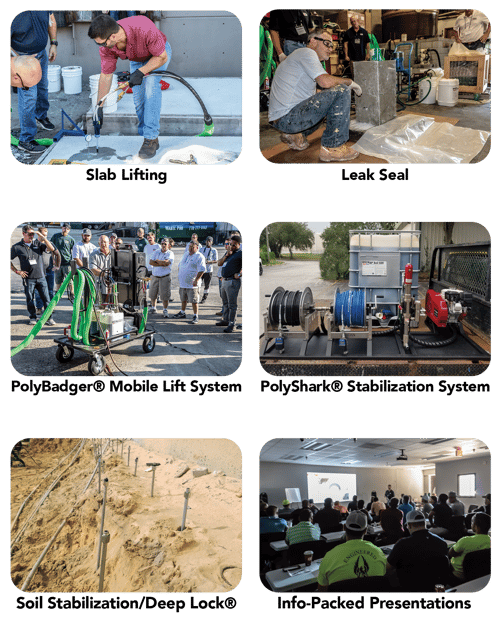
Get ready for a thorough education in Slab Lifting, Soil Stabilization, the Deep Lock® process, Crack Injection, and Curtain Grouting. You’ll get hands-on training from a technical staff with decades of on-the-job experience.

Agenda Items

  • Geotech Product Line Overview
  • Geotech Applications & Case Studies
  • MixMaster Pro Slab Lifting Gun
  • Slab Lift Rig Demonstration
  • Pump Demos & Training
  • PolyShark® / Soil Stabilization
  • Deep Lock® 
  • Ground Penetrating Radar
  • PolyBadger® Mobile Slab Lifting System
  • Crack Injection
  • Curtain Grouting
  • Estimating Material for Jobs

Topics: Equipment & Accessories, All Posts, Lift Slabs, Stabilize Soil, Business Tips, Fill Voids, Deep Lock

Geotech & Leak Seal Training: May 2nd - 4th, 2023

Posted by Kreg Thornley on Mar 7, 2023 10:00:00 AM

Banner - Geotech & Leak Seal Training - Spring 2023

Alchemy-Spetec HQ in Tucker, GA

AS Geotech Training Spring 2023 - Registration

May 2nd - May 4th
$745 Registration Fee

$665 for each additional participant from
the same company.

Get ready for a thorough education in Slab Lifting, Soil Stabilization, the Deep Lock® process, Crack Injection, and Curtain Grouting. You’ll get hands-on training from a technical staff with decades of on-the-job experience.

Agenda Items

  • Geotech Product Line Overview
  • Geotech Applications & Case Studies
  • MixMaster Pro Slab Lifting Gun
  • Slab Lift Rig Demonstration
  • Pump Demos & Training
  • PolyShark® / Soil Stabilization
  • Deep Lock® 
  • Ground Penetrating Radar
  • PolyBadger® Mobile Slab Lifting System
  • Crack Injection
  • Curtain Grouting
  • Estimating Material for Jobs

Topics: Equipment & Accessories, All Posts, Lift Slabs, Stabilize Soil, Business Tips, Fill Voids, Deep Lock

Sealing Leaks in Cold Weather

Posted by Stephen C. Barton on Nov 17, 2022 10:00:00 AM

Banner - Sealing Leaks in Cold Weather 2022

Body - Sealing Leaks in Cold Weather 2022It's that time of year again. As temperatures drop, take a moment to review this previously posted article packed with cold-weather tips.


There are plenty of leak seal jobs that need to be done in the winter. So let's take a look at those cold-weather markets. We'll also review some special considerations for conditioning leak seal material and equipment. Then we’ll leave you with a few cold temperature leak seal application tips.

Cold Weather Markets

You have a variety of options for seeking jobs that are inside, and out of the elements, during the winter months.  Hopefully, these ideas will spark more brainstorming on your part. First up we have tunnels, both pedestrian and vehicle. Tunnels often leak, sometimes significantly enough to result in quite a big job. Aquariums are another possibility. As you can imagine, there are infinite potential leak problems in a structure holding that much water. Other possible large jobs could include mines and water treatment plants (which have plenty of interior spaces with potential leak issues). On the smaller side, there are utility vaults, lift stations, manholes, and elevator pits.

If you’re still up for working outside during the winter months, you’re in luck because concrete contracts during colder weather. The contraction makes cracks open wider. Wider cracks make leaks more apparent to the property owner and make them easier to repair.

Conditioning Materials and Equipment

One important point to understand is that cold weather requires you to make an extra effort to keep your materials and equipment warm. Cold material reacts slower and gets thicker. Be sure to store your materials and equipment in a heated room the night before the job. When on the job site, there are many ways to keep everything warm. Use an enclosed vehicle, like a box truck, enclosed trailer, or pickup truck with a camper top or bed cover. Keep as much material and equipment inside the vehicle as possible when working. Use a portable heater to maintain a warm temperature. You can also use electric pail heaters to keep your resin ready for action.

Remember that it won’t do you any good to heat the resin if you’re pumping it through cold equipment. The cold steel inside the pump and the cold hose will literally suck the heat out of the resin before it gets where it needs to be. This will increase the viscosity, making it harder to mix with the water and it will slow down the reaction dramatically. So don’t neglect the equipment side of the equation!

Cold Temperature Application Tips

If you’re using a product with an accelerator, you may need to use a faster accelerator or increase your percentage. Also, bring lots of oakum. You may have to use more if the cold temperature slows down the material or the contracted concrete has made the cracks wider.

If your job requires you to inject into a structure underwater (and the water’s cold), you can use a technique called twin streaming. In this approach, you hook two valves together in a parallel fashion – then inject warm water along with the resin to kick-start its reaction before hitting the cold water.

Conclusion

I hope this overview has helped spark some ideas on your part for finding leak seal work during the winter months. Just remember to keep your materials and equipment conditioned and you should be fine. Have more questions about polyurethane leak seal in cold weather? Call us at 404-618-0438.

Want more in-depth info on polyurethane leak sealing?

Download an Info-Packed Leak Seal Brochure!

Topics: Equipment & Accessories, All Posts, Seal Leaks, Business Tips

Stabilizing Soil in Cold Weather

Posted by Stephen C. Barton on Nov 15, 2022 10:00:00 AM

Banner - Stabilizing Soil in Cold Weather 2022

Body - Stabilizing Soil in Cold Weather 2022It's that time of year again. As temperatures drop, take a moment to review this previously posted article packed with cold-weather tips.

In this blog post, we will share some tips for stabilizing soil in cold weather. The two main points to remember are – to make sure the ground isn’t frozen and to condition your material and equipment properly.

Do Not Attempt Soil Stabilization Work When the Ground is Frozen

If you’re considering soil stabilization in cold weather, the first step is to make sure that the water table isn’t frozen. Iced earth is not permeable enough for the proper mixing of resin and soil. If you attempt to proceed with frozen soil, you’ll just be wasting your material. Best to wait it out in that case.

Properly Condition Equipment and Materials

For optimal results, it’s best to store any materials and equipment that are to be used in a heated environment overnight. It’s best to keep your AP Soil 600 above 60 degrees at all times. This is key because cold material reacts slower and gets thicker. The methods you use to condition your material on the job site will depend on the type of vehicle you’re using.

If you have an insulated rig, it should stay around 40 degrees warmer than outside temperatures. Most foam rigs have built-in electric heaters that require an extension cord to a power outlet at the job site or at your facility for overnight storage. Alternatively, you could buy an electric radiator heater. Other available heating devices include drum band heaters and heated drum mats (be careful not to scorch the polymers by turning band heaters up too high). For a more DIY approach, you could build a hot box around the material storage area in your rig.

If you’re using pails and a smaller vehicle, use an enclosed vehicle, like a box truck, enclosed trailer, or pickup truck with a camper top or bed cover. Keep as much material and equipment inside the vehicle as possible when working. Use a portable heater to maintain a warm temperature. You can also use electric pail heaters to keep your resin ready for action.

Using a combination of the methods described above, you should be able to keep your materials warm enough. In extreme cases when the material gets a bit too cold and thick, you may want to use AP Cat 600 to speed up the reaction time.

Conclusion

As long as the ground isn’t frozen, you should be able to stabilize soil in cold weather.  Just make sure your materials and equipment are conditioned properly.  If you have any further questions, please contact us at 404-618-0438.

Want in-depth info on soil stabilization products?

Download an Info-Packed Soil Stabilization Brochure!

Topics: Equipment & Accessories, All Posts, Stabilize Soil, Business Tips

Lifting Slabs in Cold Weather

Posted by Andy Powell on Nov 10, 2022 10:00:00 AM

Banner - Lifting Slabs in Cold Weather 2022

Body - Lifting Slabs in Cold Weather 2022It's that time of year again. As temperatures drop, take a moment to review this previously posted article packed with cold-weather tips.

Contrary to popular opinion, as a contractor, you don’t have to put up your equipment and rigs due to cold weather. There are many jobs to be done and many ways to keep your material conditioned. Use this season to your advantage and gain valuable business.

Cold Weather Markets

Seasonal attractions such as theme parks are a great place to start looking for winter work. Many of these parks (the ones that aren’t in Orlando) shut down for the winter and this is the time they do maintenance and repairs. Think of all the concrete lifting and leveling that can be done.

Factories can be less active in the winter months with production slowing down in many industries. This is a good time for them to do maintenance and floor repairs as well.

Warehouses typically operate year-round, so there is always work available. Warehouse floors are used and abused on a daily basis and will sooner or later need some form of repairs done to keep business running at a steady pace. In addition, many warehouses have dangerous voids beneath their floors that require repair.  

Exterior concrete slabs are still worth considering, even in cold weather. These slabs experience the most wear and tear from the environment itself (think erosion) and daily traffic. You’ll need to lift concrete slabs before the ground freezes and only after your materials have been thoroughly conditioned.

Conditioning Materials

Your slab lifting equipment probably has built-in heaters and a heated hose. Each brand and model of pump has different-sized pre-heaters and different ∆T (∆ = Delta and T = Temperature). This sounds complicated but is actually quite simple.  ∆T is simply the change in temperature.  Let’s say your material has been sitting in a cold trailer all night and the temperature has dropped to 40 degrees F. If the required temperature of your B side material is 120 degrees F, then your pump better be rated with a ∆T of at least 80 degrees. However, if your material is preconditioned to 70 degrees F, then your machine only has to be rated for a ∆T of 50 degrees. As I said, every machine is rated differently based on the size of the heaters. What is important to know is that there are limitations to how much heating your machine can do.

Keeping your materials conditioned in the winter months is a lot easier than it sounds. The main point is to keep your AP Lift products above 60 degrees at all times. Keeping the polyurethane at or above that temperature can be accomplished in a number of ways.

If you have an insulated rig, it should stay around 40 degrees warmer than outside temperatures. Most foam rigs have built-in electric heaters that require an extension cord to a power outlet at the job site or at your facility for overnight storage. Alternatively, you could buy an electric radiator heater. Other available heating devices include drum band heaters and heated drum mats (be careful not to scorch the polymers by turning band heaters up too high). For a more DIY approach, you could build a hot box around the material storage area in your rig.

Heat Sink

Another consideration when lifting cold slabs is the heat sink factor. AP Lift products come out of the gun hot and get even hotter as they react. However, cold concrete acts as a heat sink and sucks the energy out of the foam as it starts to react. This can slow down the reaction speed of the foam. If you are pumping into a void, it will have little effect because most of the foam is not in contact with the concrete. If you are trying to lift a slab with little void, it will have more of an effect because more of the foam is in contact with the cold concrete and cold soil. More volume = more energy.

Conclusion

Don’t let common preconceptions deter you from slab lifting in cold weather. As noted above, there is no need to shut down completely for the upcoming winter months if you don’t want to. Opportunities still exist and one of them may just be the job you’ve been looking for all year. There are many ways to keep your equipment and materials conditioned to efficiently work in lower temperatures. Have more questions about slab lifting in cold weather? Call us at 404-618-0438.

Want more in-depth info on slab lifting?

Download an Info-Packed Slab Lift Brochure!

Topics: Equipment & Accessories, All Posts, Lift Slabs, Business Tips

Winterizing Your PolyBadger

Posted by Erik Prinzing on Nov 1, 2022 10:00:00 AM

Banner - Winterizing Your PolyBadger

Body - Winterizing Your PolyBadgerAs the weather gets colder, contractors in some regions will need to prepare their PolyBadger Lifting Systems for storage during the off-season. We're providing step-by-step instructions for that procedure in this article.

Prepping a PolyBadger for Winter Storage

  1. Establish power to the cabinet and heat the hose (A heater, B heater, and hose) to the target temperature of 130° F.
  2. Introduce material to the cabinet.
  3. Turn the air supply on and recirculate to heat up the ISO and resin.
  4. Once the PolyBadger is up to temperature, turn off the air supply and remove the airlines from the stick pumps.
  5. Remove the supply and the recirculation line from the A-side stick pump.
  6. Drain all the remaining material from the pump and clean it with brake cleaner.
  7. Place the stick A side stubby stick pump into a 5-gallon pail of the AS Pump Flush.
  8. Reconnect the supply line and leave the recirculation line to drain in a purge pail.
  9. Repeat steps 5-8 on the B-side stick pump.
  10. Reconnect the air supply to the stick pumps, hold the return lines in a purge pail, and slowly open the air valve on the stick pumps.
  11. You will notice material slowly pushed out of the recirculation line into the purge pail. Continue to pump AP Flush 121 through the system until it comes out of the recirculation line clear, with no added color or debris.
  12. Shut the air valve supplying the stick pumps. This will stop the flow of material.
  13. Reconnect the recirculation lines to the appropriate stick pump and tighten.
  14. Turn the recirculation pump valves to supply the hose.
  15. You can remove the Handi Gun or leave it on for this stage, holding the hose in the purge pail. Turn on the supply valves on the end of the hose just before the Handi Gun. Slowly open the air valve on the stick pumps and pull the trigger on the gun.
  16. You will notice material slowly pushed out of the hose line into the purge pail. Continue to pump AP Flush 121 through the system until it comes out of the hose line clear, with no added color or debris.
  17. Shut the air valve supplying the stick pumps. This will stop the flow of material.
  18. Remove the stick pumps from the AS Pump Flush. (Make sure to mark your pails A and B for future use).
  19. Insert stick pumps into AP Pump Saver 195. (Make sure to mark your pails A and B for future use)
  20. Push the AP Pump Saver 195 through the hose line. You will notice the AS Pump Flush slowly pushed out of the hose line into the purge pail. Continue to pump AP Pump Saver 195 through the system until it comes out of the hose line clear (you will notice a thick, clean fluid).
  21. Turn off the supply valves on the hose just before the Handi Gun.
  22. Disconnect the air supply to the stick pumps.
  23. Move the hose supply valve into the recirculation position to depressurize the system.
  24. Shut off supply valves to the cabinet.
  25. Turn off heat zones.
  26. Turn off the main disconnect.
  27. Remove residual grease from interior cabinet pumps.
  28. Replace with new grease.

Want more information on the PolyBadger?

Download an Info-Packed PolyBadger System Brochure!

Topics: Equipment & Accessories, All Posts, Lift Slabs

Winterizing Your Slab Lifting Rig

Posted by Stephen C. Barton on Oct 27, 2022 10:00:00 AM

Banner - Winterizing Your Slab Lifting Rig

Body - Winterizing Your Slab Lifting RigAs the weather gets colder, contractors in some regions will need to prepare their slab lifting rigs for storage during the off-season. We're providing step-by-step instructions for that procedure in this article.

Please Note:

  • You will notice that more care is given to the A-side of the system, this is normal.
  • This procedure assumes you are using a PMC pump.

Prepping a Slab Lifting Rig for Winter Storage

  1. Remove and clean the A and B stick pumps. Clean the exterior of the pumps with brake cleaner to remove as much residual resin and polyol as possible.
  2. Place the A-Side transfer pump into a 5-gallon pail of the AS Pump Flush.
  3. Remove the recirculation hose from the A-Side drum and place it in a purge pail.
  4. Open A-Side inlet valve and recirculation valve on your PMC machine.
  5. Slowly open the air valve on the A-Side transfer pump to start introducing the AS Pump Flush through the A-Side of the machine.
  6. You will notice iso material being pushed out of the recirculation line into the purge pail. Continue to pump AS Pump Flush through the system until it comes out of the recirculation line clear, with no added coloring or debris.
  7. Shut the air supply feeding the transfer pump. This will stop all flow of material.
  8. Un-cap the A-Side of the PMC whip hose. Once un-capped, place the hose into the purge pail.
  9. Close the recirculation valve on the A-Side of the PMC machine.
  10. Slowly open the air valve on the A-Side transfer pump to start the flow of AS Pump Flush through the heated hose.
  11. You will notice iso material being pushed out of the whip hose into the purge pail. Continue to pump AS Pump Flush through the system until it comes out of the recirculation line clear, with no added coloring or debris.
  12. Now that this process is complete, the A-Side has been completely cleaned of any iso material.
  13. Remove the A-Side transfer pump from the pail of AS Pump Flush and place it into a 5-gallon pail of AP Lube 190.
  14. Slowly open the air valve on the A-Side transfer pump to start introducing the AP Lube 190 through the A-Side of the machine. Continue to pump the AP Lube 190 until you have pure and clean AP Lube 190 coming out of the end of the whip hose
  15. Place the B-Side stick pump into a separate 5-gallon pail of AP Lube 190.
  16. Slowly open the air valve on the B-Side transfer pump to start introducing the AP Lube 190 through the B-Side of the machine and heated hose. Continue to pump AP Lube 190 through the system until it comes out of the end of the whip hose, with no added coloring or debris.
  17. Once the entire system is full of clean AP Lube 190, slowly start to recirculate the AP Lube 190 through the entire system. When doing this, it is best to let the PMC machine cycle while recirculating the AP lube 190.
  18. Once all these steps are complete, close the air on each transfer pump and re-cap the heated PMC whip hoses.

Want more information on geotech products and equipment?

Download the Info-Packed Geotech Product Catalog!

Topics: Equipment & Accessories, All Posts, Lift Slabs

Soil Testing Equipment

Posted by Kreg Thornley on Oct 18, 2022 10:00:00 AM

Banner - Soil Testing Equipment

Body - Soil Testing EquipmentSoil testing equipment is extremely helpful for planning slab lifting and soil stabilization work. Contractors use ground penetrating radar systems and dynamic cone penetrometers to get a sense of soil conditions before they drill their first hole into a slab or push their first injection pipe into the ground.

Deep Look™ Ground Penetrating Radar

The Deep Look™ wireless ground penetrating radar collects data from hundreds of thousands of pulse reflections each second to help contractors identify objects below ground. The triple-frequency antenna design provides higher-resolution imaging than conventional GRP systems.

Dynamic Cone Penetrometer

The Pagini DPM30 dynamic cone penetrometer is ideal for testing soil strength and density at various depths. The fact that it is exceptionally small means it can be used on sites that are inaccessible to normal machines. A hydraulic pump raises and drops a weight onto a measuring rod, pushing it into the ground. To measure soil strength, the operator counts the number of blows it takes to drive the steel rod in 10-centimeter increments. Good soil requires 10+ blows to drive the rod 10 centimeters. Anything less is typically indicative of weak soil conditions.

Want more info on geotech equipment and repair materials?

Download the Info-Packed Geotech Product Catalog!

Topics: Equipment & Accessories, Lift Slabs, Stabilize Soil, Deep Lift, Deep Lock

Reminder - Register for Fall Geotech Training

Posted by Kreg Thornley on Sep 8, 2022 10:00:00 AM

Banner - Reminder-Geotech Training Program Fall 2022

Alchemy-Spetec HQ in Tucker, GA

THIS EVENT HAS BEEN CANCELLED

Sign Up to Get Notified for Future Training Events

AS-Training-Program---Fall-2021$745 Registration Fee
$665 for each additional participant from
the same company.

Get ready for a thorough education in Slab Lifting, Soil Stabilization, the Alchemy-Spetec Deep Lift® process, equipment, and applications. You’ll get hands-on training from a technical staff with decades of on-the-job experience.

Tuesday, October 4th

  • Geotech Product Line Overview
  • Geotech Applications & Case Studies
  • MixMaster Pro Slab Lifting Gun
  • Slab Lift Rig Demonstration

Wednesday, October 5th

  • Pump Demos & Training
  • PolyShark® / Soil Stabilization
  • Deep Lift® 
  • Ground Penetrating Radar

Thursday, March 31st

  • PolyBadger® Mobile Slab Lifting System
  • Estimating Material for Jobs

THIS EVENT HAS BEEN CANCELLED

Sign Up to Get Notified for Future Training Events

Topics: Equipment & Accessories, All Posts, Lift Slabs, Stabilize Soil, Business Tips, Deep Lift, Fill Voids

Reminder - Fall Geotech Training: October 4th - 6th, 2022

Posted by Kreg Thornley on Aug 29, 2022 10:00:00 AM

Banner - Reminder 2 Fall Geotech Training

Alchemy-Spetec HQ in Tucker, GA

THIS EVENT HAS BEEN CANCELLED

Sign Up to Get Notified for Future Training Events

AS-Training-Program---Fall-2021$745 Registration Fee
$665 for each additional participant from
the same company.

Get ready for a thorough education in Slab Lifting, Soil Stabilization, the Alchemy-Spetec Deep Lift® process, equipment, and applications. You’ll get hands-on training from a technical staff with decades of on-the-job experience.

Tuesday, October 4th

  • Geotech Product Line Overview
  • Geotech Applications & Case Studies
  • MixMaster Pro Slab Lifting Gun
  • Slab Lift Rig Demonstration

Wednesday, October 5th

  • Pump Demos & Training
  • PolyShark® / Soil Stabilization
  • Deep Lift® 
  • Ground Penetrating Radar

Thursday, March 31st

  • PolyBadger® Mobile Slab Lifting System
  • Estimating Material for Jobs

THIS EVENT HAS BEEN CANCELLED

Sign Up to Get Notified for Future Training Events

Topics: Equipment & Accessories, All Posts, Lift Slabs, Stabilize Soil, Business Tips, Deep Lift, Fill Voids