Looking for a Contractor?

Alchatek Blog

Winterizing Your PolyBadger

Posted by Erik Prinzing on Nov 1, 2022 10:00:00 AM

Banner - Winterizing Your PolyBadger

Body - Winterizing Your PolyBadger
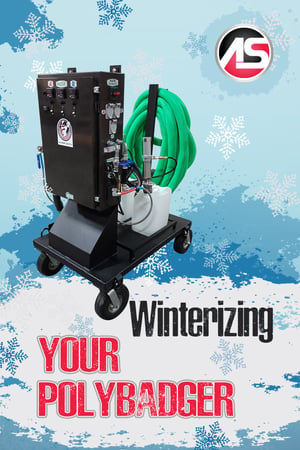
As the weather gets colder, contractors in some regions will need to prepare their PolyBadger Lifting Systems for storage during the off-season. We're providing step-by-step instructions for that procedure in this article.

Prepping a PolyBadger for Winter Storage

  1. Establish power to the cabinet and heat the hose (A heater, B heater, and hose) to the target temperature of 130° F.
  2. Introduce material to the cabinet.
  3. Turn the air supply on and recirculate to heat up the ISO and resin.
  4. Once the PolyBadger is up to temperature, turn off the air supply and remove the airlines from the stick pumps.
  5. Remove the supply and the recirculation line from the A-side stick pump.
  6. Drain all the remaining material from the pump and clean it with brake cleaner.
  7. Place the stick A side stubby stick pump into a 5-gallon pail of the AS Pump Flush.
  8. Reconnect the supply line and leave the recirculation line to drain in a purge pail.
  9. Repeat steps 5-8 on the B-side stick pump.
  10. Reconnect the air supply to the stick pumps, hold the return lines in a purge pail, and slowly open the air valve on the stick pumps.
  11. You will notice material slowly pushed out of the recirculation line into the purge pail. Continue to pump AP Flush 121 through the system until it comes out of the recirculation line clear, with no added color or debris.
  12. Shut the air valve supplying the stick pumps. This will stop the flow of material.
  13. Reconnect the recirculation lines to the appropriate stick pump and tighten.
  14. Turn the recirculation pump valves to supply the hose.
  15. You can remove the Handi Gun or leave it on for this stage, holding the hose in the purge pail. Turn on the supply valves on the end of the hose just before the Handi Gun. Slowly open the air valve on the stick pumps and pull the trigger on the gun.
  16. You will notice material slowly pushed out of the hose line into the purge pail. Continue to pump AP Flush 121 through the system until it comes out of the hose line clear, with no added color or debris.
  17. Shut the air valve supplying the stick pumps. This will stop the flow of material.
  18. Remove the stick pumps from the AS Pump Flush. (Make sure to mark your pails A and B for future use).
  19. Insert stick pumps into AP Pump Saver 195. (Make sure to mark your pails A and B for future use)
  20. Push the AP Pump Saver 195 through the hose line. You will notice the AS Pump Flush slowly pushed out of the hose line into the purge pail. Continue to pump AP Pump Saver 195 through the system until it comes out of the hose line clear (you will notice a thick, clean fluid).
  21. Turn off the supply valves on the hose just before the Handi Gun.
  22. Disconnect the air supply to the stick pumps.
  23. Move the hose supply valve into the recirculation position to depressurize the system.
  24. Shut off supply valves to the cabinet.
  25. Turn off heat zones.
  26. Turn off the main disconnect.
  27. Remove residual grease from interior cabinet pumps.
  28. Replace with new grease.

Want more information on the PolyBadger?

Download an Info-Packed PolyBadger System Brochure!

Topics: Equipment & Accessories, All Posts, Lift Slabs

Winterizing Your Slab Lifting Rig

Posted by Stephen C. Barton on Oct 27, 2022 10:00:00 AM

Banner - Winterizing Your Slab Lifting Rig

Body - Winterizing Your Slab Lifting RigAs the weather gets colder, contractors in some regions will need to prepare their slab lifting rigs for storage during the off-season. We're providing step-by-step instructions for that procedure in this article.

Please Note:

  • You will notice that more care is given to the A-side of the system, this is normal.
  • This procedure assumes you are using a PMC pump.

Prepping a Slab Lifting Rig for Winter Storage

  1. Remove and clean the A and B stick pumps. Clean the exterior of the pumps with brake cleaner to remove as much residual resin and polyol as possible.
  2. Place the A-Side transfer pump into a 5-gallon pail of the AS Pump Flush.
  3. Remove the recirculation hose from the A-Side drum and place it in a purge pail.
  4. Open A-Side inlet valve and recirculation valve on your PMC machine.
  5. Slowly open the air valve on the A-Side transfer pump to start introducing the AS Pump Flush through the A-Side of the machine.
  6. You will notice iso material being pushed out of the recirculation line into the purge pail. Continue to pump AS Pump Flush through the system until it comes out of the recirculation line clear, with no added coloring or debris.
  7. Shut the air supply feeding the transfer pump. This will stop all flow of material.
  8. Un-cap the A-Side of the PMC whip hose. Once un-capped, place the hose into the purge pail.
  9. Close the recirculation valve on the A-Side of the PMC machine.
  10. Slowly open the air valve on the A-Side transfer pump to start the flow of AS Pump Flush through the heated hose.
  11. You will notice iso material being pushed out of the whip hose into the purge pail. Continue to pump AS Pump Flush through the system until it comes out of the recirculation line clear, with no added coloring or debris.
  12. Now that this process is complete, the A-Side has been completely cleaned of any iso material.
  13. Remove the A-Side transfer pump from the pail of AS Pump Flush and place it into a 5-gallon pail of AP Lube 190.
  14. Slowly open the air valve on the A-Side transfer pump to start introducing the AP Lube 190 through the A-Side of the machine. Continue to pump the AP Lube 190 until you have pure and clean AP Lube 190 coming out of the end of the whip hose
  15. Place the B-Side stick pump into a separate 5-gallon pail of AP Lube 190.
  16. Slowly open the air valve on the B-Side transfer pump to start introducing the AP Lube 190 through the B-Side of the machine and heated hose. Continue to pump AP Lube 190 through the system until it comes out of the end of the whip hose, with no added coloring or debris.
  17. Once the entire system is full of clean AP Lube 190, slowly start to recirculate the AP Lube 190 through the entire system. When doing this, it is best to let the PMC machine cycle while recirculating the AP lube 190.
  18. Once all these steps are complete, close the air on each transfer pump and re-cap the heated PMC whip hoses.

Want more information on geotech products and equipment?

Download the Info-Packed Geotech Product Catalog!

Topics: Equipment & Accessories, All Posts, Lift Slabs

Soil Testing Equipment

Posted by Kreg Thornley on Oct 18, 2022 10:00:00 AM

Banner - Soil Testing Equipment

Body - Soil Testing EquipmentSoil testing equipment is extremely helpful for planning slab lifting and soil stabilization work. Contractors use ground penetrating radar systems and dynamic cone penetrometers to get a sense of soil conditions before they drill their first hole into a slab or push their first injection pipe into the ground.

Deep Look™ Ground Penetrating Radar

The Deep Look™ wireless ground penetrating radar collects data from hundreds of thousands of pulse reflections each second to help contractors identify objects below ground. The triple-frequency antenna design provides higher-resolution imaging than conventional GRP systems.

Dynamic Cone Penetrometer

The Pagini DPM30 dynamic cone penetrometer is ideal for testing soil strength and density at various depths. The fact that it is exceptionally small means it can be used on sites that are inaccessible to normal machines. A hydraulic pump raises and drops a weight onto a measuring rod, pushing it into the ground. To measure soil strength, the operator counts the number of blows it takes to drive the steel rod in 10-centimeter increments. Good soil requires 10+ blows to drive the rod 10 centimeters. Anything less is typically indicative of weak soil conditions.

Want more info on geotech equipment and repair materials?

Download the Info-Packed Geotech Product Catalog!

Topics: Equipment & Accessories, Lift Slabs, Stabilize Soil, Deep Lift, Deep Lock

Reminder - Register for Fall Geotech Training

Posted by Kreg Thornley on Sep 8, 2022 10:00:00 AM

Banner - Reminder-Geotech Training Program Fall 2022

Alchemy-Spetec HQ in Tucker, GA

THIS EVENT HAS BEEN CANCELLED

Sign Up to Get Notified for Future Training Events

AS-Training-Program---Fall-2021$745 Registration Fee
$665 for each additional participant from
the same company.

Get ready for a thorough education in Slab Lifting, Soil Stabilization, the Alchemy-Spetec Deep Lift® process, equipment, and applications. You’ll get hands-on training from a technical staff with decades of on-the-job experience.

Tuesday, October 4th

  • Geotech Product Line Overview
  • Geotech Applications & Case Studies
  • MixMaster Pro Slab Lifting Gun
  • Slab Lift Rig Demonstration

Wednesday, October 5th

  • Pump Demos & Training
  • PolyShark® / Soil Stabilization
  • Deep Lift® 
  • Ground Penetrating Radar

Thursday, March 31st

  • PolyBadger® Mobile Slab Lifting System
  • Estimating Material for Jobs

THIS EVENT HAS BEEN CANCELLED

Sign Up to Get Notified for Future Training Events

Topics: Equipment & Accessories, All Posts, Lift Slabs, Stabilize Soil, Business Tips, Deep Lift, Fill Voids

Reminder - Fall Geotech Training: October 4th - 6th, 2022

Posted by Kreg Thornley on Aug 29, 2022 10:00:00 AM

Banner - Reminder 2 Fall Geotech Training

Alchemy-Spetec HQ in Tucker, GA

THIS EVENT HAS BEEN CANCELLED

Sign Up to Get Notified for Future Training Events

AS-Training-Program---Fall-2021$745 Registration Fee
$665 for each additional participant from
the same company.

Get ready for a thorough education in Slab Lifting, Soil Stabilization, the Alchemy-Spetec Deep Lift® process, equipment, and applications. You’ll get hands-on training from a technical staff with decades of on-the-job experience.

Tuesday, October 4th

  • Geotech Product Line Overview
  • Geotech Applications & Case Studies
  • MixMaster Pro Slab Lifting Gun
  • Slab Lift Rig Demonstration

Wednesday, October 5th

  • Pump Demos & Training
  • PolyShark® / Soil Stabilization
  • Deep Lift® 
  • Ground Penetrating Radar

Thursday, March 31st

  • PolyBadger® Mobile Slab Lifting System
  • Estimating Material for Jobs

THIS EVENT HAS BEEN CANCELLED

Sign Up to Get Notified for Future Training Events

Topics: Equipment & Accessories, All Posts, Lift Slabs, Stabilize Soil, Business Tips, Deep Lift, Fill Voids

Reminder - Geotech Training: October 4th - 6th, 2022

Posted by Kreg Thornley on Aug 25, 2022 10:00:00 AM

Banner - Reminder-Geotech Training Fall 2022

Alchemy-Spetec HQ in Tucker, GA

THIS EVENT HAS BEEN CANCELLED

Sign Up to Get Notified for Future Training Events

AS-Training-Program---Fall-2021$745 Registration Fee
$665 for each additional participant from
the same company.

Get ready for a thorough education in Slab Lifting, Soil Stabilization, the Alchemy-Spetec Deep Lift® process, equipment, and applications. You’ll get hands-on training from a technical staff with decades of on-the-job experience.

Tuesday, October 4th

  • Geotech Product Line Overview
  • Geotech Applications & Case Studies
  • MixMaster Pro Slab Lifting Gun
  • Slab Lift Rig Demonstration

Wednesday, October 5th

  • Pump Demos & Training
  • PolyShark® / Soil Stabilization
  • Deep Lift® 
  • Ground Penetrating Radar

Thursday, March 31st

  • PolyBadger® Mobile Slab Lifting System
  • Estimating Material for Jobs

THIS EVENT HAS BEEN CANCELLED

Sign Up to Get Notified for Future Training Events

Topics: Equipment & Accessories, All Posts, Lift Slabs, Stabilize Soil, Business Tips, Deep Lift, Fill Voids

Geotech Training: October 4th - 6th, 2022

Posted by Kreg Thornley on Aug 23, 2022 10:00:00 AM

Banner - Geotech Training Fall 2022

Alchemy-Spetec HQ in Tucker, GA

THIS EVENT HAS BEEN CANCELLED

Sign Up to Get Notified for Future Training Events

AS-Training-Program---Fall-2021$745 Registration Fee
$665 for each additional participant from
the same company.

Get ready for a thorough education in Slab Lifting, Soil Stabilization, the Alchemy-Spetec Deep Lift® process, equipment, and applications. You’ll get hands-on training from a technical staff with decades of on-the-job experience.

Tuesday, October 4th

  • Geotech Product Line Overview
  • Geotech Applications & Case Studies
  • MixMaster Pro Slab Lifting Gun
  • Slab Lift Rig Demonstration

Wednesday, October 5th

  • Pump Demos & Training
  • PolyShark® / Soil Stabilization
  • Deep Lift® 
  • Ground Penetrating Radar

Thursday, March 31st

  • PolyBadger® Mobile Slab Lifting System
  • Estimating Material for Jobs

THIS EVENT HAS BEEN CANCELLED

Sign Up to Get Notified for Future Training Events

Topics: Equipment & Accessories, All Posts, Lift Slabs, Stabilize Soil, Business Tips, Deep Lift, Fill Voids

Limited Time Offer on the New MixMaster Pro

Posted by Kreg Thornley on Jul 12, 2022 10:00:00 AM

Body - Limited Time Offer on the New MixMaster ProSave Time, Hassle, and Money!

Spray foam insulation guns are made for the process of spraying foam at constant pressures. Slab lifting requires a gun that is designed to deal with changing pressures and backpressure without backing up or crossing over.

  • Get the new MixMaster Pro Version 7.0 for $2,450 (that's a savings of $355).
  • Get an "I Am a MixMaster!" T-shirt (while supplies last).
  • Mention the "I Am a MixMaster" promo for the discount and the T-shirt. Offer expires August 31st, 2022. Act now!

Contact your regional manager or call 404-618-0438 to place an order. (Be sure to mention your T-shirt size.)
Find your regional manager here.

MixMaster Pro 7.0 Features

  • New CNC machined handle.
  • Custom machined nipples.
  • Less threaded connections.

MixMaster Pro 7.0 Benefits

  • End-of-day cleaning time cut in half.
  • The handle is built to last through the toughest of jobs.
  • The nipples can be removed easily.
  • Less threaded connections = fewer leak possibilities.

Want more info about the MixMaster Pro?

Download an Info-Packed MixMaster Pro Brochure!

Topics: Equipment & Accessories, All Posts, Lift Slabs

How to Equip Your Spray Foam Rig for Slab Lifting

Posted by Kreg Thornley on Jun 21, 2022 10:00:00 AM

Banner - How to Equip Your Spray Foam Rig for Slab Lifting

Body - How to Equip Your Spray Foam Rig for Slab Lifting
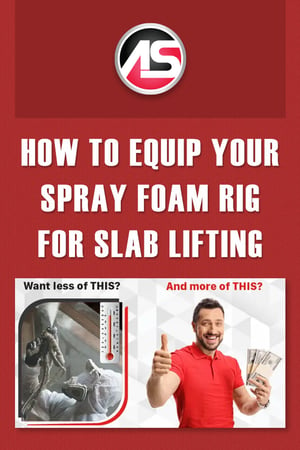
Many spray foam insulation installers are interested in adding slab lifting capability to their rig setup. If you're a spray foam installer considering slab lifting, we have all the info you need right here. With just four additional pieces of equipment and one set of material, you can add slab lifting to your service offerings. Let’s take a look at exactly what additional equipment and material are required to get started...

Slab Lifting Equipment

MixMaster Pro Slab Lifting Gun
The MixMaster Pro is a two-component resin injection gun manufactured specifically for lifting concrete slabs, designed to handle back-pressure. 

Titan Impact 440 (Modified) Pump with Flush Hose
The Titan Impact 440 (Modified) pump is used for flushing the MixMaster Pro gun in between foam injections. (It's also used for pumping one-component material in soil stabilization and seawall repair applications.)

3/8” MixMaster Ports
These heavy-duty ports create an airtight seal for injecting foam into drill holes. 

Dial Indicator Crane
This precision tool is used to measure the lift of the slab within 1/10” of an inch.

Polyurethane Slab Lifting Material

AP Lift 430, AP Lift 440, or AP Lift 475 (100 Gallon Unit)
Sunken concrete slabs can be lifted back into place with these two-component polymer foams designed to work in wet or dry conditions. The expansion force of these concrete leveling foams coupled with the pressure of a specialized pump generate enough controlled force to lift virtually any structure back into position with 1/8” precision.

AP Flush 125 (5 Gallon Unit)
Water-based gun flush specifically used for flushing out the MixMaster Pro impingement gun. Also used to protect concrete from resin stains.

AS Pump Flush (5 Gallon Unit)
High-performance pump flush that is friendly to the environment and does an excellent job flushing out injection pumps.

Want to talk to a spray foam to slab lift conversion expert?

Request a "Spray Foam to Slab Lift" Consultation

Topics: Equipment & Accessories, All Posts, Lift Slabs, Business Tips

Introducing the PolyShark Version 2.0

Posted by Kreg Thornley on May 19, 2022 10:00:00 AM

Banner - Introducing the PolyShark Version 2.0

Body - Introducing the PolyShark Version 2.0
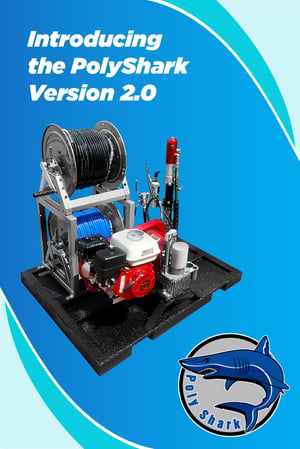
The new and improved PolyShark 2.0 is here! 

Features

  • Stacked hose reels.
  • Smaller footprint.
  • More portable.

Benefits

  • Easy access to hose reels.
  • Can be shipped on a standard 40" x 46" pallet.
  • Easily fits on a barge, van, or trailer.

A Geotech Pump System Like No Other

The PolyShark system includes injection hoses, suction lines, flow meters, a custom solid steel frame, a skid-mounted setup, and top-of-the-line components. It is a complete turnkey unit, ready to go upon arrival. Let's take a closer look...

  • Two 350 feet injection hose reels are included, allowing an exceptional amount of additional reach for limited access and/or remote location jobs.
  • Suction lines make it easy to pump material from totes, drums, or even pails if needed. This type of flexibility is not common to all geotech pumps.
  • Flow meters make it easy to accurately track the amount of material pumped.
  • The custom solid steel frame, polyurea coated for excellent chemical resistance, is built to last and weather all types of environments.
  • The skid-mounted setup keeps all system components together, allowing for easy transfer from truck to trailer to the ground on a job site if necessary.
  • The Honda gas motor, Titan hydraulic pump, and Titan hydraulic fluid ram are top-of-the-line, tried, and true components. This means less maintenance and downtime when compared to competing systems.

Want more information on the PolyShark?

Download an Info-Packed PolyShark System Brochure!

Topics: Repair Seawalls, Equipment & Accessories, All Posts, Stabilize Soil