
 Inflow and Infiltration (I&I)
Inflow and infiltration (I&I) refer to the entry of groundwater and rainfall-derived water into wastewater and stormwater collection systems through defects such as cracked pipes, deteriorated manholes, faulty connections, and other openings. This excess water can overload the capacity of wastewater treatment plants and collection systems.
Inflow refers to water that enters the sewer system from direct connections such as roof drains, yard and area drains, foundation drains, surface runoff, or street wash waters. Infiltration refers to groundwater that enters the sewer system from the surrounding soil through defective pipes, pipe joints, connections, or manhole walls. Infiltration is the focus of polyurethane grouting.
Managing I&I is important for preventing sewer overflows, reducing treatment costs, and minimizing energy consumption.
Understanding the Risks: What are Sanitary Sewer Overflows (SSOs)?
Sanitary sewer overflows (SSOs) are a prevalent concern, posing significant public health threats. EPA data indicates an alarming 23,000 to 75,000 SSO incidents annually in the U.S. These overflows, laden with raw sewage, are carriers of bacteria, viruses, and other harmful entities, potentially leading to conditions ranging from mild stomach discomforts to severe diseases like cholera and hepatitis.
The Financial Implications and Opportunities
Tackling these issues often requires a significant financial commitment. The EPA's Clean Water State Revolving Fund (CWSRF) has allocated hundreds of billions of dollars for diverse water infrastructure projects. Established in 1987, this initiative offers states the autonomy to address their unique water quality challenges.
A Cost-Efficient Approach to Mitigating Infiltration in Sanitary/Stormwater Systems
Here's an efficient plan employing flexible polyurethane grout that promises a robust return on investment:
- Assessment: Start with inspecting lift stations and manholes.
- Identification: Locate and prioritize significant leaks.
- Targeted Repair: Utilize flexible polyurethane grout for precise point repairs.
A single crew can often mitigate leaks in two standard 8' deep manholes a day. This swift mitigation can lead to substantial savings. For instance, addressing leaks in just a single day can easily amount to around $30,000 in annual savings, based on local water treatment costs. In mere months, the cost of the repair is already recouped.
For municipal managers overseeing stormwater and wastewater systems, embracing flexible polyurethane grout for leak repair is a strategic move. It's not just about ensuring infrastructure longevity, but also safeguarding public health and achieving economic efficiency.
For more information...


 I remember my first day on the job back in June of 1985. We were working nights in the subway tunnels of Atlanta, sealing leaks in the ceiling. The crew handed me a 30-pound hammer drill and told me to drill holes in the ceiling at a 45-degree angle. Sure, what the heck is a 45-degree angle? I put on a lot of muscle that summer drilling overhead and hauling 50-pound pails of resin all over the Southeastern U.S.

 There are five basic steps to be done when placing a crack injection. This is crack injection 101. Learn these steps and you will be well on your way to understanding what it takes to seal a water leak in concrete with products such as
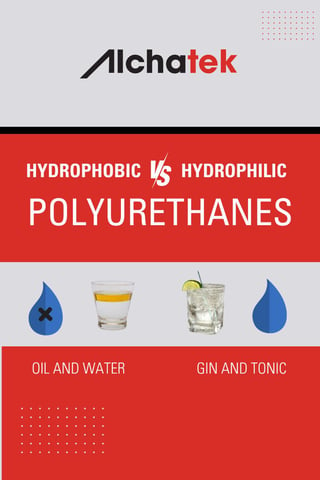 Hydrophobic polyurethanes naturally repel water (similar to the way oil would repel water and stay separate if you were trying to mix them in a glass). These products push water out of the area in question as they expand. Hydrophobics are used with catalysts which allow you to adjust the set time. They also have zero shrinkage after curing.
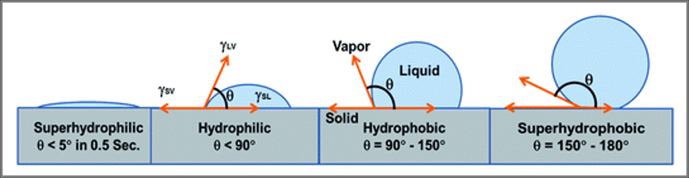


 If you're a leak seal contractor, you may be familiar with this situation: A property owner with leaking concrete calls you up and says, "Hey, everything is dry right now, so I want to get someone out here to go ahead and waterproof the structure." Attempting a waterproofing job when the structure is completely dry is not recommended.


 Polyurethane grouting is a complex process that involves numerous specifications and guidelines. However, amidst the vast amount of information, there are five fundamental rules that lie at the core of all successful polyurethane grouting projects. We will explore these rules, highlighting their significance in achieving desired outcomes.
 In this article, we’re comparing the use of epoxies and polyurethanes for waterproofing. This is not a battle of good versus evil, but rather a discussion about their differences and when to use each type of material.
 A question that often comes up in our line of work is whether a cartridge can be used to inject cracks, specifically leaking cracks in concrete. The answer is a resounding yes...depending on the situation. In some cases, an
 Today, we delve into the technicalities of hydraulic cement and crystalline cement versus polyurethane grout for leak seal injection. This article aims to provide you with detailed, actionable information to guide your decision-making process.