

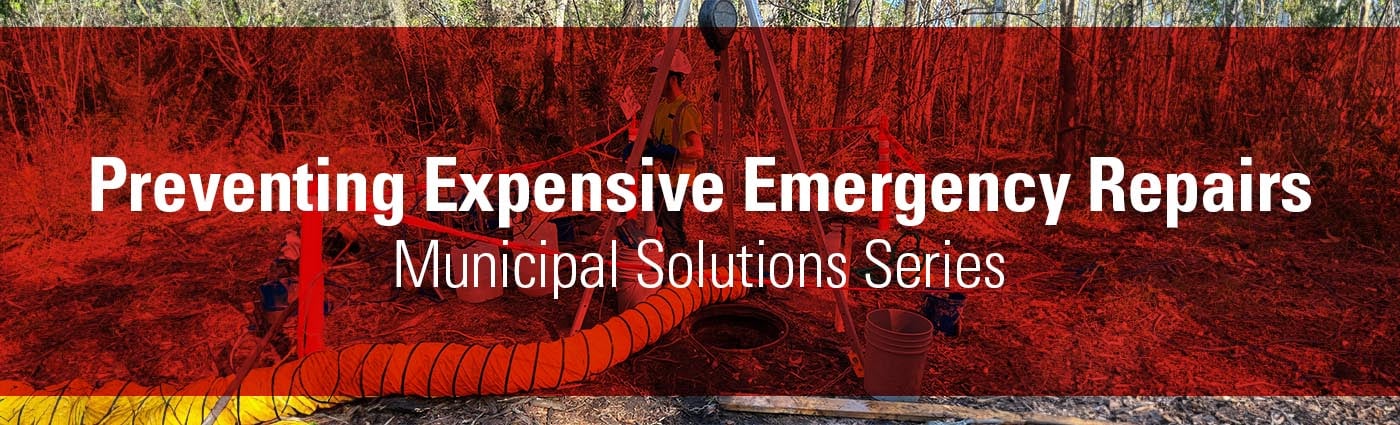
 The Maze of Repair-Related Regulations
For municipal managers overseeing stormwater and wastewater systems, the regulatory landscape can often feel like a complex maze. When it comes to repairs on manholes and lift stations, the stakes are even higher. Regulatory compliance is not just a matter of adhering to best practices; it's a legal requirement that carries significant consequences for non-compliance. This blog post aims to guide you through the labyrinth of permits and compliance requirements, offering tips for staying ahead of regulatory changes and outlining the benefits of compliant repair practices.
Navigating Permits and Compliance During Repair Projects
Understanding the Regulatory Framework
Before embarking on any repair project, it's crucial to have a thorough understanding of the regulatory framework that governs stormwater and wastewater systems. This includes federal, state, and local regulations, as well as industry standards. Ignorance is not an excuse in the eyes of the law, and failure to comply can result in hefty fines, legal action, and damage to your municipality's reputation.
Obtaining Necessary Permits
Permit acquisition is often the first step in any repair project. Whether it's a minor leak seal or a major overhaul, permits are usually required to ensure that the work meets established safety and environmental standards. Make sure to apply for these permits well in advance of your planned repair dates, as the approval process can be time-consuming.
Compliance Checks and Balances
Once you've obtained the necessary permits, the next step is to ensure that the repair work itself adheres to all regulatory requirements. This often involves:
- Pre-repair inspections to assess the scope and impact of the work.
- Mid-repair checks to ensure that the work is proceeding as per the approved plans.
- Post-repair audits to confirm that the repairs meet all compliance standards.
Record-Keeping
Maintaining detailed records is not just good practice; it's often a regulatory requirement. Documentation should include:
- The initial assessment and scope of the repair.
- All permits and approvals.
- Details of the repair process, including materials used and personnel involved.
- Final inspection reports and compliance certifications.
Tips for Staying Ahead of Regulatory Changes
Regular Training and Updates
Regulations are not static; they evolve over time. Regular training sessions can help your team stay updated on the latest changes and how they impact your operations.
Consult Regulatory Agencies
Don't hesitate to consult with regulatory agencies for guidance. They can provide valuable insights into compliance requirements and may even offer resources to help you meet them.
Leverage Technology
Modern technology can be a valuable ally in maintaining compliance. Software solutions are available that can track permit statuses, alert you to upcoming regulatory changes, and even automate some aspects of the compliance process.
Peer Networking
Networking with peers in other municipalities can provide additional perspectives on how to navigate the complex world of regulatory compliance. Industry conferences, webinars, and online forums are excellent platforms for such interactions.
The Benefits of Compliant Repair Practices
Adhering to regulatory compliance during repairs is not just a legal necessity; it offers several tangible benefits:
Risk Mitigation
Compliance reduces the risk of legal repercussions, including fines and lawsuits, that can be both financially and reputationally damaging.
Operational Efficiency
A well-planned, compliant repair process is often more efficient, minimizing downtime and ensuring that repairs are durable and effective.
Public Trust
Compliance with regulations not only protects the municipality from legal consequences but also builds public trust. When residents see that their local government is committed to following the law and protecting public safety, it enhances the municipality's credibility.
Environmental Stewardship
Many regulations are designed to protect the environment. By adhering to these rules, municipalities contribute to broader environmental conservation efforts, aligning with public sentiment and ethical responsibilities.
In summary, navigating the maze of repair-related regulations may be challenging, but the benefits of doing so are manifold. By understanding the regulatory landscape, obtaining necessary permits, and maintaining rigorous compliance checks, municipal managers can ensure that their repair projects are not only successful but also legally sound. Staying ahead of regulatory changes through training, consultation, and technology can further streamline this process, making compliance an integrated part of your operational strategy.
For information on municipal leak seal products...

 The High Stakes of Unpredictability


 The Environmental Stakes of Wastewater Management
 The Critical Role of Wastewater Management in Public Health
 Finally! We are at the last basic step. Now for the fun part - injecting the polyurethane resin. If you only have one pump, be sure to flush the pump out completely with

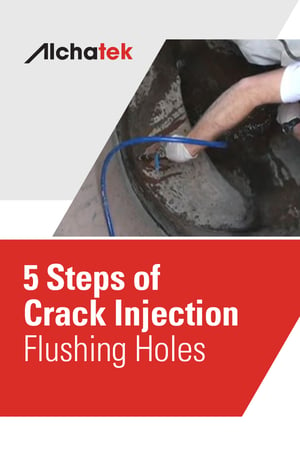
 All cracks that aren’t actively leaking at the time you are sealing them need to be flushed out with water. Flushing them gives you several advantages:
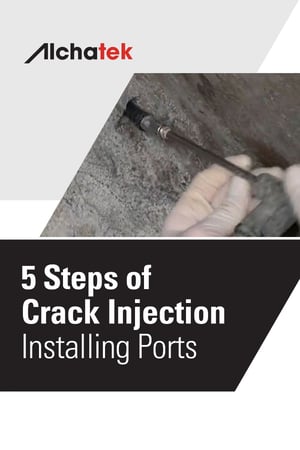 Installing high-pressure injection ports is pretty straightforward, so I won’t spend too much time on this topic. Just a few quick tips.
 Here it is. My favorite topic. Why? Because it is my pet peeve. It separates the technicians who care from those who are only going through the motions. Quite frankly, it can be the difference between a successful outcome and dismal failure - or at the very least an expensive callback.
 Reducing infiltration is paramount for healthy storm and wastewater collection systems. Management teams should consider cost-effective, eco-friendly, easy-to-use products. Ideal products simplify repairs through quick mobilization and installation while being effective and long-lasting.
 .jpg?width=1400&height=425&name=Banner%20-%205%20Steps%20of%20Crack%20Injection%20-%20Drilling%20Holes%20(Continued).jpg)
.jpg?width=300&height=450&name=Body%20-%205%20Steps%20of%20Crack%20Injection%20-%20Drilling%20Holes%20(Continued).jpg) Let’s face it, most of the structures you drill through will be full of rebar. Rebar is the steel reinforcement that gives the structure its strength. Concrete protects the rebar by shielding it from moisture, and the high pH of concrete keeps the rebar from rusting. However, once a crack forms it allows more water and environmental gasses to reach the area surrounding the rebar. Carbonation of the concrete can now occur which causes the pH to drop and the corrosion process to begin. The rust expands and takes up 15 times the volume of the un-corroded steel which causes tensile forces to work against the concrete eventually resulting in additional cracking and spalling. Hopefully, you will be called in to fix the leaks before much of this damage occurs.
Let’s face it, most of the structures you drill through will be full of rebar. Rebar is the steel reinforcement that gives the structure its strength. Concrete protects the rebar by shielding it from moisture, and the high pH of concrete keeps the rebar from rusting. However, once a crack forms it allows more water and environmental gasses to reach the area surrounding the rebar. Carbonation of the concrete can now occur which causes the pH to drop and the corrosion process to begin. The rust expands and takes up 15 times the volume of the un-corroded steel which causes tensile forces to work against the concrete eventually resulting in additional cracking and spalling. Hopefully, you will be called in to fix the leaks before much of this damage occurs.