Looking for a Contractor?

Alchatek Blog

5 Steps of Crack Injection – 3. Installing Ports

Posted by Stephen C. Barton on Sep 26, 2023 10:00:00 AM

Banner - 5 Steps of Crack Injection - Installing Ports

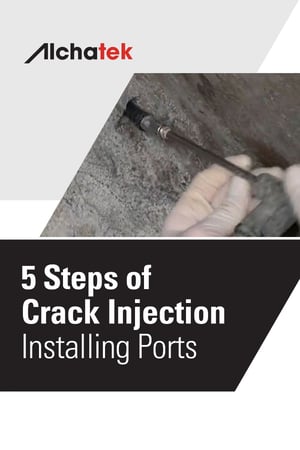
Body - 5 Steps of Crack Injection - Installing PortsInstalling high-pressure injection ports is pretty straightforward, so I won’t spend too much time on this topic. Just a few quick tips.

1. Hammer In Ports. Place the port in a clean 3/8” diameter hole and hammer it in. The high-quality materials our ports are made of will take a pounding. But you don’t have to hammer them in too hard. With a little practice, you will begin to notice the sound changes slightly when the port is seated. Use an electric screwdriver or drill with a 5/16” socket to seat the zerk fitting into the port. Also, make sure you have a “T” handle socket for use in areas where water is pouring down on your head (so you don’t short out your electric screwdriver or drill).

You may notice that the bag of ports is wet on the inside when you get them. The water helps the ports stay resistant to cracking.

The downside to Hammer In Ports is that they only contact the concrete in a very small area and make a seal (due to the tapered nature of the port). In good quality concrete, this seal will hold back several thousand p.s.i. However, if the concrete is weak or the drilled hole is out of round, you can have a problem. In which case you want to use a Mechanical Port.

2. Mechanical Ports have dropped in price dramatically over the years due to inexpensive labor and cheaper materials from overseas. There is now little price difference between the Hammer In Ports and the Mechanical Ports compared to what there used to be. I have a personal affinity for Mechanical Ports because I used to make them in my father’s shop back in the early 1980s. They have a much larger surface area to create a seal and will hold more pressure than the concrete can take.

Make sure you seat the rubber all the way inside the hole. If it is partially outside of the hole, it can cause the surface of the hole to spall, chip, and crack. Setting it in at least ¼” past the surface of the hole will give you a great seal and reduce the chance of cracking the concrete unnecessarily.

Snug the ports down, but don’t over-tighten. It is easier than you think to crack the concrete by over-tightening (especially if you have drilled close to the crack or at a very steep angle).

Now that you have the ports installed, you are ready to clean out the crack by flushing water through the ports. I’ll discuss that in the next section.

5 Steps of Crack Injection - Overview
5 Steps of Crack Injection - 1. Drilling Holes
5 Steps of Crack Injection – 1. Drilling Holes (Continued)
5 Steps of Crack Injection – 2. Flushing Holes
5 Steps of Crack Injection – 3. Installing Ports
5 Steps of Crack Injection – 4. Flushing Cracks
5 Steps of Crack Injection – 5. Injecting Resin

Want in-depth info on crack injection procedures and products?

Download an Info-Packed Leak Seal Brochure!

Topics: All Posts, Seal Leaks

5 Steps of Crack Injection – 2. Flushing Holes

Posted by Stephen C. Barton on Sep 20, 2023 10:00:00 AM

Banner - 5 Steps of Crack Injection - Flushing Holes

Body - 5 Steps of Crack Injection - Flushing HolesHere it is. My favorite topic. Why? Because it is my pet peeve. It separates the technicians who care from those who are only going through the motions. Quite frankly, it can be the difference between a successful outcome and dismal failure - or at the very least an expensive callback.

When you drill holes you create concrete dust. The hammer drill bit literally chews up the concrete. Most of it comes out of the hole and falls on the floor. However, a lot of dust is left behind inside the hole. If it is not properly flushed out then it will mix with your polyurethane injection resin and make a thick paste. This thick paste can be forced into the crack and prevent the clean resin from reaching deep into the crack where it is needed. Most of the time you won’t even realize you have a problem. But there it is nonetheless. Waiting for the right conditions to allow water to seep back through the crack you thought you fixed.

How do you avoid this? Simple - flush the hole out from the back using a very cheap flexible hose that attaches to your flush pump (you did bring a separate flush pump didn’t you?). Start at the highest hole and work your way down until clean water is flowing out of each hole.

Spraying water on the face of the holes may make it look clean, but it is not effective. There is still dust deep in the hole. Filling a water bottle up and squeezing it so that water shoots part way up the hole is not good enough. You have to have the water exit your hose at the back of the hole. This is the only way.

Are there exceptions? Of course, there are. If you pull the drill bit out of the hole and water gushes out behind it in a steady stream you can skip this step. Otherwise, make sure you bring a flush hose with you. It has to be small enough to fit inside your drill hole. We make it easy for you. We make one and sell it for cheap (so don’t blame us if you get to your job site and don’t have one).

This is so basic it is silly. However, I have seen experienced technicians do the water bottle trick and try to explain that it is sufficient. I’m happy to report that those guys are working for your competitors now. Just make sure your guys don’t get lulled into laziness and skip what just might be the most important of these five basic steps:

  1. Drill the hole
  2. Flush the hole
  3. Install the ports
  4. Flush the crack
  5. Inject the resin

Next up, we install the ports!

5 Steps of Crack Injection - Overview
5 Steps of Crack Injection - 1. Drilling Holes
5 Steps of Crack Injection – 1. Drilling Holes (Continued)
5 Steps of Crack Injection – 2. Flushing Holes
5 Steps of Crack Injection – 3. Installing Ports
5 Steps of Crack Injection – 4. Flushing Cracks
5 Steps of Crack Injection – 5. Injecting Resin

Want in-depth info on crack injection procedures and products?

Download an Info-Packed Leak Seal Brochure!

Topics: All Posts, Seal Leaks, Crack Injection

Spetec PUR GT380: Now Available in Cartridges

Posted by Kreg Thornley on Sep 19, 2023 10:00:00 AM

Banner - Spetec PUR GT380 Cartridges-1

Body - Spetec PUR GT380 Cartridges-1Reducing infiltration is paramount for healthy storm and wastewater collection systems. Management teams should consider cost-effective, eco-friendly, easy-to-use products. Ideal products simplify repairs through quick mobilization and installation while being effective and long-lasting. 

Now available in cartridges, Spetec PUR GT380 is a one-component, low-viscosity, flexible hydrophilic polyurethane gel injection resin for shutting off leaks in structures where movement may occur.

Features & Benefits

  • Easy to Use: No Pump or Hoses Required
  • Transporation-Friendly: Requires Minimal Space
  • Flexible Formula: Designed for Dynamic Joints and Pipe Penetrations
  • Made to Last: Designed a Harsh Sewer Environments
  • Can Cure to Foam or Gel Based on Water Content
  • Solvent-Free and Non-Corrosive
  • May Be Used in Underwater Applications
  • Can Accept Up To 10x Its Volume in Water
  • Can Be Used with Oakum for Wider Cracks and Joints

Packaging: 10.5 oz Cartridges - Case of 12
Item #: GT380-Inectr

Spetec PUR GT380 is highly chemically resistant and is designed for sealing active water leaks in joints in concrete structures that are exposed to harsh environments, like those found in sewer collection systems. Depending on the ratio of grout to water, Spetec PUR GT380 can form a flexible foam or a gel. 

Want more information on polyurethane leak seal products and equipment?

Download the Info-Packed Leak Seal Product Catalog!


Topics: All Posts, Seal Leaks

5 Steps of Crack Injection – 1. Drilling Holes (Continued)

Posted by Stephen C. Barton on Sep 13, 2023 10:00:00 AM

Banner - 5 Steps of Crack Injection - Drilling Holes (Continued)

Body - 5 Steps of Crack Injection - Drilling Holes (Continued)Let’s face it, most of the structures you drill through will be full of rebar. Rebar is the steel reinforcement that gives the structure its strength. Concrete protects the rebar by shielding it from moisture, and the high pH of concrete keeps the rebar from rusting. However, once a crack forms it allows more water and environmental gasses to reach the area surrounding the rebar. Carbonation of the concrete can now occur which causes the pH to drop and the corrosion process to begin. The rust expands and takes up 15 times the volume of the un-corroded steel which causes tensile forces to work against the concrete eventually resulting in additional cracking and spalling. Hopefully, you will be called in to fix the leaks before much of this damage occurs.

Once you are on the job site, this slow process of decay does not really affect you (unless the concrete is spalling off as you drill). Your issue with the rebar is that it will stop your drill bit from penetrating the crack. The cracks will often follow the rebar, especially if there is not adequate coverage of concrete over the rebar. Shallow rebar is a huge contributing factor to cracks in concrete.

At this point, all you care about are two things. First, how do you know if you have hit rebar? Second, if you have hit it, what do you do next?

After drilling many thousands of holes, as I have over my career, I pretty much know when I have hit rebar. Here are a few things to look for:

  1. The forward progress of drilling has stopped.
  2. The sound of the drilling changes.
  3. The quantity of drilling dust is reduced.
  4. If you are not sure, put your hand out to catch some of the drilling dust coming out of the drill hole. Observe it for metal shavings.

Given enough time and effort, you can drill through rebar. However, I wouldn’t recommend this as a general practice. It takes a lot of time, weakens the structure you are trying to protect, and...have you bought a drill bit lately? Steel is expensive! Try this instead:

  1. Move further away from the crack and try again (adjust your drilling angle).
  2. Move closer to the crack and try again (adjust your drilling angle).
  3. Move parallel to the crack and try again.
  4. Move to the other side of the crack and try again.

As a last resort, drill straight into the crack. This is not the ideal situation, but if you can drill deep enough to get an injection port installed, then you might be able to successfully seal the leak. 

Now that the surface of your concrete looks like Swiss cheese, it is time to go get that bag of fast-set hydraulic cement you brought along for just this purpose. Try to patch it up before you begin injection because some of those abandoned holes are libel to have hit pay dirt. If you don’t seal them up then you will have foam or resin leaking out of the holes.

Hitting rebar is not fun and can be frustrating. The key is to expect it and try to think three-dimensionally. See if you can visualize what is going on behind the concrete. This is one of the keys to becoming a really good injection technician.

5 Steps of Crack Injection - Overview
5 Steps of Crack Injection - 1. Drilling Holes
5 Steps of Crack Injection – 1. Drilling Holes (Continued)
5 Steps of Crack Injection – 2. Flushing Holes
5 Steps of Crack Injection – 3. Installing Ports
5 Steps of Crack Injection – 4. Flushing Cracks
5 Steps of Crack Injection – 5. Injecting Resin

For more information...

Download an Info-Packed Leak Seal Brochure!

Topics: All Posts, Seal Leaks, Crack Injection

Polyurethane Grout for Leak Repair: Economic Implications for Municipalities

Posted by Charlie "The Grout Geek" Lerman on Sep 12, 2023 1:30:00 PM

Banner - Polyurethane Grout for Leak Repair Economic Implications for Munic

Body - Polyurethane Grout for Leak Repair Economic Implications for MunicipInflow and Infiltration (I&I)

Inflow and infiltration (I&I) refer to the entry of groundwater and rainfall-derived water into wastewater and stormwater collection systems through defects such as cracked pipes, deteriorated manholes, faulty connections, and other openings. This excess water can overload the capacity of wastewater treatment plants and collection systems.

Inflow refers to water that enters the sewer system from direct connections such as roof drains, yard and area drains, foundation drains, surface runoff, or street wash waters. Infiltration refers to groundwater that enters the sewer system from the surrounding soil through defective pipes, pipe joints, connections, or manhole walls. Infiltration is the focus of polyurethane grouting.

Managing I&I is important for preventing sewer overflows, reducing treatment costs, and minimizing energy consumption.

Understanding the Risks: What are Sanitary Sewer Overflows (SSOs)?

Sanitary sewer overflows (SSOs) are a prevalent concern, posing significant public health threats. EPA data indicates an alarming 23,000 to 75,000 SSO incidents annually in the U.S. These overflows, laden with raw sewage, are carriers of bacteria, viruses, and other harmful entities, potentially leading to conditions ranging from mild stomach discomforts to severe diseases like cholera and hepatitis.

The Financial Implications and Opportunities

Tackling these issues often requires a significant financial commitment. The EPA's Clean Water State Revolving Fund (CWSRF) has allocated hundreds of billions of dollars for diverse water infrastructure projects. Established in 1987, this initiative offers states the autonomy to address their unique water quality challenges.

A Cost-Efficient Approach to Mitigating Infiltration in Sanitary/Stormwater Systems

Here's an efficient plan employing flexible polyurethane grout that promises a robust return on investment:

  1. Assessment: Start with inspecting lift stations and manholes.
  2. Identification: Locate and prioritize significant leaks.
  3. Targeted Repair: Utilize flexible polyurethane grout for precise point repairs.

A single crew can often mitigate leaks in two standard 8' deep manholes a day. This swift mitigation can lead to substantial savings. For instance, addressing leaks in just a single day can easily amount to around $30,000 in annual savings, based on local water treatment costs. In mere months, the cost of the repair is already recouped.

For municipal managers overseeing stormwater and wastewater systems, embracing flexible polyurethane grout for leak repair is a strategic move. It's not just about ensuring infrastructure longevity, but also safeguarding public health and achieving economic efficiency.

For more information...

Download an Info-Packed Infrastructure Leak Seal and Void Fill Brochure!

Topics: All Posts, Seal Leaks, Crack Injection, Curtain Grouting, Municipal Resources

5 Steps of Crack Injection - 1. Drilling Holes

Posted by Stephen C. Barton on Sep 7, 2023 10:00:00 AM

Banner - 5 Steps of Crack Injection - Drilling Holes

Body - 5 Steps of Crack Injection - Drilling HolesI remember my first day on the job back in June of 1985. We were working nights in the subway tunnels of Atlanta, sealing leaks in the ceiling. The crew handed me a 30-pound hammer drill and told me to drill holes in the ceiling at a 45-degree angle. Sure, what the heck is a 45-degree angle? I put on a lot of muscle that summer drilling overhead and hauling 50-pound pails of resin all over the Southeastern U.S.

Drilling holes into concrete seems like a straightforward process. However, it must be done correctly or everything you do afterward is a waste of time. Often, contractors put their least experienced technician on that job because it is manual labor and can be taught quickly. But knowing a few of the basics can help a newbie drill like an expert.

First, you have to understand that the beginning of the hole is where the injection port makes its seal against up to 3,000 pounds per square inch of injection pressure. It is important that the hole stay round, especially when using hammer in type ports. That means you have to keep the drill bit in a straight line.

Why a 45-degree angle? This is the best way to intersect the crack halfway through the structure (which is your goal). For example: On a 10” thick wall, come off the crack 5”, drill at a 45-degree angle and you should hit your target. Just start with your drill bit straight into the wall, give the trigger a few bumps to make an indention in the concrete with the bit, and rotate your drill so that the angle is halfway between your starting position and the wall.

How far apart should you space your holes? It depends on the width of the crack. Tighter cracks need tighter spacing because the resin won’t travel as far. Wider cracks can have wider spacing because the resin will travel with ease. A rule of thumb is to drill your holes no farther apart than the thickness of the concrete. Drill, flush, and pump a test hole with water to get an idea of how far the resin will travel.

Be sure to pull the drill bit out every four or five inches of penetration to clean out the drilling dust. Otherwise, you are likely to bind up your drill bit, which is not fun to try to remove.

Sometimes you will have to drill straight into the crack. I always try to angle drill first, but with extremely tight cracks you may have to compromise and drill straight in. Go as deep as you can, but make sure you don’t go all the way through.

Another tip: If you stagger your holes from one side of the crack to another, be sure not to intersect a hole you already drilled. This causes all kinds of problems.

We will talk about flushing drilling dust out of your holes later, but I can’t repeat it enough. If you want a successful injection job you have to flush the drilling dust out of the holes from the back. Otherwise, the dust will form a paste that gets forced into the crack and blocks your resin from getting where it needs to be. Splashing water on the front of the hole doesn’t really help. Be sure to get a small hose to the back of the hole and flush it with clean water.

In the next article, we'll take a look at what to do when you inevitably hit the injection contractor's nemesis...rebar!

5 Steps of Crack Injection - Overview
5 Steps of Crack Injection - 1. Drilling Holes
5 Steps of Crack Injection – 1. Drilling Holes (Continued)
5 Steps of Crack Injection – 2. Flushing Holes
5 Steps of Crack Injection – 3. Installing Ports
5 Steps of Crack Injection – 4. Flushing Cracks
5 Steps of Crack Injection – 5. Injecting Resin

Want in-depth info on crack injection procedures and products?

Download an Info-Packed Leak Seal Brochure!

Topics: All Posts, Seal Leaks, Crack Injection

5 Steps of Crack Injection - Sealing Leaks in Concrete

Posted by Stephen C. Barton on Aug 29, 2023 10:00:00 AM

Banner - 5 Steps of Crack Injection - Overview

Body - 5 Steps of Crack Injection - OverviewThere are five basic steps to be done when placing a crack injection. This is crack injection 101. Learn these steps and you will be well on your way to understanding what it takes to seal a water leak in concrete with products such as Spetec PUR F400 and Spetec GT500. In future articles, we will explore every one of these steps in more detail and address the multitude of options (such as port selection, hole spacing, depth, what to do when you hit rebar, etc.) But for right now, we are going to discuss the most basic steps.

Step 1: Drill holes. Use a hammer drill to drill holes in the concrete that intersects the crack. These holes are usually drilled at a 45-degree angle to intersect the crack halfway through the structure so that the resin is forced toward the front and back of the crack.

Step 2: Flush the holes. When you drill, you create concrete dust. If you don’t flush this dust out of the holes, it will be forced into the crack during injection and may clog the crack, preventing the resin from getting where it needs to go. Put a flexible hose all the way to the back of the hole so that water flushes the dust from the back of the hole to the surface of the concrete. Flush until clean water is flowing.

Step 3: Install your injection port. The port is what seals the hole and gives the injection pump a direct connection to the crack.

Step 4: Flush the crack. Unless the water is pouring out of the crack, you will need to inject clean water through the injection port and into the crack. This serves several purposes:

  • Cleans the crack of dirt and other contaminants to allow the resin to flow freely.
  • Gives you an idea of how far and how easily the resin will flow into the crack when you start injecting the foam.
  • Helps to open areas where the resin wouldn’t otherwise flow. Water is thinner than resin and will penetrate deeper and into tighter areas.
  • Ensures the resin will have enough moisture to react with.

Step 5: Inject the resin. Always use the lowest pressure that will continuously feed resin into the crack. Slowly turn up the pressure as necessary to get the resin flowing. My rule of thumb is to keep injecting even if resin starts to flow out of the crack. As long as more resin is going in than is coming out, you are improving your chances of success. When the resin isn’t moving further along the crack, move to the next port.

Sounds simple, right? Well, it is and it isn’t, as we will discover in the next several chapters of this blog series...

5 Steps of Crack Injection - Overview
5 Steps of Crack Injection - 1. Drilling Holes
5 Steps of Crack Injection – 1. Drilling Holes (Continued)
5 Steps of Crack Injection – 2. Flushing Holes
5 Steps of Crack Injection – 3. Installing Ports
5 Steps of Crack Injection – 4. Flushing Cracks
5 Steps of Crack Injection – 5. Injecting Resin

Want in-depth info on crack injection procedures and products?

Download an Info-Packed Leak Seal Brochure!

Topics: All Posts, Seal Leaks, Crack Injection

Hydrophobic Polyurethanes vs Hydrophilic Polyurethanes

Posted by Charlie "The Grout Geek" Lerman on Aug 24, 2023 10:00:00 AM

Banner - Hydrophobic vs Hydrophilic Polyurethanes

The terms hydrophobic and hydrophilic may not mean anything to the average person. But, to a contractor, these terms can mean a world of difference. Hydro means water while phobic means “to fear” and philic means “to love”. Alchatek offers both hydrophobic and hydrophilic polyurethanes, so it is important to be aware of the differences between the two types.  

Hydrophobic Polyurethanes

Body - Hydrophobic vs Hydrophilic PolyurethanesHydrophobic polyurethanes naturally repel water (similar to the way oil would repel water and stay separate if you were trying to mix them in a glass). These products push water out of the area in question as they expand. Hydrophobics are used with catalysts which allow you to adjust the set time. They also have zero shrinkage after curing.

Check out these hydrophobic polyurethanes:

Hydrophilic Polyurethanes

Hydrophilic polyurethanes naturally mix with water before curing (similar to the way gin and tonic mix thoroughly in a glass). This characteristic allows for a very strong chemical and mechanical bond, as water helps pull the material into the pores of the concrete. These products do not require a catalyst. You can pump them straight out of the pail.

Check out these hydrophilic polyurethanes:

Don't Oversimplify These Concepts

Don't get caught in the trap of oversimplifying hydrophilic vs. hydrophobic.  There are varying degrees of each (see chart below for more information on how this is measured).  

Hydrophilic vs Hydrophobic.png

Some hydrophilic materials will keep absorbing water (10-15 times their original volume).  Others (such as Spetec PUR GT500) only absorb as much water as is necessary for their reaction and then they reject the rest.  Yes, hydrophilic gels will shrink like crazy in the absence of water, but Spetec PUR GT500 won't.  It is completely safe to use in a dry environment.

Want more information on Alchatek products?

Download the Info-Packed Geotech Product Catalog!

Download the Info-Packed Leak Seal Product Catalog!

Topics: All Posts, Lift Slabs, Seal Leaks, Stabilize Soil

Waterproofing in a Dry Environment

Posted by Charlie "The Grout Geek" Lerman on Jul 27, 2023 10:00:00 AM

Banner - Waterproofing in a Dry Environment

Body - Waterproofing in a Dry EnvironmentIf you're a leak seal contractor, you may be familiar with this situation: A property owner with leaking concrete calls you up and says, "Hey, everything is dry right now, so I want to get someone out here to go ahead and waterproof the structure."  Attempting a waterproofing job when the structure is completely dry is not recommended.

Let me give you an analogy. Let's say I hired you to paint a basement. And when you arrive, it's pitch black in that basement. No lights are available and you can't see anything. Can you still paint that basement? The answer is "yes", but when we turn the lights on, will I be happy with the job you've done? There's no way. It would be a terrible paint job.

Similarly, if someone is asking you to waterproof while it's dry, you are basically attempting to seal leaks while blind. You need to waterproof while water is present - not just to activate the grout, but to see where the grout needs to be. Let the leaks lead you to correct grout placement. You won't know for sure if the water is not present. If you attempt a leak seal job in a completely dry environment and then return when the water is present, you'll most likely find leaking cracks that you missed.

Moral of the story? Grout when it's wet.

Want more information on leak seal products and equipment?

Download the Info-Packed Leak Seal Product Catalog!

Topics: All Posts, Seal Leaks, Crack Injection, Curtain Grouting

Polyurethane Estimating Calculator & Leak Seal Material Selection Guide

Posted by Kreg Thornley on Jul 25, 2023 10:00:00 AM

Banner - Polyurethane Estimating Calculator & Leak Seal Material Selection Guide

The Alchatek app includes a Leak Seal Material Selection Guide and a Polyurethane Estimating Calculator.  The Leak Seal Product Selection guide asks you a series of Yes/No questions about your job and then provides product recommendations.  The Polyurethane Estimating Calculator takes the guesswork out of estimating material for Geotech and Leak Seal jobs. Here's a step-by-step guide...

Install the Alchatek App and Create an Account

1. Search the name Alchatek in your Apple App Store or Google Play Store to install the app. 

AT-App-1

2. After installing the app, create an account by clicking "Sign Up" at the bottom and following the prompts.

AT-App-2

Polyurethane Estimating Calculator (Estimate Material Quantities for Your Job)

1. Tap the three lines in the top left corner to display the application options. Choose Material Estimation Calculator, then choose Geotech (Slab Lifting & Void Fill) or Leak Seal for your job type.

AT-App-9

2. Select the measuring system you want to use.

AT-App-10

3. Fill out the required fields.

AT-App-11

4. View the recommended material quantities.

AT-App-12

Leak Seal Material Selection Guide (Choose a Leak Seal Product for Your Job)

1. Tap the three lines in the top left corner to display the application options. Choose Leak Seal Material Selection Guide.

AT-App-4

2. Answer a series of Yes/No questions about your leak seal job.

AT-App-5

3. Review the product recommendation screen (and/or click the Start Over button at the bottom to begin again).

AT-App-6

Want more information on Alchatek products?

Download the Info-Packed Geotech Product Catalog!

Download the Info-Packed Leak Seal Product Catalog!

Topics: All Posts, Lift Slabs, Seal Leaks, Business Tips, Fill Voids