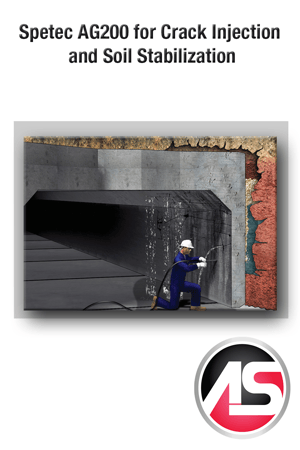
 Finally! We are at the last basic step. Now for the fun part - injecting the polyurethane resin. If you only have one pump, be sure to flush the pump out completely with AP Flush 121 before you pump the resin (unless you like rebuilding Titan airless sprayers).
Check your safety gear - safety glasses are the most important item. Put on two pairs of latex gloves (so you can easily slip on a new pair once the outer pair gets sticky - it is tough to slide fresh gloves over sweaty hands.)
Turn the pump pressure all the way down. Squirt some resin into a cup to make sure the resin is clean. Start at the lowest port and slowly crack the valve. This is a two man job (unless it is a small job). Have your partner slowly turn up the pressure as needed. Develop hand signals if the jobsite is noisy from a generator.
If the resin is flowing, keep pumping. If not, slowly adjust the pressure up. Here comes the art of the game. You have two ways to control the flow of the resin. The pump operator can control the pressure and the valve operator can control the flow. The more experienced technician should control the show.
If I am on the valve, I will tell the pump operator how high to turn up the pressure. I will close the valve while this is being done. Once the pressure is up, I will control the flow of the resin from the valve. Very slowly cracking it open. This way, if I feel a shear start to form, I have a split second to close the valve.
If I am on the pump and the valve operator is less experienced, I will have them open the valve and I will control things with the pump pressure. I will turn it up and down as necessary. It is better to have the valve operator control the show in most circumstances since that person is closer to the action, but hey, I am a control freak when it comes to crack injection.
When to stop? My rule is this - if resin is flowing, keep pumping. What if it starts to run out the face of the crack? Again, my rule is this - if more resin is going in than is coming out, keep pumping. You only have a few minutes to get the resin where it needs to be. As the AP Seal 500 reacts with water it starts to thicken up and becomes more difficult to push into the tighter recesses of the crack.
If raw resin comes out of the crack (amber resin, not a white foam), then it is time to stop. This resin will seal the crack, but at this point there is not much water for it to react with and it will cure slowly. Stop injecting and move to the next port because it will be slow to seal. It is better to see white foam coming out the face of the crack.
What happens if the foam travels past the next port - should I stop? No way. This is a home run. In most cases, the further along the face of the crack the resin travels, the deeper it is travelling as well. This gives you a better seal.
If too much resin is flowing out or washing out due to high water flow, you can use AP Oakum and a screwdriver to create a temporary plug (large or small) to give the resin time to react, expand, and seal the leak.
There are many more nuances about resin injection that you can read about in the leak seal section of this blog. For now, you have completed the basic training of sealing leaks in concrete structures. Here are the basic steps one more time for review:
- Drill the injection holes.
- Flush the injection holes.
- Set the injection ports.
- Flush the crack with water.
- Inject the resin.
Congratulations! You have now completed the five basic injection steps and are ready to give it a shot on your own. Of course, many readers are as experienced as I am. If you aren’t, please feel free to call us at 404-618-0438 and ask any questions. The team at Alchemy-Spetec is here to help!
Click below to read the previous articles in this series if you missed them:
5 Steps of Concrete Crack Injection - Overview
5 Steps of Concrete Crack Injection - 1. Drilling Holes
5 Steps of Concrete Crack Injection – 1. Drilling Holes (Continued)
5 Steps of Concrete Crack Injection – 2. Flushing the Holes
5 Steps of Concrete Crack Injection – 3. Installing the Ports
5 Steps of Concrete Crack Injection – 4. Flushing the Cracks
Want in-depth info on crack injection procedures and products?


 All cracks that aren’t actively leaking at the time you are sealing them need to be flushed out with water. Flushing them gives you several advantages:
 Installing high pressure injection ports is pretty straight forward, so I won’t spend too much time on this topic. Just a few quick tips.
 Here it is. My favorite topic. Why? Because I have seen and heard some really stupid things concerning this. It is my pet peeve. It separates the technicians who care from those who are only going through the motions. And quite frankly, it can be the difference between a successful outcome and dismal failure - or at the very least an expensive call back.
 Let’s face it, most of the structures you drill through will be full of rebar. Rebar is the steel reinforcement that gives the structure its strength. Concrete protects the rebar by shielding it from moisture, and the high pH of concrete keeps the rebar from rusting. However, once a crack forms it allows more water and environmental gasses to reach the area surrounding the rebar. Carbonation of the concrete can now occur which causes the pH to drop and the corrosion process to begin. The rust expands and takes up 15 times the volume of the un-corroded steel which causes tensile forces to work against the concrete eventually resulting in additional cracking and spalling. Hopefully, you will be called in to fix the leaks before much of this damage occurs.
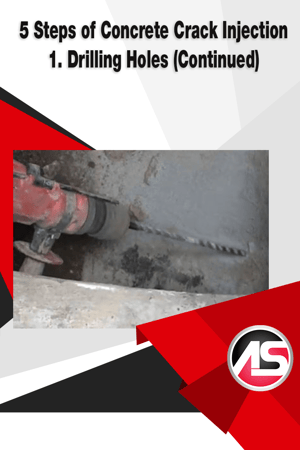
 I remember my first day on the job back in June of 1985. We were working nights in the MARTA subway tunnels in Atlanta, sealing leaks in the ceiling. They handed me a 30 pound hammer drill and told me to drill holes in the ceiling at a 45 degree angle. Sure, what the heck is a 45 degree angle? I put on a lot of muscle that summer drilling overhead and hauling 50 pound pails of resin all over the Southeastern U.S.
 There are five basic steps to be done when injecting a crack in concrete that is leaking water. This is crack injection 101. Learn these steps and you will be well on your way to understanding what it takes to seal a water leak in concrete with products such as
 When it comes to leaking cracks,