Looking for a Contractor?

Alchatek Blog

5 Steps of Crack Injection – 2. Flushing Holes

Posted by Stephen C. Barton on Sep 20, 2023 10:00:00 AM

Banner - 5 Steps of Crack Injection - Flushing Holes

Body - 5 Steps of Crack Injection - Flushing HolesHere it is. My favorite topic. Why? Because it is my pet peeve. It separates the technicians who care from those who are only going through the motions. Quite frankly, it can be the difference between a successful outcome and dismal failure - or at the very least an expensive callback.

When you drill holes you create concrete dust. The hammer drill bit literally chews up the concrete. Most of it comes out of the hole and falls on the floor. However, a lot of dust is left behind inside the hole. If it is not properly flushed out then it will mix with your polyurethane injection resin and make a thick paste. This thick paste can be forced into the crack and prevent the clean resin from reaching deep into the crack where it is needed. Most of the time you won’t even realize you have a problem. But there it is nonetheless. Waiting for the right conditions to allow water to seep back through the crack you thought you fixed.

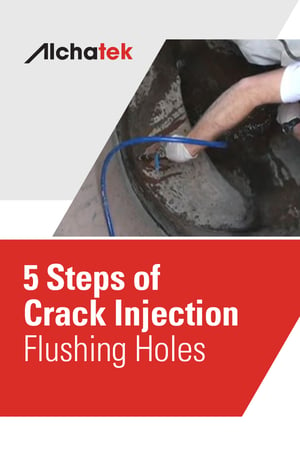
How do you avoid this? Simple - flush the hole out from the back using a very cheap flexible hose that attaches to your flush pump (you did bring a separate flush pump didn’t you?). Start at the highest hole and work your way down until clean water is flowing out of each hole.

Spraying water on the face of the holes may make it look clean, but it is not effective. There is still dust deep in the hole. Filling a water bottle up and squeezing it so that water shoots part way up the hole is not good enough. You have to have the water exit your hose at the back of the hole. This is the only way.

Are there exceptions? Of course, there are. If you pull the drill bit out of the hole and water gushes out behind it in a steady stream you can skip this step. Otherwise, make sure you bring a flush hose with you. It has to be small enough to fit inside your drill hole. We make it easy for you. We make one and sell it for cheap (so don’t blame us if you get to your job site and don’t have one).

This is so basic it is silly. However, I have seen experienced technicians do the water bottle trick and try to explain that it is sufficient. I’m happy to report that those guys are working for your competitors now. Just make sure your guys don’t get lulled into laziness and skip what just might be the most important of these five basic steps:

  1. Drill the hole
  2. Flush the hole
  3. Install the ports
  4. Flush the crack
  5. Inject the resin

Next up, we install the ports!

5 Steps of Crack Injection - Overview
5 Steps of Crack Injection - 1. Drilling Holes
5 Steps of Crack Injection – 1. Drilling Holes (Continued)
5 Steps of Crack Injection – 2. Flushing Holes
5 Steps of Crack Injection – 3. Installing Ports
5 Steps of Crack Injection – 4. Flushing Cracks
5 Steps of Crack Injection – 5. Injecting Resin

Want in-depth info on crack injection procedures and products?

Download an Info-Packed Leak Seal Brochure!

Topics: All Posts, Seal Leaks, Crack Injection

5 Steps of Crack Injection – 1. Drilling Holes (Continued)

Posted by Stephen C. Barton on Sep 13, 2023 10:00:00 AM

Banner - 5 Steps of Crack Injection - Drilling Holes (Continued)

Body - 5 Steps of Crack Injection - Drilling Holes (Continued)Let’s face it, most of the structures you drill through will be full of rebar. Rebar is the steel reinforcement that gives the structure its strength. Concrete protects the rebar by shielding it from moisture, and the high pH of concrete keeps the rebar from rusting. However, once a crack forms it allows more water and environmental gasses to reach the area surrounding the rebar. Carbonation of the concrete can now occur which causes the pH to drop and the corrosion process to begin. The rust expands and takes up 15 times the volume of the un-corroded steel which causes tensile forces to work against the concrete eventually resulting in additional cracking and spalling. Hopefully, you will be called in to fix the leaks before much of this damage occurs.

Once you are on the job site, this slow process of decay does not really affect you (unless the concrete is spalling off as you drill). Your issue with the rebar is that it will stop your drill bit from penetrating the crack. The cracks will often follow the rebar, especially if there is not adequate coverage of concrete over the rebar. Shallow rebar is a huge contributing factor to cracks in concrete.

At this point, all you care about are two things. First, how do you know if you have hit rebar? Second, if you have hit it, what do you do next?

After drilling many thousands of holes, as I have over my career, I pretty much know when I have hit rebar. Here are a few things to look for:

  1. The forward progress of drilling has stopped.
  2. The sound of the drilling changes.
  3. The quantity of drilling dust is reduced.
  4. If you are not sure, put your hand out to catch some of the drilling dust coming out of the drill hole. Observe it for metal shavings.

Given enough time and effort, you can drill through rebar. However, I wouldn’t recommend this as a general practice. It takes a lot of time, weakens the structure you are trying to protect, and...have you bought a drill bit lately? Steel is expensive! Try this instead:

  1. Move further away from the crack and try again (adjust your drilling angle).
  2. Move closer to the crack and try again (adjust your drilling angle).
  3. Move parallel to the crack and try again.
  4. Move to the other side of the crack and try again.

As a last resort, drill straight into the crack. This is not the ideal situation, but if you can drill deep enough to get an injection port installed, then you might be able to successfully seal the leak. 

Now that the surface of your concrete looks like Swiss cheese, it is time to go get that bag of fast-set hydraulic cement you brought along for just this purpose. Try to patch it up before you begin injection because some of those abandoned holes are libel to have hit pay dirt. If you don’t seal them up then you will have foam or resin leaking out of the holes.

Hitting rebar is not fun and can be frustrating. The key is to expect it and try to think three-dimensionally. See if you can visualize what is going on behind the concrete. This is one of the keys to becoming a really good injection technician.

5 Steps of Crack Injection - Overview
5 Steps of Crack Injection - 1. Drilling Holes
5 Steps of Crack Injection – 1. Drilling Holes (Continued)
5 Steps of Crack Injection – 2. Flushing Holes
5 Steps of Crack Injection – 3. Installing Ports
5 Steps of Crack Injection – 4. Flushing Cracks
5 Steps of Crack Injection – 5. Injecting Resin

For more information...

Download an Info-Packed Leak Seal Brochure!

Topics: All Posts, Seal Leaks, Crack Injection

Polyurethane Grout for Leak Repair: Economic Implications for Municipalities

Posted by Charlie "The Grout Geek" Lerman on Sep 12, 2023 1:30:00 PM

Banner - Polyurethane Grout for Leak Repair Economic Implications for Munic

Body - Polyurethane Grout for Leak Repair Economic Implications for MunicipInflow and Infiltration (I&I)

Inflow and infiltration (I&I) refer to the entry of groundwater and rainfall-derived water into wastewater and stormwater collection systems through defects such as cracked pipes, deteriorated manholes, faulty connections, and other openings. This excess water can overload the capacity of wastewater treatment plants and collection systems.

Inflow refers to water that enters the sewer system from direct connections such as roof drains, yard and area drains, foundation drains, surface runoff, or street wash waters. Infiltration refers to groundwater that enters the sewer system from the surrounding soil through defective pipes, pipe joints, connections, or manhole walls. Infiltration is the focus of polyurethane grouting.

Managing I&I is important for preventing sewer overflows, reducing treatment costs, and minimizing energy consumption.

Understanding the Risks: What are Sanitary Sewer Overflows (SSOs)?

Sanitary sewer overflows (SSOs) are a prevalent concern, posing significant public health threats. EPA data indicates an alarming 23,000 to 75,000 SSO incidents annually in the U.S. These overflows, laden with raw sewage, are carriers of bacteria, viruses, and other harmful entities, potentially leading to conditions ranging from mild stomach discomforts to severe diseases like cholera and hepatitis.

The Financial Implications and Opportunities

Tackling these issues often requires a significant financial commitment. The EPA's Clean Water State Revolving Fund (CWSRF) has allocated hundreds of billions of dollars for diverse water infrastructure projects. Established in 1987, this initiative offers states the autonomy to address their unique water quality challenges.

A Cost-Efficient Approach to Mitigating Infiltration in Sanitary/Stormwater Systems

Here's an efficient plan employing flexible polyurethane grout that promises a robust return on investment:

  1. Assessment: Start with inspecting lift stations and manholes.
  2. Identification: Locate and prioritize significant leaks.
  3. Targeted Repair: Utilize flexible polyurethane grout for precise point repairs.

A single crew can often mitigate leaks in two standard 8' deep manholes a day. This swift mitigation can lead to substantial savings. For instance, addressing leaks in just a single day can easily amount to around $30,000 in annual savings, based on local water treatment costs. In mere months, the cost of the repair is already recouped.

For municipal managers overseeing stormwater and wastewater systems, embracing flexible polyurethane grout for leak repair is a strategic move. It's not just about ensuring infrastructure longevity, but also safeguarding public health and achieving economic efficiency.

For more information...

Download an Info-Packed Infrastructure Leak Seal and Void Fill Brochure!

Topics: All Posts, Seal Leaks, Crack Injection, Curtain Grouting, Municipal Resources

5 Steps of Crack Injection - 1. Drilling Holes

Posted by Stephen C. Barton on Sep 7, 2023 10:00:00 AM

Banner - 5 Steps of Crack Injection - Drilling Holes

Body - 5 Steps of Crack Injection - Drilling HolesI remember my first day on the job back in June of 1985. We were working nights in the subway tunnels of Atlanta, sealing leaks in the ceiling. The crew handed me a 30-pound hammer drill and told me to drill holes in the ceiling at a 45-degree angle. Sure, what the heck is a 45-degree angle? I put on a lot of muscle that summer drilling overhead and hauling 50-pound pails of resin all over the Southeastern U.S.

Drilling holes into concrete seems like a straightforward process. However, it must be done correctly or everything you do afterward is a waste of time. Often, contractors put their least experienced technician on that job because it is manual labor and can be taught quickly. But knowing a few of the basics can help a newbie drill like an expert.

First, you have to understand that the beginning of the hole is where the injection port makes its seal against up to 3,000 pounds per square inch of injection pressure. It is important that the hole stay round, especially when using hammer in type ports. That means you have to keep the drill bit in a straight line.

Why a 45-degree angle? This is the best way to intersect the crack halfway through the structure (which is your goal). For example: On a 10” thick wall, come off the crack 5”, drill at a 45-degree angle and you should hit your target. Just start with your drill bit straight into the wall, give the trigger a few bumps to make an indention in the concrete with the bit, and rotate your drill so that the angle is halfway between your starting position and the wall.

How far apart should you space your holes? It depends on the width of the crack. Tighter cracks need tighter spacing because the resin won’t travel as far. Wider cracks can have wider spacing because the resin will travel with ease. A rule of thumb is to drill your holes no farther apart than the thickness of the concrete. Drill, flush, and pump a test hole with water to get an idea of how far the resin will travel.

Be sure to pull the drill bit out every four or five inches of penetration to clean out the drilling dust. Otherwise, you are likely to bind up your drill bit, which is not fun to try to remove.

Sometimes you will have to drill straight into the crack. I always try to angle drill first, but with extremely tight cracks you may have to compromise and drill straight in. Go as deep as you can, but make sure you don’t go all the way through.

Another tip: If you stagger your holes from one side of the crack to another, be sure not to intersect a hole you already drilled. This causes all kinds of problems.

We will talk about flushing drilling dust out of your holes later, but I can’t repeat it enough. If you want a successful injection job you have to flush the drilling dust out of the holes from the back. Otherwise, the dust will form a paste that gets forced into the crack and blocks your resin from getting where it needs to be. Splashing water on the front of the hole doesn’t really help. Be sure to get a small hose to the back of the hole and flush it with clean water.

In the next article, we'll take a look at what to do when you inevitably hit the injection contractor's nemesis...rebar!

5 Steps of Crack Injection - Overview
5 Steps of Crack Injection - 1. Drilling Holes
5 Steps of Crack Injection – 1. Drilling Holes (Continued)
5 Steps of Crack Injection – 2. Flushing Holes
5 Steps of Crack Injection – 3. Installing Ports
5 Steps of Crack Injection – 4. Flushing Cracks
5 Steps of Crack Injection – 5. Injecting Resin

Want in-depth info on crack injection procedures and products?

Download an Info-Packed Leak Seal Brochure!

Topics: All Posts, Seal Leaks, Crack Injection

Case Study - Sealing Hairline Cracks in a Fire Protection Storage Tank

Posted by Charlie "The Grout Geek" Lerman on Aug 31, 2023 10:00:00 AM

Banner - Sealing Hairline Cracks in a Fire Protection Storage Tank

Body - Sealing Hairline Cracks in a Fire Protection Storage TankA general contractor working on new luxury apartment construction in Queens, NY reached out to a local leak seal specialist after discovering hairline cracks in the base joint of a fire protection storage tank. (A fire protection storage tank stores water for use in fire suppression systems.)

Powerful Polymer

Cracks in concrete come in all widths and sizes. Some of the most difficult ones to inject are the hairline cracks. The thinnest flexible polyurethane grouts on the market are between 100cps - 200cps which makes it difficult if not impossible to get them to penetrate a hairline crack. Spetec AG200 is an acrylic-based grout and it is 18cps, or about 5-10 times thinner than the thinnest flexible polyurethane. Clearly, a thinner grout will penetrate cracks much more effectively. Spetec AG200 is almost as thin as water, but when it polymerizes it forms a flexible hydrophilic gel. This gel features 500% elongation, which may sound like overkill to some, but 500% movement in a hairline crack is not much. The ultra-low viscosity and field adjustable set time make Spetec AG200 ideal for thin and hairline cracks.

Painless Procedure

The crew followed the standard crack injection procedure:

  1. Identify crack locations.
  2. Estimate the amount of material needed.
  3. Prepare the surface of the crack.
  4. Drill injection holes at a 45-degree angle.
  5. Flush out injection holes with water to remove any debris.
  6. Insert injection ports on both sides of the crack.
  7. Inject water into each port.
  8. Start injection of material.
  9. Always grout twice.
  10. Add water again.

Spetec AG200 was successfully injected into cracks and the base joint of the firefighting water reserve tank.

Rapid Result

The defects in the tank were easily penetrated by Spetec AG200 and the job was a success. This allowed the general contractor to get back on schedule with the building construction.

Want more information on leak seal products and equipment?

Download the Info-Packed Leak Seal Product Catalog!

Topics: All Posts, Crack Injection

5 Steps of Crack Injection - Sealing Leaks in Concrete

Posted by Stephen C. Barton on Aug 29, 2023 10:00:00 AM

Banner - 5 Steps of Crack Injection - Overview

Body - 5 Steps of Crack Injection - OverviewThere are five basic steps to be done when placing a crack injection. This is crack injection 101. Learn these steps and you will be well on your way to understanding what it takes to seal a water leak in concrete with products such as Spetec PUR F400 and Spetec GT500. In future articles, we will explore every one of these steps in more detail and address the multitude of options (such as port selection, hole spacing, depth, what to do when you hit rebar, etc.) But for right now, we are going to discuss the most basic steps.

Step 1: Drill holes. Use a hammer drill to drill holes in the concrete that intersects the crack. These holes are usually drilled at a 45-degree angle to intersect the crack halfway through the structure so that the resin is forced toward the front and back of the crack.

Step 2: Flush the holes. When you drill, you create concrete dust. If you don’t flush this dust out of the holes, it will be forced into the crack during injection and may clog the crack, preventing the resin from getting where it needs to go. Put a flexible hose all the way to the back of the hole so that water flushes the dust from the back of the hole to the surface of the concrete. Flush until clean water is flowing.

Step 3: Install your injection port. The port is what seals the hole and gives the injection pump a direct connection to the crack.

Step 4: Flush the crack. Unless the water is pouring out of the crack, you will need to inject clean water through the injection port and into the crack. This serves several purposes:

  • Cleans the crack of dirt and other contaminants to allow the resin to flow freely.
  • Gives you an idea of how far and how easily the resin will flow into the crack when you start injecting the foam.
  • Helps to open areas where the resin wouldn’t otherwise flow. Water is thinner than resin and will penetrate deeper and into tighter areas.
  • Ensures the resin will have enough moisture to react with.

Step 5: Inject the resin. Always use the lowest pressure that will continuously feed resin into the crack. Slowly turn up the pressure as necessary to get the resin flowing. My rule of thumb is to keep injecting even if resin starts to flow out of the crack. As long as more resin is going in than is coming out, you are improving your chances of success. When the resin isn’t moving further along the crack, move to the next port.

Sounds simple, right? Well, it is and it isn’t, as we will discover in the next several chapters of this blog series...

5 Steps of Crack Injection - Overview
5 Steps of Crack Injection - 1. Drilling Holes
5 Steps of Crack Injection – 1. Drilling Holes (Continued)
5 Steps of Crack Injection – 2. Flushing Holes
5 Steps of Crack Injection – 3. Installing Ports
5 Steps of Crack Injection – 4. Flushing Cracks
5 Steps of Crack Injection – 5. Injecting Resin

Want in-depth info on crack injection procedures and products?

Download an Info-Packed Leak Seal Brochure!

Topics: All Posts, Seal Leaks, Crack Injection

Waterproofing in a Dry Environment

Posted by Charlie "The Grout Geek" Lerman on Jul 27, 2023 10:00:00 AM

Banner - Waterproofing in a Dry Environment

Body - Waterproofing in a Dry EnvironmentIf you're a leak seal contractor, you may be familiar with this situation: A property owner with leaking concrete calls you up and says, "Hey, everything is dry right now, so I want to get someone out here to go ahead and waterproof the structure."  Attempting a waterproofing job when the structure is completely dry is not recommended.

Let me give you an analogy. Let's say I hired you to paint a basement. And when you arrive, it's pitch black in that basement. No lights are available and you can't see anything. Can you still paint that basement? The answer is "yes", but when we turn the lights on, will I be happy with the job you've done? There's no way. It would be a terrible paint job.

Similarly, if someone is asking you to waterproof while it's dry, you are basically attempting to seal leaks while blind. You need to waterproof while water is present - not just to activate the grout, but to see where the grout needs to be. Let the leaks lead you to correct grout placement. You won't know for sure if the water is not present. If you attempt a leak seal job in a completely dry environment and then return when the water is present, you'll most likely find leaking cracks that you missed.

Moral of the story? Grout when it's wet.

Want more information on leak seal products and equipment?

Download the Info-Packed Leak Seal Product Catalog!

Topics: All Posts, Seal Leaks, Crack Injection, Curtain Grouting

The Five Rules of Leak Seal Grouting

Posted by Charlie "The Grout Geek" Lerman on Jul 20, 2023 10:00:00 AM

Banner - The Five Rules of Leak Seal Grouting

Body - The Five Rules of Leak Seal GroutingPolyurethane grouting is a complex process that involves numerous specifications and guidelines. However, amidst the vast amount of information, there are five fundamental rules that lie at the core of all successful polyurethane grouting projects. We will explore these rules, highlighting their significance in achieving desired outcomes.

Rule #1: Don’t Eat the Grout

On a serious note, this rule serves as a safety reminder to avoid accidents or potential health risks associated with ingesting grout materials. It may seem obvious, but it is crucial to emphasize that grout should never be ingested.

Rule #2: Protect Your Eyes

Ensuring eye protection is essential when working with polyurethane grout. Always wear appropriate safety gear and keep an eyewash nearby. This precautionary measure prevents grout particles or splashed drops from coming into contact with your eyes, safeguarding your vision and preventing injuries.

Rule #3: Avoid Premature Water Addition

One must refrain from adding water to the grout before pumping it. While experienced professionals might occasionally deviate from this rule, it generally stands as a reliable guideline, especially for those new to the field. By adhering to this rule, the grout maintains its intended consistency and properties, leading to optimal results.

Rule #4: Get the Grout in Right Location

Precise grout placement plays a crucial role in achieving successful outcomes. It is essential to accurately direct the grout to the desired location whether performing crack injections or high-flow grouting. High-flow grouting, especially, demands effective retention of the grout in place.

Rule #5: Allow Sufficient Set Time

The final rule stresses the importance of providing ample time for the grout to set. Once the grout reaches its intended location, it is crucial to avoid disturbances and allow the curing process to occur effectively. This rule is particularly significant in high-flow scenarios, where maintaining the grout in place poses a significant challenge.

As long as these rules are upheld, exploration and experimentation in grouting methods can be undertaken. This approach acknowledges the uniqueness of each job site and encourages problem-solving while adhering to the core principles of grouting.

Want more information on leak seal grouting materials and equipment?

Download the Info-Packed Leak Seal Product Catalog!

Topics: All Posts, Seal Leaks, Crack Injection, Curtain Grouting

Polyurethane vs Epoxy for Waterproofing

Posted by Charlie "The Grout Geek" Lerman on Jul 13, 2023 10:00:00 AM

Banner - Polyurethane vs Epoxy

Body - Polyurethane vs EpoxyIn this article, we’re comparing the use of epoxies and polyurethanes for waterproofing. This is not a battle of good versus evil, but rather a discussion about their differences and when to use each type of material.

A Brief History

Epoxies and polyurethanes are both old technologies, with epoxies making their way into the construction market about a decade before polyurethanes. The term “chemical grouting” often refers to epoxy, much like how “soda” is used as a generic term for carbonated drinks.

Why Epoxy?

When you’re asked to waterproof with epoxy, it’s essential to ask why. Are you merely waterproofing, or are you also doing a structural repair? Epoxies are strong, about three to four times stronger than the concrete you put them in. They will waterproof that crack, but when movement occurs, you’ll likely see mirror cracking about a foot over on either side. When you have mirror cracking, your water problem will return.

The Case for Polyurethane

If you’re just looking to waterproof, polyurethane is almost always going to be the better choice. Polyurethanes are flexible, allowing the wall to move and breathe as it needs to while stopping the water from coming in. It’s simple that way.

Wet Environments and Polyurethanes

One other point worth noting is that polyurethanes can be installed in wet environments. That’s typically when you have the leak. Epoxies, on the other hand, don’t like to be installed in wet situations. Remember, it’s not about which one is better overall, but about which one is better for your specific situation. As always, feel free to contact us with any questions about epoxy vs polyurethane for waterproofing or for assistance with your waterproofing project.

Want more information on leak seal products and equipment?

Download the Info-Packed Leak Seal Product Catalog!

Topics: All Posts, Seal Leaks, Crack Injection

Pressure in Crack Injection

Posted by Charlie "The Grout Geek" Lerman on Jul 13, 2023 10:00:00 AM

Banner - Pressure in Crack Injection

Body - Pressure in Crack Injection“At what pressure am I going to inject the grout?” This question is not only common but also crucial on leak seal jobs, as it directly impacts the quality of your work. The answer, however, is not as straightforward as one might hope. The optimal pressure for injection is as low as possible. However, the exact pressure cannot be determined until the injection process begins.

Hairline Cracks

When dealing with urethane and hairline cracks, the pressure required is generally on the high end. This is where the technical expertise comes into play. If the pressure is too high, there is a risk of spalling the concrete, which can lead to further damage. To mitigate this risk, one might consider switching to an acrylate-type product. Acrylate, being almost as thin as water, penetrates hairline cracks more effectively, thereby reducing the risk of spalling.

Process of Injection

As a rule of thumb, the process begins by connecting to the port, whether for crack injection or curtain grouting. The ball valve is opened while the pump is off. Once the pump is turned on, the pressure is gradually increased until a steady flow rate is achieved. This process requires a keen eye and a steady hand, reinforcing the importance of technical expertise in this field.

The Concept of Exploratory Grouting

The in world of crack injection, there is a concept known as exploratory grouting. This process involves intentionally creating one small crack to understand the wall’s resistance. Typically, walls start cracking around 1500 PSI, although this can vary, with some walls withstanding up to 2200 PSI. This exploratory process is essential for understanding the wall’s capacity and planning the injection process accordingly.

Marking the Pressure

It is recommended to mark the pressure at which the wall cracks using a wax pencil on the pump. This marking serves as a reminder of the wall’s capacity. Remember, you get one free crack for exploratory purposes. Any cracks after that are on you. 

Want more information on crack injection with polyurethane?

Download an Info-Packed Crack Injection Brochure!

Topics: All Posts, Crack Injection