Looking for a Contractor?

Alchatek Blog

Andy Powell

Recent Posts

Retaining Wall Replacement Stabilization with AP 720

Posted by Andy Powell on Dec 2, 2021 10:00:00 AM

Banner - Retaining Wall Replacement Stabilization with AP 720

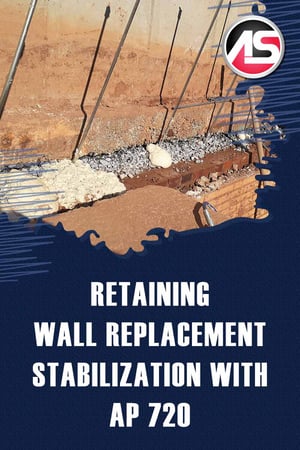
Body - Retaining Wall Replacement Stabilization with AP 720When an old brick retaining wall in downtown Greenville collapsed and crushed three cars, Wurster Engineering and Construction was called in to stabilize the embankment and install a new wall system. Based out of Greenville, SC, Wurster is a geotechnical engineering and construction firm that specializes in soil and embankment stabilization. The project would require removal of the remaining brick wall, soil nailing the embankment, installing a shotcrete wall, and then tying in a new brick wall to the stabilized embankment.

However, one problem remained. There was one area where there was a portion of the brick wall that needed removal, but the temporary concrete retaining wall to protect the property had been poured on a bed of gravel that was being held in place by the remaining brick. The gravel under the temporary wall footing was contained by the remaining brick, which when removed would cause all of the gravel to run out. This section was about 30-35’ long, 2’ high, and 4-5’ deep from the face of the wall to the back.

Powerful Polymer

In order to solve this issue, Wurster Engineering and Construction selected AP Fill 720 to permeate the gravel and hold it in place while the brick was removed. This polyurethane resin was the ideal choice because of its ability to thoroughly permeate the gravel, lock it all together, and then cure to a high compressive strength. With the gravel locked in place, Wurster Engineering and Construction was able to install supplemental support jacks under the temporary retaining wall. After the jacks were in place, they were able to install the soil nails followed by the shotcrete.

Painless Procedure

Approximately 50 gallons of AP Fill 720 were used to build this solidified wall of gravel behind the remaining brick wall. Injection probes were spaced 18” apart to ensure proper permeation and coverage needed to create one solid mass. The crew came in at a steep 20 to 30-degree angle behind the brick and put in about 2 gallons of polyurethane per probe, with 5% catalyst mixed in. The crew then installed more probes at a shallow 60-degree angle in the areas that needed further permeation and coverage. These extra placements of approximately 2 gallons per probe were essential to keeping the gravel in place from side to side and front to back. This entire process took one day to complete with a small crew of three people.

Rapid Result

The day after grouting, the site work demolition subcontractor chiseled off the remaining brick from the solidified AP Fill 720 gravel wall - and the project was determined to be a complete success. The entire job was finished quickly with minimal mobilization costs. We appreciate our friends at Wurster Engineering and Construction for trusting Alchemy-Spetec’s material and consultation for geotechnical projects such as this one.

Want more information about soil stabilization?

Download an Info-Packed Soil Stabilization Brochure!

Topics: All Posts, Stabilize Soil

Lifting Slabs in Cold Weather

Posted by Andy Powell on Oct 26, 2021 10:00:00 AM

Banner - Lifting Slabs in Cold Weather 2021

Body - Lifting Slabs in Cold Weather 2021It's that time of year again. As temperatures drop, take a moment to review this previously posted article packed with cold-weather tips.

Contrary to popular opinion, as a contractor, you don’t have to put up your equipment and rigs due to cold weather. There are many jobs to be done and many ways to keep your material conditioned. Use this season to your advantage and gain valuable business.

Cold Weather Markets

Seasonal attractions such as theme parks are a great place to start looking for winter work. Many of these parks (the ones that aren’t in Orlando) shut down for the winter and this is the time they do maintenance and repairs. Think of all the concrete lifting and leveling that can be done.

Factories can be less active in the winter months with production slowing down in many industries. This is a good time for them to do maintenance and floor repairs as well.

Warehouses typically operate year-round, so there is always work available. Warehouse floors are used and abused on a daily basis and will sooner or later need some form of repairs done to keep business running at a steady pace. In addition, many warehouses have dangerous voids beneath their floors that require repair.  

Exterior concrete slabs are still worth considering, even in the cold weather. These slabs experience the most wear and tear from the environment itself (think erosion) and daily traffic. You’ll need to lift concrete slabs before the ground freezes and only after your materials have been thoroughly conditioned.

Conditioning Materials

Your slab lifting equipment probably has built-in heaters and a heated hose. Each brand and model of pump has different sized pre-heaters and different ∆T (∆ = Delta and T = Temperature). This sounds complicated but is actually quite simple.  ∆T is simply the change in temperature.  Let’s say your material has been sitting in a cold trailer all night and the temperature has dropped to 40 degrees F. If the required temperature of your B side material is 120 degrees F, then your pump better be rated with a ∆T of at least 80 degrees. However, if your material is preconditioned to 70 degrees F, then your machine only has to be rated for a ∆T of 50 degrees. As I said, every machine is rated differently based on the size of the heaters. What is important to know is that there are limitations to how much heating your machine can do.

Keeping your materials conditioned in the winter months is a lot easier than it sounds. The main point is to keep your AP Lift products above 60 degrees at all times. Keeping the polyurethane at or above that temperature can be accomplished in a number of ways.

If you have an insulated rig, it should stay around 40 degrees warmer than outside temperatures. Most foam rigs have built-in electric heaters that require an extension cord to a power outlet at the job site or at your facility for overnight storage. Alternately, you could buy an electric radiator heater. Other available heating devices include drum band heaters and heated drum mats (be careful not to scorch the polymers by turning band heaters up too high). For a more DIY approach, you could build a hot box around the material storage area in your rig.

Heat Sink

Another consideration when lifting cold slabs is the heat sink factor. AP Lift products come out of the gun hot and get even hotter as they react. However, cold concrete acts as a heat sink and sucks the energy out of the foam as it starts to react. This can slow down the reaction speed of the foam. If you are pumping into a void, it will have little effect because most of the foam is not in contact with the concrete. If you are trying to lift a slab with little void, it will have more of an effect because more of the foam is in contact with the cold concrete and cold soil. More volume = more energy.

Conclusion

Don’t let common preconceptions deter you from slab lifting in cold weather. As noted above, there is no need to shut down completely for the upcoming winter months if you don’t want to. Opportunities still exist and one of them may just be the job you’ve been looking for all year. There are many ways to keep your equipment and materials conditioned to efficiently work in lower temperatures. Have more questions about slab lifting in cold weather? Call us at 404-618-0438.

Want more in-depth info on slab lifting?

Download an Info-Packed Slab Lift Brochure!

Topics: Equipment & Accessories, All Posts, Lift Slabs, Business Tips

How To Evaluate a Site for Deep LiftⓇ & Deep Stabilization

Posted by Andy Powell on Aug 31, 2021 10:00:00 AM

Banner - How To Evaluate a Site for Deep Lift & Deep Stabilization

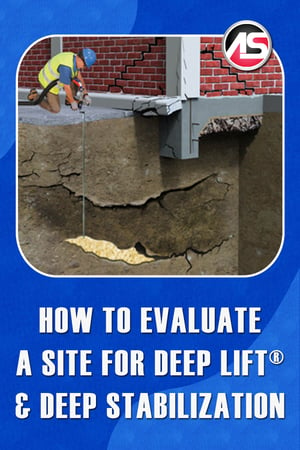
Body - How To Evaluate a Site for Deep Lift & Deep StabilizationFor any Deep Lift or deep stabilization project, we want to gather as much information as possible about the project site.  This information falls into a few different categories, in no particular order:

  • The Cause(s) of the Settlement or Void

  • Information on the Structure

  • Geotechnical Data

  • General Observations and Measurements

  • Site Evaluation Tools

Now I will break down each category into a checklist. 

The Cause(s) of the Settlement or Void

It's important to identify the Causes of Settlement in a structure so that you can do a proper repair and not have the problem reoccur.  Things to look for include:

  • Broken pipes - is there a known plumbing issue, has it been resolved, have the drainage lines been scoped, are there unusually high water bills, have the owners observed persistent, soggy ground?
  • Are there stormwater or sewer culverts that run below the property?
  • Is there a seawall, retaining wall, or bulkhead supporting soil in the vicinity of the building?
  • Downspouts and gutter issues - do the downspouts discharge onto the ground next to the building or into pipes, are those buried drain pipes intact, are the gutters large enough to convey the rainwater to the downspouts, or do they overflow onto the ground next to the building?
  • Are there any known trash pits or large trees that have been taken out next to the building?
  • Do the building owners know any history about the site, was this building constructed on land that was already suspect?  Any kind of history you can get is valuable information.
  • Are there site drainage issues like water runoff coming in contact with the building?
  • Is there evidence of poor compaction?
  • Have there been any construction projects next to the property where dewatering has been done?

Information on the Structure

What kind of structure are we proposing to stabilize or lift? Information about the Structure includes but is not limited to the following:

  • Are there drawings, plans, or as-builts, for the structure?  Particularly we are interested in what kind of foundation the building is on.
  • Is the structure on pilings?
  • How deep are the footings?
  • How wide are the footings?
  • Are there interior strip footings?
  • Do the interior slabs rest on the footing or are they floating slabs?
  • What is the footing construction - poured concrete, concrete block, a combination of block on top of concrete?
  • Is the building structure made of wood, block, steel frame, poured concrete, a combination?
  • Is there siding or a brick facade on the building?
  • Is it a single or multi-story building?
  • Where are the plumbing and other utilities located?
  • Are there overhead power lines?
  • Can you reach the areas to be grouted with your equipment, do you have enough hose?

Geotechnical Data

Sometimes it is impossible to determine the causes of settlement without getting a Geotechnical engineer involved.  The kinds of Geotechnical Data we are looking for include:

Observations and Measurements

Finally, we need to put our Observations and Measurements together so we can complete the estimate, determine the full scope of the project, and set customer expectations accordingly.

  • How much has the structure settled?
  • Is the roofline affected?
  • Is the brick or block separating, are there stair-step cracks?
  • How many square feet of the interior slab has settled, how many inches down?
  • Perform soundings on the slab to determine if there are voids underneath.
  • Drill holes and use a probe or borescope camera to look underneath.

Tools for Site Evaluation

Of course, it is hard to get some of this information without the proper Tools for Site Evaluation.

  • Measuring wheel.
  • Camera for still pics and for video (I like to narrate my observations while I video record my walkthrough.  That way I don't have to remember what each still picture means.
  • Measuring tape.
  • Rotating laser with transit stick - or use a Zip Level to measure elevation changes.
  • Flashlight.
  • Drill.
  • Soil probe.
  • Borescope camera.
  • Drill hole patching material
  • Laptop, tablet, or a notepad and pen (for recording your information).

Want more information on the Deep LiftⓇ process?

Download an Info-Packed Deep Lift Brochure!

Topics: All Posts, Deep Lift

Stabilizing & Lifting a Bridge Approach Slab with Polyurethane

Posted by Andy Powell on Aug 10, 2021 10:00:00 AM

Banner - Stabilizing and Lifting a Bridge Approach Slab with Polyurethane

Body - Stabilizing and Lifting a Bridge Approach SlabLifting a settled bridge approach slab with polyurethane foam requires specific knowledge of proved repair procedures for these types of structures. Here's an overview...

Look for a Hidden Sleeper Slab

Larger roads and highways will often have a hidden sleeper slab that spans underneath the pavement and the approach slab. It is designed to help transfer the traffic load from the roadway to the approach slab. If there is settling at a bridge approach you must determine if there is a sleeper slab in place. Drill through the pavement where it meets the approach slab and if you hit more concrete underneath the pavement you have found the sleeper. If there is a sleeper present where there is settling you will need to perform deep injection a couple of feet below the sleeper - just for soil stabilization. Rural roads and private roads typically do not have a sleeper slab present. Always ask the client if there are drawings available.

Deep Soil Stabilization Followed by Lifting

At least one level of deep injection is required for approach slab/pavement lifting. This is for soil stabilization. 4' spacing and 4' below the pavement is standard. Do not exceed more than 30 lbs per point at a given depth. It is advised to always have a DCP (dynamic cone penetrometer) test done in order to determine the blow counts. Low blow counts indicate weak soil zones that need to be targeted for deep injection. Lifting will be done directly through the pavement/approach slab, the same way you do standard slab lifting. Do the deep injections first and then finish with the injections directly beneath the slab.

Fill Voids with Polyurethane

Watch for voids under the approach slabs where they meet the bridge abutments. There are typically voids in this area that need to be filled. When filling them, it is good to have an observer under the bridge because the foam can fill the void up and come over the abutment, depending on how the structure is designed.

Want more info on geotech repair products?

Download the Info-Packed Geotech Product Catalog!

Topics: All Posts, Lift Slabs

Stabilize Soil with Polyurethane

Posted by Andy Powell on Jul 13, 2021 10:00:00 AM

Banner - Stabilize Soil with Polyurethane

Body - Stabilize Soil with PolyurethaneUnstable soil can be defined as soil that will not stay in place on its own, and therefore requires extra support. It should be noted that unstable soil can threaten the stability, security, and safety of infrastructure and can damage, degrade, and even destroy a number of structures, such as buildings, bridges, and roads. There are a variety of factors that can cause unstable soil including erosion, poor compaction, freeze/thaw cycles, and decomposition.

The Causes of Unstable Soil

Erosion
Poor drainage, improperly placed downspouts, leaking drain pipes, and broken water lines are common culprits.

Poor Compaction
When backfilling on a job site, the contractor is supposed to compact the backfill by driving over it with heavy equipment. However, this isn’t always done properly for one reason or another.

Freeze/Thaw
Processes of freezing and thawing essentially accelerate erosion processes. Cold weather freezes moisture trapped in tiny cracks. When this water freezes, it expands, subsequently pushing on the rocks and breaking them into smaller pieces. As processes of freezing and thawing continue, rock and sediment are continually broken down.

Biological Decay
Construction trash pits, buried trees, and other biodegradable materials all break down. Sometimes structures are built over these areas.

Stabilize Soil with Polyurethane

Loose soil can be consolidated, voids can be filled, and water migration halted by permeating the soil with one of the AP series products of ultra-low viscosity polyurethane resins. Once the bearing capacity of the soil has been increased with this process, then the structure can be lifted if necessary.  Learn more about Soil Stabilization Products here.

Want more information on polyurethane soil stabilization?

Download an Info-Packed Soil Stabilization Brochure!

Topics: All Posts, Stabilize Soil

Starting Up a Slab Lifting Business

Posted by Andy Powell on May 18, 2021 10:00:00 AM

Banner - Starting-Up-a-Slab-Lifting-Business

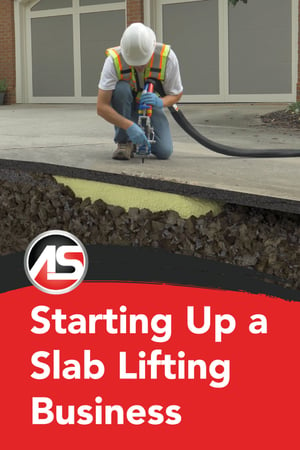
Body - Starting-Up-a-Slab-Lifting-BusinessIn this post, I provide an overview of a series of articles I wrote in 2018 on the basics of starting up a slab lifting business.

Subjects Covered in This Series

In this blog post series, we address some of the key points and considerations that slab-lifting startups frequently face. With so many years of market experience, we are uniquely positioned and qualified to offer this guidance. Because we are passionate about what we do, we are motivated to be part of your success story! Some of the topics we will cover include:

So You’re Thinking About Starting a Slab Lifting Company: Key Considerations

Slab lifting is an economical alternative to complete concrete replacement, be it a simple sidewalk repair or providing a cost-effective remedy for an entire building foundation.

If someone asked you to drive to Seattle, would you get in your car and take off, or would you look at a map first? A business and marketing plan is the roadmap for your slab lifting/concrete leveling business. It will help you define and stay true to your path, and it’s a tool you will need to attain startup financing.

Whether your goal is to launch a slab lifting venture that caters to home or business owners, you also will need a dependable, knowledgeable supplier who will not only sell you slab lifting pumps, guns and foams - but also serve as a trusted advisor.
Click here to read more...

Slab Lifting Market Hot Zones

Once you’re ready to make the move to start up a slab lifting business, one of your first areas of focus should be identifying and defining your service areas and your potential customer base within each sector or area. Broadly speaking, there are three viable market segments to explore for slab lifting services: Residential, Commercial, and Municipal.
Click here to read more...

Selling the Customer: Why Polyurethane Slab Lifting Is the Better Choice

The first question any engineer will ask is “Does the solution fit the needs of the application?” When it comes to structural foams used for slab lifting repair projects, you can confidently answer “yes.” But if you want to guide your customer to a concrete leveling repair solution, you should also be able to illustrate the pros, explain the cons, and enunciate the selling points.
Click here to read more...

Marketing Your Slab Lifting Business

Marketing your new slab lifting business takes time and the right approach. If your slab lifting business is a small to medium-sized operation, tools and strategies that increase your market presence and help you attract leads are extremely important.
Click here to read more...

Essential Gear for Starting Your Next Generation Slab Lifting Business

Slab lifting with polymers is rapidly replacing old technologies because it’s fast, strong, doesn’t shrink, and has a low impact on the environment. So it’s no surprise that we get a lot of inquiries from contractors interested in adding this service, in addition to individuals wanting to create a startup slab lifting business. So what exactly are we talking about in terms of the essential gear?

A slab lifting rig is a rolling business unto itself. It is a self-contained, turnkey, mobile unit that has all of the equipment necessary to perform the work. There are a variety of configurations but all of these setups will contain the following: Trailer or Box Truck, Power Source, Compressed Air System, Fluid Transfer System, Proportioner Pump, Heated Hoses, and Impingement Gun. Let’s look at these in more detail.
Click here to read more...

Want more information on Alchemy-Spetec geotech products and equipment?

Download the Info-Packed Geotech Product Catalog!

Topics: Equipment & Accessories, All Posts, Lift Slabs, Business Tips

Giving the Gift of Safety

Posted by Andy Powell on Dec 21, 2020 10:00:00 AM

Banner - Giving the Gift of Safety

Body - Giving the Gift of SafetyIt has become an Alchemy-Spetec annual tradition to re-post this classic holiday season safety blog I wrote a few years ago.  Merry Christmas and Happy New Year!

This time of year, most people will spend a little extra time with their loved ones.  It is also a time to reflect on the loved ones we miss that are no longer with us.  Like most of us, I know people who have either been lost or have suffered through a loss.  In those cases there was nothing that could have been done to stop it.  However, there are things that we can do to guard against job related safety hazards.

I've been fortunate enough to spend time in an OSHA safety training class.  It was required in order to be present supervising a project at a chemical facility.  Signing in at 6 AM, I’ll admit I was not looking forward to spending all day there.  By the end of the day I was glad that I went.

In an intro video, the narrator said that every morning when you kiss your loved one goodbye before you go to work, keep in mind that someone, somewhere will not come home from work that day.  Workplace accidents are almost entirely preventable.  Investigations typically find the cause quite easily. 

The class I attended contained a dozen or so modules, each one with a video case study followed by the teaching.  Every case study module covered a different accident where people didn’t come home from work that day.  All of them could have been prevented.  I learned about fire, electrical and chemical safety; as well as confined space, ladders, scaffolds, and working in trenches.  I have worked in the construction industry since my teenage years, so it was sobering to look back and think about some of the close calls I had.

If you're a contractor or industry related business owner looking for a good investment, send your employees to one of these classes.  It’s an excellent opportunity for them to learn safety principles that can protect you, your other employees, and your business from being lost.  It’s a gift that will keep on giving.  You don’t need Christmas as a reason to do this, but in the spirit of the season, you may want to make it the reason.  

Click here to find an OSHA safety class near you.

Merry Christmas and Happy New Year.

Topics: All Posts, Business Tips

Lifting Slabs in Cold Weather

Posted by Andy Powell on Oct 6, 2020 10:00:00 AM

Banner - Lifting Slabs in Cold Weather

Body - Lifting Slabs in Cold WeatherContrary to popular opinion, as a contractor, you don’t have to put up your equipment and rigs due to cold weather. There are many jobs to be done and many ways to keep your material conditioned. Use this season to your advantage and gain valuable business.
Cold Weather Markets

Seasonal attractions such as theme parks are a great place to start looking for winter work. Many of these parks (the ones that aren’t in Orlando) shut down for the winter and this is the time they do maintenance and repairs. Think of all the concrete lifting and leveling that can be done.

Factories can be less active in the winter months with production slowing down in many industries. This is a good time for them to do maintenance and floor repairs as well.

Warehouses typically operate year round, so there is always work available. Warehouse floors are used and abused on a daily basis and will sooner or later need some form of repairs done to keep business running at a steady pace. In addition, many warehouses have dangerous voids beneath their floors that require repair.  

Exterior concrete slabs are still worth considering, even in the cold weather. These slabs experience the most wear and tear from the environment itself (think erosion) and daily traffic. You’ll need to lift concrete slabs before the ground freezes and only after your materials have been thoroughly conditioned.

Conditioning Materials

Your slab lifting equipment probably has built in heaters and a heated hose. Each brand and model of pump has different sized pre-heaters and different ∆T (∆ = Delta and T = Temperature). This sounds complicated, but is actually quite simple.  ∆T is simply the change in temperature.  Let’s say your material has been sitting in a cold trailer all night and the temperature has dropped to 40 degrees F. If the required temperature of your B side material is 120 degrees F, then your pump better be rated with a ∆T of at least 80 degrees. However, if your material is preconditioned to 70 degrees F, then your machine only has to be rated for a ∆T of 50 degrees. As I said, every machine is rated differently based on the size of the heaters. What is important to know is that there are limitations to how much heating your machine can do.

Keeping your materials conditioned in the winter months is a lot easier than it sounds. The main point is to keep your AP Lift products above 60 degrees at all times. Keeping the polyurethane at or above that temperature can be accomplished in a number of ways.

If you have an insulated rig, it should stay around 40 degrees warmer than outside temperatures. Most foam rigs have built in electric heaters that require an extension cord to a power outlet at the job site or at your facility for overnight storage. Alternately, you could buy an electric radiator heater. Other available heating devices include drum band heaters and heated drum mats (be careful not to scorch the polymers by turning band heaters up too high). For a more DIY approach, you could build a hot box around the material storage area in your rig.

Heat Sink

Another consideration when lifting cold slabs is the heat sink factor. AP Lift products come out of the gun hot and get even hotter as they react. However, cold concrete acts as a heat sink and sucks the energy out of the foam as it starts to react. This can slow down the reaction speed of the foam. If you are pumping into a void, it will have little effect because most of the foam is not in contact with the concrete. If you are trying to lift a slab with little void, it will have more of an effect because more of the foam is in contact with the cold concrete and cold soil. More volume = more energy.

Conclusion

Don’t let common preconceptions deter you from slab lifting in cold weather. As noted above, there is no need to shut down completely for the upcoming winter months if you don’t want to. Opportunities still exist and one of them may just be the job you’ve been looking for all year. There are many ways to keep your equipment and materials conditioned to efficiently work in lower temperatures. Have more questions about slab lifting in cold weather? Call us at 404-618-0438.

Editor's Note: This post was originally published in 2018 as Slab Lifting in Cold Weather.

Want more in-depth info on slab lifting?

Download an Info-Packed Slab Lift Brochure!

Topics: Equipment & Accessories, All Posts, Lift Slabs, Business Tips

Maintaining the Compressed Air System in Your Rig

Posted by Andy Powell on Sep 29, 2020 10:00:00 AM

Banner - Maintaining the Compressed Air System in Your Rig

Body - Maintaining the Compressed Air System in Your RigI don’t know what it is about this time of year but for some reason at the beginning of fall we receive the most tech support phone calls from slab lifting contractors. Some of it is related to the changing weather, but this past week several things happened that made me want to address a specific topic – the compressed air system of the polyurethane foam rig.

It’s easy when discussing a trailer or box truck rig setup to focus on what type of plural component machine you are running. We all want to know whether you have a PH-2 or an E30 for example, or maybe an air powered Boss proportioner. What is often overlooked and neglected is the compressed air system in the rig. For a slab lifting contractor, it’s likely your air system is working harder than any other component on your rig. If you have had the joy of standing next to the compressor while it is running, you can’t deny that.
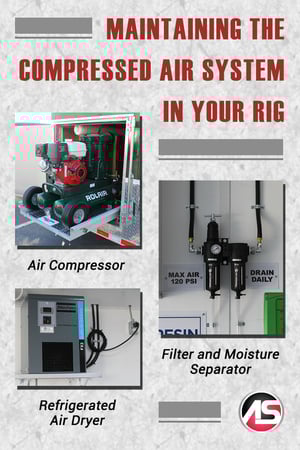
I want to highlight the main components of the compressed air system; describing their purpose and offering a few tips for keeping them running like they’re supposed to.

These components include:

  • Air Compressor
  • Coalescing Filter and Moisture Separator
  • Refrigerated Air Dryer

Air Compressor

The majority of slab lifting rigs we see have reciprocating air compressors, also known as piston air compressors. These are identified by having a tank, and they are in a horizontal or upright configuration. They can be either gasoline or electric powered. There are also rotary screw compressors out there which don’t have a tank but still need to be maintained. If you have a compressor with a tank, that tank needs to be drained of the moisture it collects. Some have automatic drains that pop open after the unit shuts down; others must be drained manually.

Last week we worked with a contractor who had an air powered proportioner. His machine could build up pressure, but once he started injecting poly the flow would slow down to just a trickle. He would then shut off the gun and the proportioner would pressure up again. Turns out the air compressor tank was almost completely full of water so he would exhaust the remaining air supply right away when shooting the foam. A good policy is to drain the tank every day at the end of the shift. If it doesn’t drain automatically then there are typically valves that are easy to access. I actually like to start my compressor up the next shift with the tank valve open because it will always blow some more water out when it fires up. Then I shut the valves and things pressure up per usual.

In addition to draining the tank, you need to check and change the compressor oil per the manufacturer’s guidelines. This is for all compressors. If you don’t have a manual on board the rig to tell you when to change the oil or what oil to put in, this info can easily be found on the internet or hopefully from your rig provider.

Filters and Moisture Separators

You can usually find the moisture filter and separator mounted on the wall, often combined with the regulator and air pressure gauge. These filters have a housing below them that collects moisture that is coming from the air compressor. This is the first line of defense (after the air compressor) from keeping moisture out of your transfer pumps, so make sure to open the little valves at the bottom and drain these filter/separators daily. I do it at the end of the day and once again at the beginning of the shift when I am checking my air pressure upon startup.

Refrigerated Air Dryers

The refrigerated air dryer is the last line of defense before the compressed air is sent over to the transfer pumps. I have seen these mounted in various places in a rig from on the floor to up on the wall. First, do not pile tools and other rig items on top of and around the air dryer. These units work nonstop, and they need airflow to do their job without overheating. Take care not to block them in. Second, I believe most of these air dryers also have filters and coils that need to be cleaned occasionally. Check the manufacturers guidelines for your model and keep those items clean so that your unit can run more efficiently and for a longer life.

Conclusion

Your compressed air system is vital to your plural component machine running on ratio and making good polyurethane foam. Components that remove moisture from the air are critical for keeping your transfer pumps running like they are supposed to without breaking down or losing pressure.

Always keep these critical points in mind:

  • Drain the tank
  • Change the oil
  • Drain the filter/separator units
  • Don’t block in your refrigerated air dryer, and keep the unit clean

These essential maintenance tasks don’t take but a few minutes, and they can save you hours of frustration and head scratching.

Want more information on Geotech material and equipment?

Download the Info-Packed Geotech Product Catalog!

Topics: Equipment & Accessories, All Posts, Lift Slabs, Deep Lift

Polyurethane Seawall Repair in Florida

Posted by Andy Powell on Aug 27, 2020 10:00:00 AM

Banner - AS - Polyurethane Seawall Repair in Florida

Body - AS - Polyurethane Seawall Repair in FloridaWith 1,350 miles of coastline, Florida is home to countless seawalls.  If you're a property owner or manager in the Sunshine State, you have landed in the right place. Alchemy-Spetec provides environmentally safe seawall repair polyurethane materials to contractors covering all of Florida. (These seawall repair foams are NSF approved for contact with potable water.) If you have a seawall requiring evaluation, we'd be happy to refer you to an experienced contractor covering your area. Call us now at 404-618-0438.

If you're still in research mode, we have plenty of information for you on this website about polyurethane seawall repair. Visit the Seawall Repair Overview Page for a brief explanatory video, product info and a complete list of seawall repair blog articles at the bottom.

In a previous blog post, Polyurethane Seawall Repair Explained, we reviewed the benefits of repairing with polyurethane...

Why Use Polyurethane for Seawall Repair?

Non-Intrusive Application
Polyurethane can be injected through pipes directly into voids and loose sandy soil using small portable equipment.

Proven Solution
Seawall repair resins are used extensively seal cracks, voids and defects as well as for filling voids and stabilizing the soil.

Creates an Impermeable Mass
Polyurethane seals leaks along the wall, fills the voids that have occurred, and mixes with the soil to form a solid, impermeable mass.

What Are the Results of Polyurethane Seawall Repair?

Long Lasting Solution
Alchemy-Spetec seawall repair resins cure to a strength greater than crystalline bedrock. Combined with proper drainage, this method can greatly extend the life of your seawall.

Water Tight Seawall
The resin reacts with water or moisture in the soil and expands to fill voids while it permeates sandy soil to form a solid, strong, watertight mass.

Click here to read the rest of Polyurethane Seawall Repair Explained.

Property owners and managers in Florida can rest assured.  If you have seawall problems, we have you covered.  Contact us at 404-618-0438 for a referral to a contractor near you.  

Want more information on seawall repair with polyurethane?

Download an Info-Packed Seawall Repair Brochure!

Topics: Repair Seawalls, All Posts