Looking for a Contractor?

Alchatek Blog

Andy Powell

Recent Posts

Winter Contracting Series - 4. Prepping a PolyBadger for Winter Storage

Posted by Andy Powell on Nov 17, 2023 10:00:00 AM

Banner - 4. Prepping a PolyBadger for Winter Storage

Body - 4. Prepping a PolyBadger for Winter StorageThis guide outlines a step-by-step process for setting up your PolyBadger system for winter storage. Following these recommendations will not only preserve the integrity of your equipment but also make it easier to get it running when the warm weather returns.

Preparing a PolyBadger for Winter Storage

  1. Establish power to the cabinet and heat the hose (A heater, B heater, and hose) to the target temperature of 130° F.
  2. Introduce material to the cabinet.
  3. Turn the air supply on and recirculate to heat up the ISO and resin.
  4. Once the PolyBadger is up to temperature, turn off the air supply and remove the airlines from the stick pumps.
  5. Remove the supply and the recirculation line from the A-side stick pump.
  6. Drain all the remaining material from the pump and clean it with brake cleaner.
  7. Place the stick A side stubby stick pump into a 5-gallon pail of AP Pump Flush.
  8. Reconnect the supply line and leave the recirculation line to drain in a purge pail.
  9. Repeat steps 5-8 on the B-side stick pump.
  10. Reconnect the air supply to the stick pumps, hold the return lines in a purge pail, and slowly open the air valve on the stick pumps.
  11. You will notice material slowly pushed out of the recirculation line into the purge pail. Continue to pump AP Pump Flush through the system until it comes out of the recirculation line clear, with no added color or debris.
  12. Shut the air valve supplying the stick pumps. This will stop the flow of material.
  13. Reconnect the recirculation lines to the appropriate stick pump and tighten.
  14. Turn the recirculation pump valves to supply the hose.
  15. You can remove the Handi Gun or leave it on for this stage, holding the hose in the purge pail. Turn on the supply valves on the end of the hose just before the Handi Gun. Slowly open the air valve on the stick pumps and pull the trigger on the gun.
  16. You will notice material slowly pushed out of the hose line into the purge pail. Continue to pump AP Pump Flush through the system until it comes out of the hose line clear, with no added color or debris.
  17. Shut the air valve supplying the stick pumps. This will stop the flow of material.
  18. Remove the stick pumps from the AP Pump Flush. (Make sure to mark your pails A and B for future use).
  19. Insert stick pumps into AP Pump Saver 195. (Make sure to mark your pails A and B for future use).
  20. Push the AP Pump Saver 195 through the hose line. You will notice the AS Pump Flush slowly pushed out of the hose line into the purge pail. Continue to pump AP Pump Saver 195 through the system until it comes out of the hose line clear (you will notice a thick, clean fluid).
  21. Turn off the supply valves on the hose just before the Handi Gun.
  22. Disconnect the air supply to the stick pumps.
  23. Move the hose supply valve into the recirculation position to depressurize the system.
  24. Shut off supply valves to the cabinet.
  25. Turn off heat zones.
  26. Turn off the main disconnect.
  27. Remove residual grease from interior cabinet pumps.
  28. Replace with new grease.

If you follow these steps, your PolyBadger should be ready for secure storage during the winter months.

For in-depth information on geotech polyurethane applications...

Download an Info-Packed Slab Lift Brochure!

Download an Info-Packed Soil Stabilization Brochure!

Topics: Equipment & Accessories, All Posts, Lift Slabs

Winter Contracting Series - 3. Prepping a Slab Lifting Rig for Winter Storage

Posted by Andy Powell on Nov 16, 2023 2:00:00 PM

Banner - 3. Prepping a Slab LIfting Rig for Winter Storage

Body - 3. Prepping a Slab LIfting Rig for Winter StorageAs temperatures drop, contractors in certain areas need to winterize their slab lifting rigs for storage during the off-season. Below are the step-by-step guidelines to properly store your equipment.

Important Note

  • Extra attention is devoted to the A-side of the system, which is standard practice.
  • This guide assumes you're using a PMC pump for your slab lifting rig.

Preparing a Slab Lifting Rig for Winter Storage

  1. Remove and clean the A and B stick pumps. Clean the exterior of the pumps with brake cleaner to remove as much residual resin and polyol as possible.
  2. Place the A-Side transfer pump into a 5-gallon pail of the AP Pump Flush.
  3. Remove the recirculation hose from the A-Side drum and place it in a purge pail.
  4. Open A-Side inlet valve and recirculation valve on your PMC machine.
  5. Slowly open the air valve on the A-Side transfer pump to start introducing the AS Pump Flush through the A-Side of the machine.
  6. You will notice iso material being pushed out of the recirculation line into the purge pail. Continue to pump AS Pump Flush through the system until it comes out of the recirculation line clear, with no added coloring or debris.
  7. Shut the air supply feeding the transfer pump. This will stop all flow of material.
  8. Un-cap the A-Side of the PMC whip hose. Once un-capped, place the hose into the purge pail.
  9. Close the recirculation valve on the A-Side of the PMC machine.
  10. Slowly open the air valve on the A-Side transfer pump to start the flow of AS Pump Flush through the heated hose.
  11. You will notice iso material being pushed out of the whip hose into the purge pail. Continue to pump AS Pump Flush through the system until it comes out of the recirculation line clear, with no added coloring or debris.
  12. Now that this process is complete, the A-Side has been completely cleaned of any iso material.
  13. Remove the A-Side transfer pump from the pail of AS Pump Flush and place it into a 5-gallon pail of AP Pump Saver 195.
  14. Slowly open the air valve on the A-Side transfer pump to start introducing the AP Pump Saver 195 through the A-Side of the machine. Continue to pump the AP Pump Saver 195 until you have pure and clean AP Pump Saver 195 coming out of the end of the whip hose.
  15. Place the B-Side stick pump into a separate 5-gallon pail of AP Pump Saver 195.
  16. Slowly open the air valve on the B-Side transfer pump to start introducing the AP Pump Saver 195 through the B-Side of the machine and heated hose. Continue to pump AP Pump Saver 195 through the system until it comes out of the end of the whip hose, with no added coloring or debris.
  17. Once the entire system is full of clean AP Lube 190, slowly start to recirculate the AP Pump Saver 195 through the entire system. When doing this, it is best to let the PMC machine cycle while recirculating the AP Pump Saver 195.
  18. Once all these steps are complete, close the air on each transfer pump and re-cap the heated PMC whip hoses.

If you follow these steps, your slab lifting rig should be well-prepared for the winter storage period.

For in-depth information on geotech polyurethane applications...

Download an Info-Packed Slab Lift Brochure!

Download an Info-Packed Soil Stabilization Brochure!

Topics: Equipment & Accessories, All Posts, Lift Slabs

Winter Contracting Series - 2. Finding Jobs

Posted by Andy Powell on Nov 16, 2023 10:00:00 AM

Banner - 2. Finding Jobs

Body - 2. Finding JobsIt's time to revisit the idea of remaining profitable during the winter months, but where does one begin?

Engaging with Engineers and Consultants

Networking with engineers is a cornerstone for securing a consistent flow of projects. Engineers are usually involved in any sizable geotechnical or waterproofing project. From industrial settings to property management companies and hydroelectric plants, an engineering firm is almost always the first port of call for problem-solving.

Alchatek offers presentations designed for engineers that cover a range of polyurethane applications like leak sealing, soil stabilization, and concrete lifting. These presentations often qualify for continuing education credits, offering engineers added value. We prefer to collaborate with local contractors for these presentations, creating a link between suppliers, contractors, and engineers.

With diligent follow-up, such activities typically yield smaller-scale projects, which, when successfully completed, pave the way for larger undertakings. Engineers are the go-to professionals for property owners facing issues. If you establish yourself as a reliable, punctual, and skilled contractor, you are more likely to secure jobs without having to go through the bidding process.

Networking Through Professional Associations

A wealth of professional associations exists across various fields and trades. Becoming a member provides an excellent platform for networking and discovering new opportunities.

Take, for instance, your local chapter of BOMA (Building Owners and Managers Association), which represents the expansive commercial real estate industry. BOMA members are mainly property owners, facility managers, and building engineers—a perfect audience for discussions on topics like elevator pits, parking structures, and tripping hazards.

IFMA (International Facility Management Association) is another noteworthy association. While BOMA represents the "landlords," IFMA represents the "tenants," who are often the first to report issues. Presenting to IFMA allows you to inform facility managers about problem-solving polyurethane technologies.

Don't overlook ASCE (American Society of Civil Engineers) either. It's not just for engineers; they offer a category called Organization Partners for non-engineers. Your presentation here can also be facilitated by Alchatek.

Reaching Out to Government Agencies

Sometimes old-school techniques like making phone calls and doing online research are invaluable. Connecting with local municipalities and Departments of Transportation (DOTs) can give you insights into upcoming projects. Attend bid meetings to network with general contractors and engineers.

Don't ignore mass transit authorities in cities with train or subway systems. These authorities regularly release projects for bidding and have engineering departments that could benefit from your solutions in leak sealing and geotechnical applications.

The cold months are an opportunity if you're a contractor seeking winter work. Not only will these strategies help you find winter projects, but they will also positively impact your business all year round. Reach out to the Alchatek support team for guidance.

For in-depth information on geotech polyurethane applications...

Download an Info-Packed Slab Lift Brochure!

Download an Info-Packed Soil Stabilization Brochure!

Topics: All Posts, Lift Slabs, Stabilize Soil, Business Tips

Winter Contracting Series - 1. Maximizing Productivity

Posted by Andy Powell on Nov 15, 2023 2:00:00 PM

Banner - 1. Maximizing Productivity

Body - 1. Maximizing ProductivityContractors specializing in chemical grouting in the northern United States are often constrained by the seasons when it comes to outdoor soil stabilization and slab lifting tasks. However, with strategic planning, they can also find profitable avenues to keep busy during winter.

Winter Geotechnical Projects

  • Warehouses and Distribution Centers: Interior slab lifting and void filling. Concrete floors and loading docks.
  • Office and Retail Spaces: Interior concrete leveling.
  • Infrastructure: Below the frost line where groundwater seepage impacts the density of soil and the stability of pavement.
  • Agricultural Facilities: Slabs in structures like grain-drying bunkers.
  • Commercial/Industrial Settings: Void filling and slab leveling in manufacturing plants and factories.

Expanding the Scope: Other Polyurethane Injection Applications

Winter also provides an opportune time to acquire new skills in areas like crack injection, slab undersealing, and curtain wall grouting. Cold weather conditions make concrete contract, widening cracks and joints, thus making them easier targets for injection work. Here are additional applications requiring attention:

  • Subterranean Parking Garages: Leaks through cracks, expansion joints, and cold joints can be treated with specialized leak seal resins.
  • Elevator Shafts: Particularly in areas with high water tables, elevator pits are prone to leaks.
  • Tunnels: Whether for pedestrians, vehicles, or mass transit, tunnels often face water seepage issues, solvable via polyurethane grout.
  • Dams: Despite their massive structure, dams are not immune to leaks. Winter is a suitable time for crack injection maintenance.
  • Residential and Commercial Basements: Treat leaks in cracks and joints.
  • Slab Undersealing: Similar to curtain wall grouting, but it's done through the floor.

Consult the Alchatek support team for technical assistance with your next project.

For in-depth information on geotech polyurethane applications...

Download an Info-Packed Slab Lift Brochure!

Download an Info-Packed Soil Stabilization Brochure!

Topics: All Posts, Lift Slabs, Seal Leaks, Stabilize Soil, Business Tips

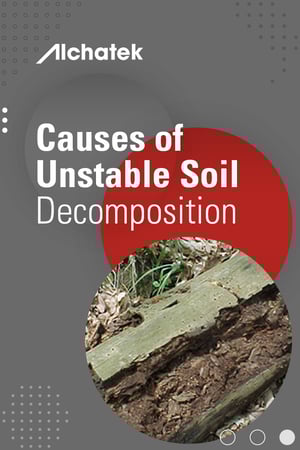
The Causes of Unstable Soil - Decomposition

Posted by Andy Powell on Aug 17, 2023 10:00:00 AM

Banner - Causes of Unstable Soil - Decomposition

Body - Causes of Unstable Soil - DecompositionWhen the residue of plants or animals is converted into soil, the process is known as decomposition. Bacteria, fungi, and worms break down this residue, taking nutrients from them and leaving the remaining portion. Organic molecules are broken down into simpler inorganic molecules. This biological process changes the makeup of the soil and can therefore lead to soil instability.
What are the causes of decomposition?

When soil has a high concentration of organic materials, the soil will naturally begin to decompose. Throughout this process of decomposition, the mass and form of these organic materials will change. Up to 90 percent of organic material will actually disappear over the course of the decomposition process, which means the mass of the soil will decrease substantially, reducing the quantity of available soil. The causes of decomposition can be broken into two main groups: manmade and natural. Trash pits or buried construction debris can cause manmade decomposition, while tree stumps and peat content can cause natural decomposition. 

What are the signs of decomposition?

Sinkholes, unstable soil, and low spots are all indications of soil decomposition. When soil begins to decompose and shift, it can compromise the integrity of buildings, foundations, and other manmade structures. 

How can decomposition be addressed?

In some cases, it is possible to dig up the cause of decomposition. For example, it might be possible to extricate a trash pit or old construction debris from the soil. However, in other cases, this simply isn’t feasible. You can’t easily extricate a trash pit after you have already built on top of it. If removal isn’t an option, the best solution is to envelop the area with polyurethane soil stabilization material. This process is known as encapsulation, and it essentially works to compact the area and reduce the amount of oxygen and water that can get to it, thereby helping to slow decomposition.

Want in-depth info on soil stabilization procedures and products?

Download an Info-Packed Soil Stabilization Brochure!

Topics: All Posts, Stabilize Soil

The Causes of Unstable Soil - Freezing and Thawing

Posted by Andy Powell on Aug 15, 2023 10:00:00 AM

Banner - Causes of Unstable Soil - Freezing and Thawing

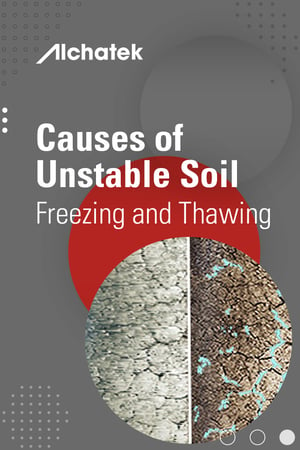
Body - Causes of Unstable Soil - Freezing and ThawingWhat is freezing and thawing?

As the name suggests, a freezing and thawing cycle refers to a natural phenomenon in which soil freezes in cold weather and then thaws out again once the temperature warms up. Freezing and thawing in northern climates is good news for farmers, as it helps to loosen up the soil and reduce compaction, which makes it easier for crop roots to grow. However, for construction engineers and contractors, this process can prove to be incredibly problematic, especially if they are building on fine-grained soils with silt or clay factions, which are more prone to freezing and thawing.

What are the problems associated with freezing and thawing?

Essentially, freezing and thawing cycles accelerate soil instability. Soil with pores containing small particles of frozen water is known as permafrost. Building on permafrost is fine, as long as the soil stays frozen, but things become problematic once the permafrost begins to thaw. Freezing and thawing of permafrost cause soil to become soft and less compact. Subsequently, this causes structures, such as roadways, railways, foundations, and pipeline supports, to sink. Obviously, this can cause major headaches.

How can the problem of freezing and thawing be mitigated?

Alchatek soil stabilization products can be used to compact the ground and displace water particles in the soil pores. Depending on the soil type, this could prevent frost heave, resulting in a stronger, more consistent base to build on.

Want in-depth info on soil stabilization procedures and products?

Download an Info-Packed Soil Stabilization Brochure!

Topics: All Posts, Stabilize Soil

The Causes of Unstable Soil - Poor Compaction

Posted by Andy Powell on Aug 10, 2023 10:00:00 AM

Banner - Causes of Unstable Soil - Poor Compaction

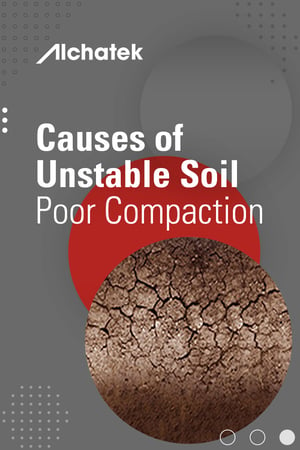
Body - Causes of Unstable Soil - Poor CompactionMany types of infrastructure, including roads, bridges, and buildings, depend on compacted soil in order to stay in place. Therefore, in order for these structures to last, a specific degree of compaction must be achieved. When soil does not adequately compact, the problem is known as poor compaction, and that can lead to more serious issues. Concrete repair contractors always need to be on the lookout for signs of poor compaction which include settling slabs, cracking foundations, and dips in roadways and railroads.
What causes poor soil compaction?

There are a variety of causes of poor soil compaction. However, much of it boils down to soil texture and soil properties. Some soils are more prone to compaction than others. Excess soil salt content, high clay fraction soils, low pH soils, and soils with high water content tend to compact less favorably. It should also be noted that decisions made by construction contractors and their teams can also influence soil compaction. For example, failure to select proper compaction equipment or compaction materials can contribute to poor compaction. Furthermore, some areas are more prone to poor compaction than others, such as portions of soil set against a foundation.

How can poor soil compaction be corrected?

Luckily, poor compaction can be corrected. The solution is to strengthen the soil until it is properly compacted. As mentioned in the previous post, voids can be filled, soil consolidated, and water migration halted with Alchatek soil stabilization products. Once the bearing capacity of the soil has been increased with this process, then the structure can be lifted if necessary.

Want in-depth info on soil stabilization procedures and products?

Download an Info-Packed Soil Stabilization Brochure!

Topics: All Posts, Stabilize Soil

The Causes of Unstable Soil - Erosion

Posted by Andy Powell on Aug 8, 2023 10:00:00 AM

Banner - Causes of Unstable Soil - Erosion

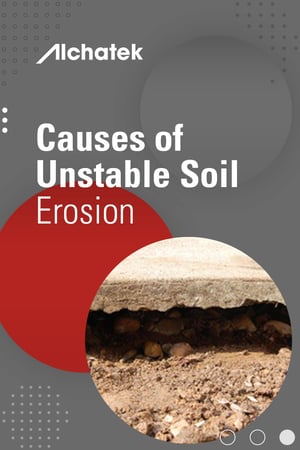
Body - Causes of Unstable Soil - ErosionWhat is erosion?

In geological terms, erosion can be defined as an exogenic process that moves a portion of the earth’s crust from one location to another. This includes a range of different processes, including water flow, wind, and even human action, that move dirt, soil, rock, etc. They are called exogenic processes because they originate outside of the earth’s crust, or externally. In more practical terms, erosion can best be described as the way in which the earth is worn away by water, wind, or ice. So when a river carves a canyon out of stone (such as when the Colorado River carved out the Grand Canyon in Arizona over the course of so many years), that is an example of erosion. The formation of sand dunes by the wind moving across the desert is also an example of erosion, as are changes in rocks along a shoreline due to the constant thrashing of waves. 

Why does erosion cause unstable soil?

You’ve probably heard that erosion is dangerous because it causes unstable soil. It is important to remember that the consequences of erosion can potentially be dramatic, causing landslides and structural damage. After investing money in the construction of a building, the last thing you want is for unstable soil to put the whole project at risk. 

How can erosion be repaired?

Voids can be filled, soil consolidated, and water migration halted with Alchatek soil stabilization products. Once the bearing capacity of the soil has been increased with this process, then the structure can be lifted if necessary.

Want in-depth info on soil stabilization procedures and products?

Download an Info-Packed Soil Stabilization Brochure!

Topics: All Posts, Stabilize Soil

The Causes of Unstable Soil - A Brief Overview

Posted by Andy Powell on Aug 3, 2023 10:00:00 AM

Banner - Causes of Unstable Soil - A Brief Overview

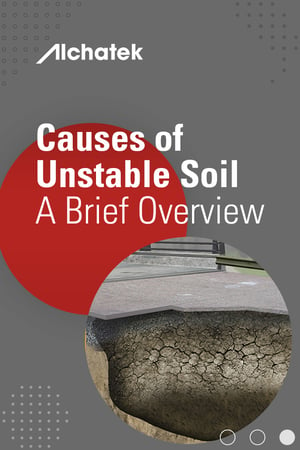
Body - Causes of Unstable Soil - A Brief OverviewUnstable soil can be defined as soil that will not stay in place on its own and therefore requires extra support. It should be noted that unstable soil can threaten the stability, security, and safety of infrastructure and can damage, degrade, and even destroy a number of structures, such as buildings, bridges, and roads.

Let's look at the four main causes of unstable soil...

Erosion

Erosion refers to processes in which external elements (wind, water, etc.) remove soil or rock from a certain location and transport it to another location. There are a variety of different erosion types, including river and gull erosion, wind erosion, and erosion attributed to human activity. Erosion ultimately destabilizes soil and can lead to landslides and sinkholes.

Poor Compaction

One of the most common causes of unstable soil is poor compaction. In some cases, certain types of soil are simply very loose and subsequently not compact. The cause of this is typically an imbalance of mineral pieces, organic matter, air, and water. For example, clay soil with very high moisture content will inevitably become unstable, as it will be incredibly difficult to compact. Similarly, soils with high sand content will be difficult to compact.

Freeze/Thaw

Processes of freezing and thawing essentially accelerate erosion processes. Cold weather freezes moisture trapped in tiny cracks. When this water freezes, it expands, subsequently pushing on the rocks and breaking them into smaller pieces. As processes of freezing and thawing continue, rock and sediment are continually broken down.

Decomposition

When soils contain a high concentration of organic materials, such as topsoil and plant matter, they will decompose, subsequently causing them to become unstable. This is because organic materials rapidly change form and mass as they decompose in the soil. In fact, up to 90 percent of organic material will disappear over the course of the decomposition process.

Fortunately, stability can be restored to soil with ultra-low viscosity polyurethane resins. Foaming and permeation polyurethanes can mitigate the damage done by processes of erosion, decomposition, freezing, and thawing, as well as help to rectify compaction problems. When it comes to unstable soil, you can’t afford to take a risk. Stable soil is crucial to maintaining secure structures.

Want in-depth info on soil stabilization procedures and products?

Download an Info-Packed Soil Stabilization Brochure!

Topics: All Posts, Stabilize Soil

Concrete Leveling with Polyurethane Foam - How Strong is Strong Enough?

Posted by Andy Powell on Aug 1, 2023 10:00:00 AM

Banner - Concrete Leveling with Polyurethane Foam - How Strong is Strong Enough

Body - Concrete Leveling with Polyurethane Foam - How Strong is Strong EnoughRaising Concrete with Confidence

When pumping a lightweight material beneath a slab, you need the confidence that it is strong enough for the application. How strong is strong enough? This is a commonly asked question by contractors that are new to slab jacking with polyurethane. Alchemy-Spetec structural foams only need to be as strong as dirt, but they're actually stronger than crystalline bedrock.

The Right Strengths for Concrete Lifting

Slab lifting foams are rated on density (weight per cubic feet) and compressive strength. This testing and rating are based on the foam in a free-rise state; the parts A and B are mixed together and allowed to expand freely. Our AP Lift 430 and AP Lift 475 structural lifting foams, for example, weigh 2.75 – 3.25 lbs (AP Lift 430) to 4.75 – 5 lbs (AP Lift 475) per cubic foot. But they have compressive strengths of 50 psi and 100 psi in a free-rise state. That's the equivalent of 7,200 to 14,000 lbs per square ft of support, just in a free-rise state.

Polyurethane Slab Jacking Compared to Clay and Bedrock

To put that into perspective, the National Home Builders Association and the International Building Code list stiff clay at 4,000 psf and crystalline bedrock as having 12,000 psf of load-bearing capacity. Consider the job site conditions where the foam will be injected into a confined area. Testing data in the lab shows that our lifting foams will increase in compressive strength: In a space confined 25% by volume there will be an increase of 31% in psi and in a space confined by 75% there will be a 79% increase in the psi.

Concrete Leveling for Any Job with the Right Foam

Today polyurethane concrete lifting foams are used to level airport slabs supporting jumbo jets, equipment and building slabs supporting tremendous loads, and even railway sleepers that support the heaviest freight trains. So don't let the word “foam” fool you. These resins cure to strengths beyond what is needed to support any structure.

Want in-depth info on slab lifting procedures and products?

Download an Info-Packed Slab Lift Brochure!

Topics: All Posts, Lift Slabs