Looking for a Contractor?

Alchatek Blog

Winterizing a Slab Lifting Rig

Posted by Stephen C. Barton on Nov 4, 2021 10:00:00 AM

Banner - Winterizing a Slab Lifting Rig

Body - Winterizing a Slab Lifting RigAs the weather gets colder, contractors in some regions will need to prepare their slab lifting rigs for storage during the off-season. We're providing step-by-step instructions for that procedure in this article.

Please Note:

  • You will notice that more care is given to the A-side of the system, this is normal.
  • This procedure assumes you are using a PMC pump.

Prepping a Slab Lifting Rig for Winter Storage

  1. Remove and clean the A and B stick pumps. Clean the exterior of the pumps with brake cleaner to remove as much residual resin and polyol as possible.
  2. Place the A-Side transfer pump into a 5-gallon pail of the AP Flush 121.
  3. Remove the recirculation hose from the A-Side drum and place it in a purge pail.
  4. Open A-Side inlet valve and recirculation valve on your PMC machine.
  5. Slowly open the air valve on the A-Side transfer pump to start introducing the AP Flush 121 through the A-Side of the machine.
  6. You will notice iso material being pushed out of the recirculation line into the purge pail. Continue to pump AP Flush 121 through the system until it comes out of the recirculation line clear, with no added coloring or debris.
  7. Shut the air supply feeding the transfer pump. This will stop all flow of material.
  8. Un-cap the A-Side of the PMC whip hose. Once un-capped, place the hose into the purge pail.
  9. Close the recirculation valve on the A-Side of the PMC machine.
  10. Slowly open the air valve on the A-Side transfer pump to start the flow of AP Flush 121 through the heated hose.
  11. You will notice iso material being pushed out of the whip hose into the purge pail. Continue to pump AP Flush 121 through the system until it comes out of the recirculation line clear, with no added coloring or debris.
  12. Now that this process is complete, the A-Side has been completely cleaned of any iso material.
  13. Remove the A-Side transfer pump from the pail of AP Flush 121 and place it into a 5-gallon pail of AP Lube 190.
  14. Slowly open the air valve on the A-Side transfer pump to start introducing the AP Lube 190 through the A-Side of the machine. Continue to pump the AP Lube 190 until you have pure and clean AP Lube 190 coming out of the end of the whip hose
  15. Place the B-Side stick pump into a separate 5-gallon pail of AP Lube 190.
  16. Slowly open the air valve on the B-Side transfer pump to start introducing the AP Lube 190 through the B-Side of the machine and heated hose. Continue to pump AP Lube 190 through the system until it comes out of the end of the whip hose, with no added coloring or debris.
  17. Once the entire system is full of clean AP Lube 190, slowly start to recirculate the AP Lube 190 through the entire system. When doing this, it is best to let the PMC machine cycle while recirculating the AP lube 190.
  18. Once all these steps are complete, close the air on each transfer pump and re-cap the heated PMC whip hoses.

Want more information on geotech products and equipment?

Download the Info-Packed Geotech Product Catalog!

Topics: Equipment & Accessories, All Posts, Lift Slabs

Lifting Slabs in Cold Weather

Posted by Andy Powell on Oct 26, 2021 10:00:00 AM

Banner - Lifting Slabs in Cold Weather 2021

Body - Lifting Slabs in Cold Weather 2021It's that time of year again. As temperatures drop, take a moment to review this previously posted article packed with cold-weather tips.

Contrary to popular opinion, as a contractor, you don’t have to put up your equipment and rigs due to cold weather. There are many jobs to be done and many ways to keep your material conditioned. Use this season to your advantage and gain valuable business.

Cold Weather Markets

Seasonal attractions such as theme parks are a great place to start looking for winter work. Many of these parks (the ones that aren’t in Orlando) shut down for the winter and this is the time they do maintenance and repairs. Think of all the concrete lifting and leveling that can be done.

Factories can be less active in the winter months with production slowing down in many industries. This is a good time for them to do maintenance and floor repairs as well.

Warehouses typically operate year-round, so there is always work available. Warehouse floors are used and abused on a daily basis and will sooner or later need some form of repairs done to keep business running at a steady pace. In addition, many warehouses have dangerous voids beneath their floors that require repair.  

Exterior concrete slabs are still worth considering, even in the cold weather. These slabs experience the most wear and tear from the environment itself (think erosion) and daily traffic. You’ll need to lift concrete slabs before the ground freezes and only after your materials have been thoroughly conditioned.

Conditioning Materials

Your slab lifting equipment probably has built-in heaters and a heated hose. Each brand and model of pump has different sized pre-heaters and different ∆T (∆ = Delta and T = Temperature). This sounds complicated but is actually quite simple.  ∆T is simply the change in temperature.  Let’s say your material has been sitting in a cold trailer all night and the temperature has dropped to 40 degrees F. If the required temperature of your B side material is 120 degrees F, then your pump better be rated with a ∆T of at least 80 degrees. However, if your material is preconditioned to 70 degrees F, then your machine only has to be rated for a ∆T of 50 degrees. As I said, every machine is rated differently based on the size of the heaters. What is important to know is that there are limitations to how much heating your machine can do.

Keeping your materials conditioned in the winter months is a lot easier than it sounds. The main point is to keep your AP Lift products above 60 degrees at all times. Keeping the polyurethane at or above that temperature can be accomplished in a number of ways.

If you have an insulated rig, it should stay around 40 degrees warmer than outside temperatures. Most foam rigs have built-in electric heaters that require an extension cord to a power outlet at the job site or at your facility for overnight storage. Alternately, you could buy an electric radiator heater. Other available heating devices include drum band heaters and heated drum mats (be careful not to scorch the polymers by turning band heaters up too high). For a more DIY approach, you could build a hot box around the material storage area in your rig.

Heat Sink

Another consideration when lifting cold slabs is the heat sink factor. AP Lift products come out of the gun hot and get even hotter as they react. However, cold concrete acts as a heat sink and sucks the energy out of the foam as it starts to react. This can slow down the reaction speed of the foam. If you are pumping into a void, it will have little effect because most of the foam is not in contact with the concrete. If you are trying to lift a slab with little void, it will have more of an effect because more of the foam is in contact with the cold concrete and cold soil. More volume = more energy.

Conclusion

Don’t let common preconceptions deter you from slab lifting in cold weather. As noted above, there is no need to shut down completely for the upcoming winter months if you don’t want to. Opportunities still exist and one of them may just be the job you’ve been looking for all year. There are many ways to keep your equipment and materials conditioned to efficiently work in lower temperatures. Have more questions about slab lifting in cold weather? Call us at 404-618-0438.

Want more in-depth info on slab lifting?

Download an Info-Packed Slab Lift Brochure!

Topics: Equipment & Accessories, All Posts, Lift Slabs, Business Tips

Polyurethane Injection vs Mudjacking

Posted by Brian Dalinghaus on Oct 21, 2021 10:00:00 AM

Banner - Polyurethane Injection vs Mudjacking

Body - Polyurethane Injection vs MudjackingThis post is part of the Alchemy-Spetec Contractor Lens series, featuring views, news & case studies written by our customers. This article, written by Brian Dalinghaus of Dalinghaus Construction, contrasts polyurethane slab lifting vs mudjacking (lifting slabs with a mortar-based mixture of "mud" or "slurry"). If you're an Alchemy-Spetec customer and you'd like to discuss writing content for our blog, please send an email to marketing@alchemy-spetec.com today!

Do you have a sinking slab that needs a lift? There are two primary lifting services in the construction industry capable of lifting, stabilizing, and leveling your foundation/flatwork: polyurethane injection and mudjacking.

If you read our blog, keep up with our Instagram, or watch our Youtube channel, then you’ve undoubtedly heard a lot about polyurethane…but not much about mudjacking. 

This is because we tend not to write extensively on services we do not provide – however, in this article, we are going to analyze the 3-key benefits of polyurethane slab lifting over mudjacking:

  1. Lighter Weight
  2. Smaller Hole Size for Application
  3. Faster Cure Time 

What is Mudjacking?

Mudjacking is the lifting or leveling of a structure, driveway, or slab of concrete by pumping a mixture of slurry (with incredibly high pressure) underneath a sunken slab.

Polyurethane Weighs Less

Polyurethane weighs 2-4 pounds per cubic foot. Mud can weigh as much as 100 pounds per cubic foot. Weight is important because it can act as an anchor, sinking an already settling ship.

Polyurethane can help stabilize soil by adding rigidity – mudjacking simply packs on more weight. Yes, mudjacking is extremely effective at lifting settled flatwork and is attractive because of its relatively cheap cost, but it is not a long-term solution.

The mud will eventually settle into the expansive soil.

Polyurethane floats on expansive clays and only settles when the soil beneath it gives way. Polyurethane is lightweight, dense, and incredibly strong.

Polyurethane relies on the expansive pressure for the lift. Mudjacking relies on installation pressure.

Fun Facts with Brian – Polyurethane expands kind of like shaving cream after leaving a can, allowing it to fit perfectly into crooks and crannies as it balloons outward.   

Polyurethane Utilizes Smaller Application Holes

Polyurethane and Mudjacking follow the same three-step system: DrillPumpPatch.

The biggest difference in the system itself is the size of the application hole.  

Poly & Mudjacking’s Three Steps –

  • Drill – Drill into the concrete (often in a grid pattern)
  • Pump – Void fill the hole with a slurry application gun
  • Patch – Patch holes and color code the concrete to match

The polyurethane injection site hole is only 3/8" to 5/8” (depending on the type of injection), whereas mudjacking injection holes are 2 to 3 inches.   

Unless you want your driveway looking like a Dalmatian, we suggest utilizing polyurethane. The patched injection sites are far less noticeable.

In addition, mudjacking can prove a bit of a mess, with excess slurry slurping out of cracks and crevices. The polyurethane foam, once dry, is easy to square off with a boxcutter.

Polyurethane Cures Faster Than Mud

Polyurethane cures quickly, solidifying up to 90% full strength in 15 minutes. In contrast, mudjacking slurry shot underneath the slab is never exposed to sunlight (thus taking a much longer time to cure).    

The truth is: slurry can take several days to a week to dry. And, fun fact about concrete, it never really fully cures.

Why Choose Polyurethane Injection? 

Polyurethane is lightweight, easy to install with little chance of a mess, and cures incredibly fast. Mudjacking, on the other hand, is not a permanent fix and can sink your flat-work.  

If you live in Southern California or Central Arizona and would like a FREE void fill inspection, click the link below -

Daulinghaus Void Fill Inspection
Want more information on polyurethane slab lifting?

Download an Info-Packed Slab Lift Brochure!

Topics: All Posts, Lift Slabs

Repairing Warehouse Slabs with Polyurethane

Posted by Kreg Thornley on Oct 19, 2021 10:00:00 AM

Banner - Repairing Warehouse Slabs with Polyurethane

Body - Repairing Warehouse Slabs with PolyurethaneThe warehouse slab/floor repair market can be a goldmine for contractors. Most major metro areas contain endless square miles of warehouse space. That's why we've posted a good number of warehouse floor and slab repair articles on this blog over the years. In this post, we'll introduce and link to the best Alchemy-Spetec warehouse slab repair articles.

Warehouse and Industrial Slab Repair With Polyurethane

One of the hidden dangers a warehouse or industrial property owner and their employees can face is an unstable or sunken slab with a large void underneath.  The last thing anyone wants is injury and/or a lawsuit resulting from an un-repaired trip hazard or worse - a complete slab collapse. The video in the Read More link below depicts a real-time example of a warehouse slab with cavernous voids below and heavy equipment resting on top.  Next, you'll see the slab repair process in action as the voids are filled and the slabs are restored to a safe, stable state with AP Lift foams that support between 7,200 - 14,000 pounds per square foot (depending on the product selected). Click to Watch the Video and Read More.

Repair Unlevel Warehouse Slabs with AP Lift 475

Voids beneath warehouse floors can be filled with AP Lift 475 foam. This product is great for slabs that rock and warehouse floors that have begun to sink. The video in the Read More link below shows an example of the product in action. Inside this warehouse, the floors have begun to rock and are unleveled - which can speed up the wear and tear on valuable equipment. With this powerful polymer and its painless application procedures, unlevel slabs can be repaired at a rapid pace. Take a look for yourself! Click to Watch the Video and Read More.

Repairing Dangerous Sunken Slabs in Warehouses and Factories

Safety is the number one priority for factory and warehouse managers across the country.  Emphasis is most often placed on training employees to wear the right personal protective equipment and observe safety procedures when operating machinery - and rightly so!  In addition, it's also important for management to consider the state of the concrete slab floors. Click to Read More.

Case Study: Waterproofing Warehouse Slabs

In this case study, Charlie "The Grout Geek" Lerman shares a story about waterproofing warehouse slabs. There was a distribution center in North Carolina sitting on land that had a high water table. Eventually, the slabs in this 100,000 square foot building began to accumulate moisture. There were offices next to the warehouse area. The moisture that was seeping through the concrete slabs was first noticed as the carpet in the office area began to get damp. Click to Read More.

Stabilizing Slabs in an Omaha Warehouse with the PolyBadger

Not too long ago, Alchemy-Spetec customer Sudbeck Construction was called in by the property owner because he had noticed four slabs that were shifting up and scraping against a wall when forklifts crossed them. The crew drilled a couple of preliminary holes in the slabs for diagnostic purposes and discovered voids underneath ranging from 12-18 inches in depth. The Sudbeck team injected 35 gallons of AP Lift 430 beneath the slabs to stabilize them. This high-strength polyurethane foam provides a solid, reliable, long-lasting base underneath the concrete to prevent future shifting or sinking. Click to Read More.

Want more information on warehouse floor and slab repair?

Download an Info-Packed Warehouse & Industrial Slab Repair Brochure!

Topics: All Posts, Lift Slabs, Seal Leaks, Stabilize Soil

Polyurethane Estimating Calculator & Leak Seal Material Selection Guide

Posted by Kreg Thornley on Oct 12, 2021 10:00:00 AM

Banner - Alchemy-Spetec App

The Alchemy-Spetec app now includes a Leak Seal Material Selection Guide, along with the Polyurethane Estimating Calculator.  The Leak Seal Product Selection guide asks you a series of Yes/No questions about your job and then provides product recommendations.  The Polyurethane Estimating Calculator takes the guesswork out of estimating material for Leak Seal, Geotech, and Floor Repair jobs. Here's a step-by-step guide...

Download the Alchemy-Spetec App & Create an Account

1. Download the app.
Search Alchemy-Spetec in your Apple App Store or Google Play Store to install the app.

Polyurethane-Estimating-Calculator-&-Leak-Seal-Product-Selection-Guide-1

2. Create an account.
After installing the app, create an account by clicking "Sign Up" at the bottom and following the prompts.

Polyurethane-Estimating-Calculator-&-Leak-Seal-Product-Selection-Guide-8

Select a Leak Seal Product for Your Job

1. Tap the three lines in the top left corner to display the application options.  Choose Leak Seal Material Selection Guide.

Polyurethane-Estimating-Calculator-&-Leak-Seal-Product-Selection-Guide54

2. Answer a series of Yes/No questions about your leak seal job.

Polyurethane-Estimating-Calculator-&-Leak-Seal-Product-Selection-Guide-10

3. Review the product recommendation screen (and/or click the Start Over button at the bottom to begin again). Call the Alchemy-Spetec support squad at 404-618-0438 for more guidance specific to your project.

Polyurethane-Estimating-Calculator-&-Leak-Seal-Product-Selection-Guide-125

NOTE: You can also access the Leak Seal Material Selection Guide via this red button in the top right corner of our website home page...

Estimate Material for Your Leak Seal, Geotech, or Floor Repair Job

1. Tap the three lines in the top left corner to display the application options. Choose Material Estimation Calculator, then choose Geotech (Slab Lifting & Void Fill), Leak Seal, or Floor Repair for your job type.

Polyurethane-Estimating-Calculator-&-Leak-Seal-Product-Selection-Guide-2

2. Select the measuring system you want to use.

Polyurethane-Estimating-Calculator-&-Leak-Seal-Product-Selection-Guide-6

3. The Slab Lifting calculator appears by default. You can switch to the Void Filling calculator by clicking the button at the bottom right. Choose your product and fill in the square feet of your slab, plus the inches it has settled (or inches of void if using the Void Filling calculator).

Polyurethane-Estimating-Calculator-&-Leak-Seal-Product-Selection-Guide-14
4. View the recommended material quantities. Call the Alchemy-Spetec support squad at 404-618-0438 for more guidance specific to your project.

Alchemy-Spetec Estimator App Results

Want more information on Alchemy-Spetec products?

Download the Info-Packed Geotech Product Catalog!

Download the Info-Packed Leak Seal Product Catalog!

Topics: All Posts, Lift Slabs, Seal Leaks, Business Tips, Floor Repair, Fill Voids

Reminder! Geotech Training: Oct 26th - 28th, 2021

Posted by Kreg Thornley on Sep 30, 2021 10:00:00 AM

Banner - Reminder Fall Geotech Training

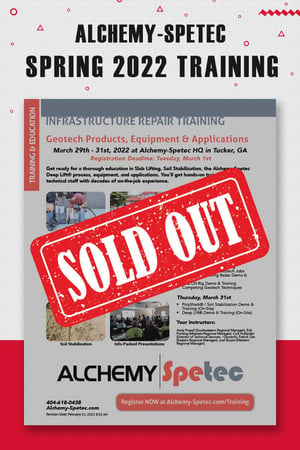
SOLD OUT!

Sign Up to Get Notified for Future Training Events

Alchemy-Spetec HQ in Tucker, GA
Registration Deadline: Tuesday, October 12th

AS-Training-Program---Fall-2021$695 Registration Fee
$615 for each additional participant from
the same company.

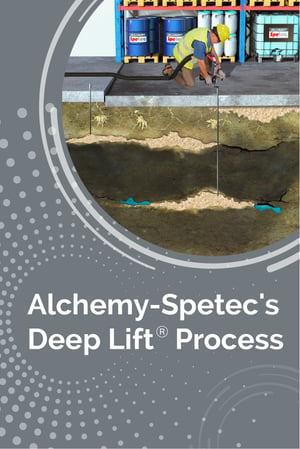
Get ready for a thorough education in Slab Lifting, Soil Stabilization, the Alchemy-Spetec Deep Lift® process, equipment, and applications. You’ll get hands-on training from a technical staff with decades of on-the-job experience.

Tuesday, October 26th

  • Geotech Product Line Overview
  • Geotech Applications & Case Studies
  • PolyBadger® Demo & Training
  • Estimating & Quoting Jobs

Wednesday, October 27th

  • PMC Pump Demo & Training
  • Leak Seal Issues on Geotech Jobs
  • Ground Penetrating Radar Demo & Training
  • Slab Lift Rig Demo & Training
  • Competing Geotech Techniques

Thursday, October 28th

  • PolyShark® / Soil Stabilization Demo & Training (On-Site)
  • Deep Lift® Demo & Training (On-Site)

Your Instructors:

Andy Powell (Southeastern Regional Manager), Erik Prinzing (Midwest Regional Manager), Colt Hullander (Director of Technical Services - Geotech), Patrick Zito (Eastern Regional Manager), Joel Bryant (Western Regional Manager).

Topics: Equipment & Accessories, All Posts, Lift Slabs, Stabilize Soil, Business Tips, Deep Lift, Fill Voids

Top Three Alchemy-Spetec Blog Posts

Posted by Kreg Thornley on Sep 21, 2021 10:00:00 AM

Banner - Top Three Alchemy-Spetec Blog Posts

Body - Top Three Alchemy-Spetec Blog PostsAs of today, the top three most viewed Alchemy-Spetec blog posts are:

  1. Slab Void Fill with Polyurethane Foam
  2. So You’re Thinking About Starting a Slab Lifting Company: Key Considerations
  3. Hydrophobic vs Hydrophilic: Polyurethanes

Given the amount of interest in these subjects, it's worth reviewing them again. In this article, we'll feature some intro text from each of these blog posts, along with a link to the full version.

Slab Void Fill with Polyurethane Foam

Voids beneath concrete slabs can be filled with two-component polymer foam designed to work in wet or dry conditions. AP Lift 430 foam can support up to 7,200 lbs per square foot and will cure to 90% full strength in 15 minutes.  (Of the most resilient concrete slab jacking foams, AP Lift 430 is proven to lift concrete slabs under harsh conditions. This two-component, high-strength, high-density, hydro-insensitive structural polyurethane foam is the top slab jacking solution for concrete slab foundation repair, soil stabilization, and compaction grouting. AP Lift 430 weighs 2.75 – 3.25 pounds per cubic foot.) Polyurethane foam conforms to void shape more accurately than cement grout, and - unlike cement - it doesn't shrink or sink over time. Read more...

So You’re Thinking About Starting a Slab Lifting Company: Key Considerations

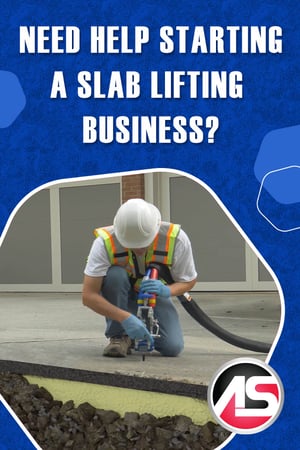
If you want to corner the market in this potentially profitable business, begin by scoping out a specialized area, such as residential, commercial, or civic/municipal. Next, make a simple short written list of the assets you absolutely must have to get started. Do you need a full-sized slab lifting rig to get rolling? Or maybe just the portable PolyBadger lifting system? Are there any special licenses or certifications required for operation? Do you have a good relationship with an equipment and materials supplier? Having the right slab lifting equipment, top-of-line materials, vendor support, and deep expertise in this unique industry are the first keys to success for startup companies. Read more...

Hydrophobic vs Hydrophilic: Polyurethanes

The terms hydrophobic and hydrophilic may not mean anything to the average person. But, to a contractor, these terms can mean a world of a difference. Hydro means water while phobic means “to fear” and philic means “to love”.  Alchemy-Spetec offers both hydrophobic and hydrophilic polyurethanes, so it is important to be aware of the differences between the two types.  Read more...

Want more information about Alchemy-Spetec products?

Download the Info-Packed Geotech Product Catalog!

Download the Info-Packed Leak Seal Product Catalog!

Topics: All Posts, Lift Slabs, Fill Voids

Geotech Training: Oct 26th - 28th, 2021

Posted by Kreg Thornley on Sep 14, 2021 10:00:00 AM

Banner - Geotech Training Fall 2021

SOLD OUT!

Sign Up to Get Notified for Future Training Events

Alchemy-Spetec HQ in Tucker, GA
Registration Deadline: Tuesday, October 12th

AS-Training-Program---Fall-2021$695 Registration Fee
$615 for each additional participant from
the same company.

Get ready for a thorough education in Slab Lifting, Soil Stabilization, the Alchemy-Spetec Deep Lift® process, equipment, and applications. You’ll get hands-on training from a technical staff with decades of on-the-job experience.

Tuesday, October 26th

  • Geotech Product Line Overview
  • Geotech Applications & Case Studies
  • PolyBadger® Demo & Training
  • Estimating & Quoting Jobs

Wednesday, October 27th

  • PMC Pump Demo & Training
  • Leak Seal Issues on Geotech Jobs
  • Ground Penetrating Radar Demo & Training
  • Slab Lift Rig Demo & Training
  • Competing Geotech Techniques

Thursday, October 28th

  • PolyShark® / Soil Stabilization Demo & Training (On-Site)
  • Deep Lift® Demo & Training (On-Site)

Your Instructors:

Andy Powell (Southeastern Regional Manager), Erik Prinzing (Midwest Regional Manager), Colt Hullander (Director of Technical Services - Geotech), Patrick Zito (Eastern Regional Manager), Joel Bryant (Western Regional Manager).

Topics: Equipment & Accessories, All Posts, Lift Slabs, Stabilize Soil, Business Tips, Deep Lift, Fill Voids

Three Resources for Finding Slab Lifting Jobs

Posted by David Park on Aug 26, 2021 11:00:00 AM

Banner - Three Resources for Finding Slab Lifting Jobs

Body - Three Resources for Finding Slab Lifting JobsI think you’ll agree with me when I say that, as a slab lifting contractor, you can never have too many leads. While there may be dozens of methods available, there are three very effective resources our customers strategically use to land new slab lifting projects on a regular basis. Let’s get started.

HomeAdvisor

HomeAdvisor can be a lead machine for residential slab lifting contractors. HomeAdvisor's online and TV marketing efforts draw in homeowners looking for local contractors of all kinds. You pay a membership fee, set a lead budget, and they feed you concrete leveling opportunities. But it doesn’t stop there. Here are some tips that can help you capitalize on those leads:

  1. Call the homeowner immediately: These leads go to multiple contractors so you need to be among the first to book an appointment.
  2. Pick specific zip codes: You can call HomeAdvisor and limit your advertising to higher-income zip codes, zip codes closest to your business, etc. Take some time to think through the reasons for targeting specific areas. For example, higher-income homeowners tend to care more about quality than price, jobs near your business reduce travel costs, and so on.
  3. Dispute bad leads: Some leads will come in that aren’t relevant. For example, the homeowner didn't realize they were choosing the wrong job type category, or they just wanted to ask some questions but did not actually have a project available. You can dispute these types of leads via HomeAdvisor's website or by calling their customer service line.

Google Ads

Google is the most popular search engine in the world. Our top customers have learned to leverage Google's massive user base through implementing strategic Google Ads campaigns. They use Google Ads to target local people who are searching for specific keywords such as "concrete leveling contractor near me" or "sinking driveway repair", etc. This means you can continually refine your parameters so that the most relevant leads end up on your landing page. 

It's important to design a custom landing page for your Google Ads campaign, encouraging the visitor to download a brochure for more information. Your brochure download process should require the lead to enter their contact info. Some people recommend excluding website navigation menus on these pages, effectively requiring the visitor to download the brochure. In this way, you capture contact info from all types of visitors - even those who are not ready to buy yet but are in the information gathering stage. These types of visitors would otherwise scour a conventional website, take notes, and then continue searching without ever sharing their contact info.  If you need someone to create your Google Ads campaign and/or landing page, we can put you in contact with experienced freelancers.

This next section is excerpted from our brochure, Marketing Your Contracting Business. (The brochure download link is at the bottom of this article.)

Blogging for Leads

Cast a Wide Net with a Lot of Posts

The more pages you have on your website, the more chances there are for someone to find it when searching a specific phrase or term. Search engines are scanning your page names, heading text, and page text when someone types in a term or phrase to see if there are any matches. So, it’s in your best interest to have as many pages full of relevant content as you can. A blog is a perfect way to accomplish that goal.

Say, for example, that you are a slab lifting contractor in San Pedro, California. You can write up case studies of jobs you’ve performed in your area. Make sure your blog titles include terms people will likely search for. For example, a post about a warehouse floor job could be titled, “Warehouse Floor Slab Lift in San Pedro”. You get the idea.

Share Your Knowledge and Build Trust

You can also use a blog as a way to share your knowledge and experience with potential customers who are looking for answers. Take some time to consider all that you’ve learned over the years and jot down ideas for blog posts that potential customers may find helpful. In addition to case studies, you can write posts instructing people how to spot problems on their property, comparing your repair costs to the costs of replacing a structure, educating people about the materials you use, etc.

You can get quite a few ideas by browsing the posts on our blog. While our articles are aimed more at contractors than property owners, you’ll still find many useful subjects to get your brainstorming started. The more useful knowledge you share, the more trust you can build with potential customers. People are much more likely to buy a service from a known expert than from a complete stranger.

Offer More Value in Exchange for Contact Info

Driving up web traffic is a good thing. Establishing yourself as an authority by creating useful content is also very helpful. If you just do those two things, you should get more people calling you and filling out the contact form on your website. But if you REALLY want to jumpstart the leads, you need to offer something of value in exchange for your reader’s contact info. At the end of every article, include a link to a relevant brochure – or something else of value – and ask for their contact info in exchange. For an example, see the form download button at the bottom of this article.

The Gift That Keeps on Giving

The great thing about a blog post with a lead capture form at the end is that, once you set it up – it’s there forever. We still get leads from blog posts we put up years ago. If you consistently write articles, you can create a compounding effect with more and more leads coming in each month.

Want more information on lead generation?

Download an Info-Packed Contractor Marketing Brochure!

Topics: All Posts, Lift Slabs, Business Tips

Stabilizing & Lifting a Bridge Approach Slab with Polyurethane

Posted by Andy Powell on Aug 10, 2021 10:00:00 AM

Banner - Stabilizing and Lifting a Bridge Approach Slab with Polyurethane

Body - Stabilizing and Lifting a Bridge Approach SlabLifting a settled bridge approach slab with polyurethane foam requires specific knowledge of proved repair procedures for these types of structures. Here's an overview...

Look for a Hidden Sleeper Slab

Larger roads and highways will often have a hidden sleeper slab that spans underneath the pavement and the approach slab. It is designed to help transfer the traffic load from the roadway to the approach slab. If there is settling at a bridge approach you must determine if there is a sleeper slab in place. Drill through the pavement where it meets the approach slab and if you hit more concrete underneath the pavement you have found the sleeper. If there is a sleeper present where there is settling you will need to perform deep injection a couple of feet below the sleeper - just for soil stabilization. Rural roads and private roads typically do not have a sleeper slab present. Always ask the client if there are drawings available.

Deep Soil Stabilization Followed by Lifting

At least one level of deep injection is required for approach slab/pavement lifting. This is for soil stabilization. 4' spacing and 4' below the pavement is standard. Do not exceed more than 30 lbs per point at a given depth. It is advised to always have a DCP (dynamic cone penetrometer) test done in order to determine the blow counts. Low blow counts indicate weak soil zones that need to be targeted for deep injection. Lifting will be done directly through the pavement/approach slab, the same way you do standard slab lifting. Do the deep injections first and then finish with the injections directly beneath the slab.

Fill Voids with Polyurethane

Watch for voids under the approach slabs where they meet the bridge abutments. There are typically voids in this area that need to be filled. When filling them, it is good to have an observer under the bridge because the foam can fill the void up and come over the abutment, depending on how the structure is designed.

Want more info on geotech repair products?

Download the Info-Packed Geotech Product Catalog!

Topics: All Posts, Lift Slabs