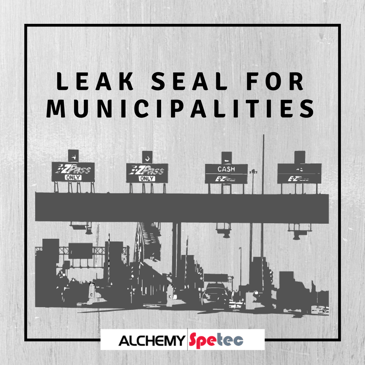
Looking for a Contractor?

Alchatek Blog

Polyurethane Leak Seal - Essential Blog Posts

Posted by Andy Powell on Nov 7, 2016 11:30:00 AM

Polyurethane Leak SealIn this article, I'll highlight a few of our most informative blog posts on the subject of polyurethane leak seal.  

Alchemy Polymers founder Stephen Barton wrote an extremely educational multi-part series on concrete crack injection.  These articles provide detailed instruction on sealing leaks with polyurethane grout.  We'll start with an excerpt from the first post in that series.  This is a great subject to explore if you're new to polyurethane leak seal or want a thorough refresher course.

Next, we'll take a look at an excerpt from a 3 part series I wrote about sealing leaks on remote job sites.  Not every job is set in an ideal, easy to access setting.  Look into this subject if you want to prepare yourself for the inevitable, out of the way, difficult leak seal job.

Lastly I'm including an excerpt from a dramatic case study, written by Stephen Barton, in which Orange County, FL municipal workers tried AP Fill 700 for the first time.  Much to their surprise, they quickly stopped a gushing leak in record time - saving 90% of their usual material usage in the process!  Read this article for a true story about our powerful polymers, being applied with painless procedures, to achieve the rapid results most contractors, property owners and engineers want from a polyurethane leak seal product.

5 Steps of Concrete Crack Injection - Overview

There are five basic steps to be done when injecting a crack in concrete that is leaking water. This is crack injection 101. Learn these steps and you will be well on your way to understanding what it takes to seal a water leak in concrete. In the rest of this series, we will explore every one of these steps in more detail and address the multitude of options (such as port selection, hole spacing, depth, what to do when you hit rebar, etc.) But for right now, we are going to discuss the most basic steps.

Step 1: Drill holes. Use a hammer drill to drill holes in the concrete that intersect the crack. These holes are usually drilled at a 45 degree angle to intersect the crack halfway through the structure so that the resin is forced towards the front and back of the crack.

Step 2: Flush the holes. When you drill, you create concrete dust. If you don’t flush this dust out of the holes, it will be forced into the crack during injection and may clog the crack preventing resin from getting where it needs to go. Put a flexible hose all the way to the back of the hole so that water flushes the dust from the back of the hole to the surface of the concrete. Flush until clean water is flowing.

Step 3: Install your injection port. The port is what seals the hole and gives the injection pump a direct connection to the crack.

Read about steps 4 and 5 in the post 5 Steps of Concrete Crack Injection - Overview.

Sealing Leaks on Remote Job Sites

Hopefully these tips on overcoming obstacles on remote job sites will be of assistance on your next out of the way project. Last summer I had the opportunity to repair pipe penetrations of aerial manholes along a drainage basin in SW Atlanta. Aerial manholes are typically found in low spots next to creeks and rivers. They are usually connected by steel or ductile iron sewer pipes that are above ground and thus, so are the penetrations.

The conditions of the job site were unique as there was no access to the individual manholes except by foot. This particular project covered a winding 1-1/2 miles through ravines and involved several crossings of the stream. The goal was to seal the 18” and 22” pipe penetrations that were leaking raw sewage down the faces of the manholes located along the creek. In this report I will let you know how we got started in preparation for the unique set of challenges this project presented.

Read more in the post Sealing Leaks on Remote Job Sites – Part 1.

AP Fill 700 Saves Orange County 90%

We were asked to do a demonstration for the Utilities division of Orange County, FL (which includes Orlando). They have a crew that does infiltration grouting among other things.

We were supposed to demonstrate our product on a fairly slow leak in a manhole. Not by design, but this was the leak they were scheduled to fix in the time frame we had scheduled the demo. Originally, they asked me to bring 5 pails of AP Fill 700. I also brought both our slow and our fast catalyst.

When I showed up in the morning, they told me they found a different leak which was a gusher. They asked if I had about 10 pails. I told them I only brought five. They said “we’ll try your stuff first, then finish up the leak with the current product we are using.”

We showed up to the jobsite and Tom, who has been doing leak seal for many years, said basically the same thing. “That’s all you brought?” Tom was quite a skeptic - at first.

Read more in the post AP Fill 700 Saves Orange County 90%.

Want more in-depth info on polyurethane leak seal?

Download an Info-Packed Leak Seal Brochure!

Topics: All Posts, Seal Leaks

Polyurethane Infrastructure Repair with Andy Powell

Posted by Stephen C. Barton on Oct 17, 2016 11:34:00 AM

On March 23rd 2016, Alchemy Polymers Technical Consultant Andy Powell was interviewed on the Business Radio X podcast.  Andy is an expert on all of the products and their infinite applications, with many years of infrastructure repair work and on-site consulting under his belt. 

In this excerpt, he sums up the Alchemy Polymers committment to quality...

Ultimately, the customer is the property owner, somebody who’s got a problem. Even though we’re selling to contractors, we kind of all have to be on the same page, and so we’re ultimately dealing with the property owner, and sometimes they don’t understand what they can’t see, and we’re oftentimes fixing things that you can’t see like, “What’s going on underneath my slab? I can’t believe that you’re telling me there’s a hole big enough to park a VW down under my slab and it’s going to cost this much.”

There’s got to be an element of trust. You’ve got to be able to prove what’s going on...you’ve got to be able to let them know that if they’re not going to treat this now, it’s not going to get better. The contractors that we work with, we train, and that’s the only way that we can really stand behind it because we can provide a product warranty, but if it’s not installed correctly, then it can come back and reflect on us. So we kind of all have to be on the same page, and it’s good for the industry as a whole, too, because if somebody’s polyurethane fails, it reflects on everybody.

Polyurethane Infrastructure Repair Interview with Andy Powell.jpg

Over the course of this 15 minute interview, Andy discusses the history of the business, the state of the industry, and the various types of infrastructure problems that can be solved with polyurethane resin. Take a moment and give it a listen. If you have any questions, give us a call afterwards at 404-618-0438. Want to hear more from Andy? Click here for a complete listing of all the Alchemy Polymers blog posts written by Andy Powell.

Want more info on polyurethane infrastructure repair?

Download the Info-Packed Geotech Product Catalog!

Download the Info-Packed Leak Seal Product Catalog!

Topics: Repair Seawalls, All Posts, Lift Slabs, Seal Leaks, Stabilize Soil