Looking for a Contractor?

Alchatek Blog

Stephen C. Barton

Recent Posts

Alchatek Welcomes Kyle Harvey

Posted by Stephen C. Barton on Dec 13, 2023 12:30:00 PM

Banner - Welcome Kyle Harvey

Body - Welcome KyleKyle, a seasoned sales leader, boasts a rich tapestry of diverse sales experience spanning various industries. His journey into the realm of leadership began with a distinguished tenure in the US Army and US Marine Corps, where he honed his skills in strategic thinking, discipline, and effective communication. The military background instilled in him a profound sense of commitment and a relentless pursuit of excellence, qualities that seamlessly translated into his subsequent career in professional sales. Kyle’s cross-industry expertise has not only broadened his perspective but has also equipped him with a unique skill set that enables him to identify innovative solutions and tailor his approach to meet the specific needs of a diverse clientele.

Kyle is dedicated to expanding the horizons of Seawall Repair Network. Recognizing the critical importance of sustainable infrastructure, he is motivated to apply his diverse sales expertise to a company at the forefront of innovation. Alchatek’s commitment to cutting-edge technologies in seawall repair aligns seamlessly with Kyle’s passion for delivering impactful solutions. Kyle is committed to contributing his strategic thinking and customer-centric approach in order to propel Alchatek to new heights in the ever-evolving realm of infrastructure solutions.

Kyle holds a BBA from The University of North Georgia, known for its distinction as The Military College of Georgia, and an MBA from The University of Dayton. Residing in Cumming, GA, he and his wife, Annette, have four children. Kyle’s life is enriched by a love for the outdoors, with fishing, hiking, and camping serving as cherished pastimes. In addition to his recreational pursuits, he also enjoys participating in mission trips, reflecting a commitment to making a positive impact beyond the confines of his professional and personal life.

Want more information on Alchatek products?

Download the Info-Packed Geotech Product Catalog!

Download the Info-Packed Leak Seal Product Catalog!

Topics: All Posts

Alchatek Welcomes Paul Melendez-Sandoval

Posted by Stephen C. Barton on Dec 13, 2023 12:00:00 PM

Banner - Welcome Paul

Body - Welcome PaulPaul is a dynamic and results-driven executive with extensive international management, marketing, business development, strategic planning, market expansion success, and consultation experience across the United States and Latin America.
Throughout his career, Paul has developed a reputation as an experienced professional with the ability to design and drive strategic improvements to scale processes, services, and systems with a focus on enabling the team to exceed adoption, retention, and growth objectives.

Paul is known to be a highly effective strategist with the capacity to use creativity to determine the best course of action for the organization using skills that transfer across multiple industries and positions; able to analyze operational needs, identify lucrative growth opportunities, define strategies for capturing new clientele, develop existing consumer base, and attain a solid foundation in competitive areas.

Perhaps most importantly, Paul is a resilient individual with strong management and people skills, personal values, integrity, and technical knowledge; able to leverage solution selling, relationship management, account executive engagement, and partner/alliance alignment to evolve an organization to deliver on predictable, profitable growth.

Paul holds an MBA in International Business (Magna Cum Laude) from Texas A&M International University, a BBA in International Business (Summa Cum Laude), and a BSC in Industrial Engineering.

Want more information on Alchatek products?

Download the Info-Packed Geotech Product Catalog!

Download the Info-Packed Leak Seal Product Catalog!

Topics: All Posts

5 Steps of Crack Injection – 5. Injecting Resin

Posted by Stephen C. Barton on Oct 9, 2023 10:00:00 AM

Banner - 5 Steps of Crack Injection - Injecting Resin

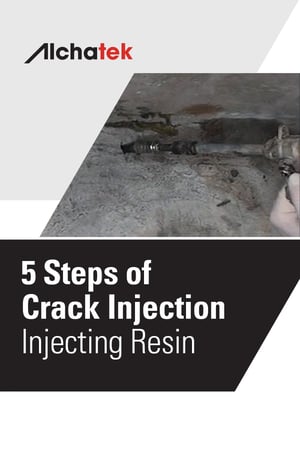
Body - 5 Steps of Crack Injection - Injecting ResinFinally! We are at the last basic step. Now for the fun part - injecting the polyurethane resin. If you only have one pump, be sure to flush the pump out completely with AP Pump Flush before you pump the resin.

Check your safety gear - safety glasses are the most important item. Put on two pairs of latex gloves (so you can easily slip on a new pair once the outer pair gets sticky - it is tough to slide fresh gloves over sweaty hands.)

Turn the pump pressure all the way down. Squirt some resin into a cup to make sure the resin is clean. Start at the lowest port and slowly crack the valve. This is a two-man job (unless it is a small job). Have your partner slowly turn up the pressure as needed. Develop hand signals if the job site is noisy from a generator.

If the resin is flowing, keep pumping. If not, slowly adjust the pressure. Here comes the art of the game. You have two ways to control the flow of the resin. The pump operator can control the pressure and the valve operator can control the flow. The more experienced technician should control the show.

If I am on the valve, I will tell the pump operator how high to turn up the pressure. I will close the valve while this is being done. Once the pressure is up, I will control the flow of the resin from the valve. Very slowly cracking it open. This way, if I feel a shear start to form, I have a split second to close the valve.

If I am on the pump and the valve operator is less experienced, I will have them open the valve and I will control things with the pump pressure. I will turn it up and down as necessary. It is better to have the valve operator control the show in most circumstances since that person is closer to the action.

When to stop? My rule is this - if the resin is flowing, keep pumping. What if it starts to run out the face of the crack? Again, my rule is this - if more resin is going in than is coming out, keep pumping. You only have a few minutes to get the resin where it needs to be. As the resin reacts with water it starts to thicken up and becomes more difficult to push into the tighter recesses of the crack.

If raw resin comes out of the crack (amber resin, not a white foam), then it is time to stop. This resin will seal the crack, but at this point, there is not much water for it to react with and it will cure slowly. Stop injecting and move to the next port because it will be slow to seal. It is better to see white foam coming out of the face of the crack.

What happens if the foam travels past the next port - should you stop? No way. This is a home run. In most cases, the further along the face of the crack the resin travels, the deeper it is traveling as well. This gives you a better seal.

If too much resin is flowing out or washing out due to high water flow, you can use Spetec Oakum and a screwdriver to create a temporary plug (large or small) to give the resin time to react, expand, and seal the leak.

Congratulations, you have completed the 5 Steps of Crack Injection blog series!

5 Steps of Crack Injection - Overview
5 Steps of Crack Injection - 1. Drilling Holes
5 Steps of Crack Injection – 1. Drilling Holes (Continued)
5 Steps of Crack Injection – 2. Flushing Holes
5 Steps of Crack Injection – 3. Installing Ports
5 Steps of Crack Injection – 4. Flushing Cracks
5 Steps of Crack Injection – 5. Injecting Resin

Please feel free to call us at 404-618-0438 and ask any questions. 

Want in-depth info on crack injection procedures and products?

Download an Info-Packed Leak Seal Brochure!

Topics: All Posts, Seal Leaks

5 Steps of Crack Injection – 4. Flushing Cracks

Posted by Stephen C. Barton on Oct 5, 2023 10:00:00 AM

Banner - 5 Steps of Crack Injection - Flushing Cracks

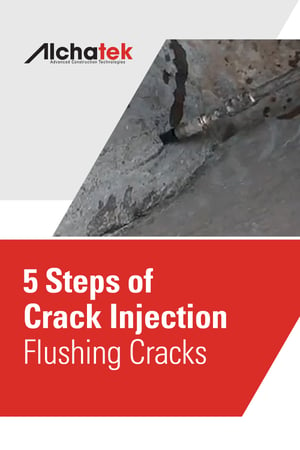
Body - 5 Steps of Crack Injection - Flushing CracksAll cracks that aren’t actively leaking at the time you are sealing them need to be flushed out with water. Flushing them gives you several advantages:
  1. Lets you know whether your drill holes have intersected the crack.
  2. Flushes dirt and debris out the surface of the crack so your resin has a cleaner internal surface to bond to.
  3. Reveals how far you can expect the resin to travel so you know if your drilled holes are close enough together.
  4. The water will help open up tight cracks that the thicker resin may not otherwise have been able to penetrate.
  5. Ensures that the resin has sufficient moisture to react with.

Start at the lowest point in the crack and flush clean water through your injection ports. It is best to have at least two pumps onsite. One for pumping water and one for pumping resin. Use the same type of high-pressure pump that you use for resin. You can use a smaller pump if you like, as long as it is capable of generating between 2,800 and 3,500 p.s.i.

BE CAREFUL when flushing tight cracks! The low viscosity of water coupled with the high pressure of the pump can shear the concrete. The water can push into tight cracks and capillaries and all at once split your concrete. You can also shear concrete with resin, but it is more likely to happen with water because you are testing your crack and trying to open it up.

Always start every port with the lowest pump pressure and slowly turn it up as necessary. Also, slowly crack the valve open when you are first injecting water or resin. This is a critical moment in the process. If you forget to turn the pump pressure down after each port, you risk blasting high pressure into the port all at once which can result in shearing of the concrete or blowing out the port.

Keep injecting water as long as it is flowing through the port and moving further and further along the crack. Monitor the water coming out of the crack. Notice if it is clean or cloudy. Keep injecting until it comes out clean.

If the project is big enough, you can have one technician injecting water and another injecting resin right behind. Personally, I like to do both steps myself. That way I know what to expect when injecting the resin. In any case, keep the water pump nearby. Many times you will have to pop another hole in the wall here and there to completely seal the crack with resin.

5 Steps of Crack Injection - Overview
5 Steps of Crack Injection - 1. Drilling Holes
5 Steps of Crack Injection – 1. Drilling Holes (Continued)
5 Steps of Crack Injection – 2. Flushing Holes
5 Steps of Crack Injection – 3. Installing Ports
5 Steps of Crack Injection – 4. Flushing Cracks
5 Steps of Crack Injection – 5. Injecting Resin

Want in-depth info on crack injection procedures and products?

Download an Info-Packed Leak Seal Brochure!

Topics: All Posts, Seal Leaks, Crack Injection

5 Steps of Crack Injection – 3. Installing Ports

Posted by Stephen C. Barton on Sep 26, 2023 10:00:00 AM

Banner - 5 Steps of Crack Injection - Installing Ports

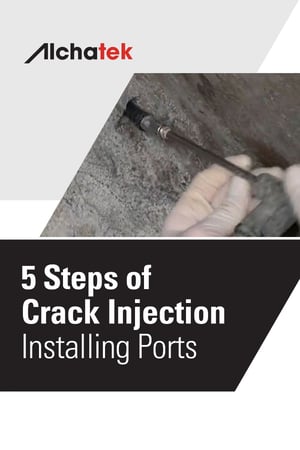
Body - 5 Steps of Crack Injection - Installing PortsInstalling high-pressure injection ports is pretty straightforward, so I won’t spend too much time on this topic. Just a few quick tips.
1. Hammer In Ports. Place the port in a clean 3/8” diameter hole and hammer it in. The high-quality materials our ports are made of will take a pounding. But you don’t have to hammer them in too hard. With a little practice, you will begin to notice the sound changes slightly when the port is seated. Use an electric screwdriver or drill with a 5/16” socket to seat the zerk fitting into the port. Also, make sure you have a “T” handle socket for use in areas where water is pouring down on your head (so you don’t short out your electric screwdriver or drill).

You may notice that the bag of ports is wet on the inside when you get them. The water helps the ports stay resistant to cracking.

The downside to Hammer In Ports is that they only contact the concrete in a very small area and make a seal (due to the tapered nature of the port). In good quality concrete, this seal will hold back several thousand p.s.i. However, if the concrete is weak or the drilled hole is out of round, you can have a problem. In which case you want to use a Mechanical Port.

2. Mechanical Ports have dropped in price dramatically over the years due to inexpensive labor and cheaper materials from overseas. There is now little price difference between the Hammer In Ports and the Mechanical Ports compared to what there used to be. I have a personal affinity for Mechanical Ports because I used to make them in my father’s shop back in the early 1980s. They have a much larger surface area to create a seal and will hold more pressure than the concrete can take.

Make sure you seat the rubber all the way inside the hole. If it is partially outside of the hole, it can cause the surface of the hole to spall, chip, and crack. Setting it in at least ¼” past the surface of the hole will give you a great seal and reduce the chance of cracking the concrete unnecessarily.

Snug the ports down, but don’t over-tighten. It is easier than you think to crack the concrete by over-tightening (especially if you have drilled close to the crack or at a very steep angle).

Now that you have the ports installed, you are ready to clean out the crack by flushing water through the ports. I’ll discuss that in the next section.

5 Steps of Crack Injection - Overview
5 Steps of Crack Injection - 1. Drilling Holes
5 Steps of Crack Injection – 1. Drilling Holes (Continued)
5 Steps of Crack Injection – 2. Flushing Holes
5 Steps of Crack Injection – 3. Installing Ports
5 Steps of Crack Injection – 4. Flushing Cracks
5 Steps of Crack Injection – 5. Injecting Resin

Want in-depth info on crack injection procedures and products?

Download an Info-Packed Leak Seal Brochure!

Topics: All Posts, Seal Leaks

5 Steps of Crack Injection – 2. Flushing Holes

Posted by Stephen C. Barton on Sep 20, 2023 10:00:00 AM

Banner - 5 Steps of Crack Injection - Flushing Holes

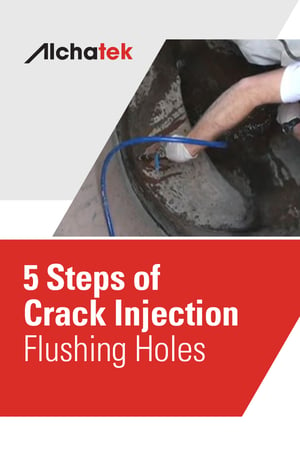
Body - 5 Steps of Crack Injection - Flushing HolesHere it is. My favorite topic. Why? Because it is my pet peeve. It separates the technicians who care from those who are only going through the motions. Quite frankly, it can be the difference between a successful outcome and dismal failure - or at the very least an expensive callback.

When you drill holes you create concrete dust. The hammer drill bit literally chews up the concrete. Most of it comes out of the hole and falls on the floor. However, a lot of dust is left behind inside the hole. If it is not properly flushed out then it will mix with your polyurethane injection resin and make a thick paste. This thick paste can be forced into the crack and prevent the clean resin from reaching deep into the crack where it is needed. Most of the time you won’t even realize you have a problem. But there it is nonetheless. Waiting for the right conditions to allow water to seep back through the crack you thought you fixed.

How do you avoid this? Simple - flush the hole out from the back using a very cheap flexible hose that attaches to your flush pump (you did bring a separate flush pump didn’t you?). Start at the highest hole and work your way down until clean water is flowing out of each hole.

Spraying water on the face of the holes may make it look clean, but it is not effective. There is still dust deep in the hole. Filling a water bottle up and squeezing it so that water shoots part way up the hole is not good enough. You have to have the water exit your hose at the back of the hole. This is the only way.

Are there exceptions? Of course, there are. If you pull the drill bit out of the hole and water gushes out behind it in a steady stream you can skip this step. Otherwise, make sure you bring a flush hose with you. It has to be small enough to fit inside your drill hole. We make it easy for you. We make one and sell it for cheap (so don’t blame us if you get to your job site and don’t have one).

This is so basic it is silly. However, I have seen experienced technicians do the water bottle trick and try to explain that it is sufficient. I’m happy to report that those guys are working for your competitors now. Just make sure your guys don’t get lulled into laziness and skip what just might be the most important of these five basic steps:

  1. Drill the hole
  2. Flush the hole
  3. Install the ports
  4. Flush the crack
  5. Inject the resin

Next up, we install the ports!

5 Steps of Crack Injection - Overview
5 Steps of Crack Injection - 1. Drilling Holes
5 Steps of Crack Injection – 1. Drilling Holes (Continued)
5 Steps of Crack Injection – 2. Flushing Holes
5 Steps of Crack Injection – 3. Installing Ports
5 Steps of Crack Injection – 4. Flushing Cracks
5 Steps of Crack Injection – 5. Injecting Resin

Want in-depth info on crack injection procedures and products?

Download an Info-Packed Leak Seal Brochure!

Topics: All Posts, Seal Leaks, Crack Injection

5 Steps of Crack Injection – 1. Drilling Holes (Continued)

Posted by Stephen C. Barton on Sep 13, 2023 10:00:00 AM

Banner - 5 Steps of Crack Injection - Drilling Holes (Continued)

Body - 5 Steps of Crack Injection - Drilling Holes (Continued)Let’s face it, most of the structures you drill through will be full of rebar. Rebar is the steel reinforcement that gives the structure its strength. Concrete protects the rebar by shielding it from moisture, and the high pH of concrete keeps the rebar from rusting. However, once a crack forms it allows more water and environmental gasses to reach the area surrounding the rebar. Carbonation of the concrete can now occur which causes the pH to drop and the corrosion process to begin. The rust expands and takes up 15 times the volume of the un-corroded steel which causes tensile forces to work against the concrete eventually resulting in additional cracking and spalling. Hopefully, you will be called in to fix the leaks before much of this damage occurs.
Once you are on the job site, this slow process of decay does not really affect you (unless the concrete is spalling off as you drill). Your issue with the rebar is that it will stop your drill bit from penetrating the crack. The cracks will often follow the rebar, especially if there is not adequate coverage of concrete over the rebar. Shallow rebar is a huge contributing factor to cracks in concrete.

At this point, all you care about are two things. First, how do you know if you have hit rebar? Second, if you have hit it, what do you do next?

After drilling many thousands of holes, as I have over my career, I pretty much know when I have hit rebar. Here are a few things to look for:

  1. The forward progress of drilling has stopped.
  2. The sound of the drilling changes.
  3. The quantity of drilling dust is reduced.
  4. If you are not sure, put your hand out to catch some of the drilling dust coming out of the drill hole. Observe it for metal shavings.

Given enough time and effort, you can drill through rebar. However, I wouldn’t recommend this as a general practice. It takes a lot of time, weakens the structure you are trying to protect, and...have you bought a drill bit lately? Steel is expensive! Try this instead:

  1. Move further away from the crack and try again (adjust your drilling angle).
  2. Move closer to the crack and try again (adjust your drilling angle).
  3. Move parallel to the crack and try again.
  4. Move to the other side of the crack and try again.

As a last resort, drill straight into the crack. This is not the ideal situation, but if you can drill deep enough to get an injection port installed, then you might be able to successfully seal the leak. 

Now that the surface of your concrete looks like Swiss cheese, it is time to go get that bag of fast-set hydraulic cement you brought along for just this purpose. Try to patch it up before you begin injection because some of those abandoned holes are libel to have hit pay dirt. If you don’t seal them up then you will have foam or resin leaking out of the holes.

Hitting rebar is not fun and can be frustrating. The key is to expect it and try to think three-dimensionally. See if you can visualize what is going on behind the concrete. This is one of the keys to becoming a really good injection technician.

5 Steps of Crack Injection - Overview
5 Steps of Crack Injection - 1. Drilling Holes
5 Steps of Crack Injection – 1. Drilling Holes (Continued)
5 Steps of Crack Injection – 2. Flushing Holes
5 Steps of Crack Injection – 3. Installing Ports
5 Steps of Crack Injection – 4. Flushing Cracks
5 Steps of Crack Injection – 5. Injecting Resin

For more information...

Download an Info-Packed Leak Seal Brochure!

Topics: All Posts, Seal Leaks, Crack Injection

5 Steps of Crack Injection - 1. Drilling Holes

Posted by Stephen C. Barton on Sep 7, 2023 10:00:00 AM

Banner - 5 Steps of Crack Injection - Drilling Holes

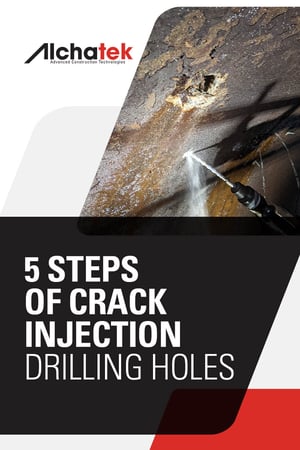
Body - 5 Steps of Crack Injection - Drilling HolesI remember my first day on the job back in June of 1985. We were working nights in the subway tunnels of Atlanta, sealing leaks in the ceiling. The crew handed me a 30-pound hammer drill and told me to drill holes in the ceiling at a 45-degree angle. Sure, what the heck is a 45-degree angle? I put on a lot of muscle that summer drilling overhead and hauling 50-pound pails of resin all over the Southeastern U.S.

Drilling holes into concrete seems like a straightforward process. However, it must be done correctly or everything you do afterward is a waste of time. Often, contractors put their least experienced technician on that job because it is manual labor and can be taught quickly. But knowing a few of the basics can help a newbie drill like an expert.

First, you have to understand that the beginning of the hole is where the injection port makes its seal against up to 3,000 pounds per square inch of injection pressure. It is important that the hole stay round, especially when using hammer in type ports. That means you have to keep the drill bit in a straight line.

Why a 45-degree angle? This is the best way to intersect the crack halfway through the structure (which is your goal). For example: On a 10” thick wall, come off the crack 5”, drill at a 45-degree angle and you should hit your target. Just start with your drill bit straight into the wall, give the trigger a few bumps to make an indention in the concrete with the bit, and rotate your drill so that the angle is halfway between your starting position and the wall.

How far apart should you space your holes? It depends on the width of the crack. Tighter cracks need tighter spacing because the resin won’t travel as far. Wider cracks can have wider spacing because the resin will travel with ease. A rule of thumb is to drill your holes no farther apart than the thickness of the concrete. Drill, flush, and pump a test hole with water to get an idea of how far the resin will travel.

Be sure to pull the drill bit out every four or five inches of penetration to clean out the drilling dust. Otherwise, you are likely to bind up your drill bit, which is not fun to try to remove.

Sometimes you will have to drill straight into the crack. I always try to angle drill first, but with extremely tight cracks you may have to compromise and drill straight in. Go as deep as you can, but make sure you don’t go all the way through.

Another tip: If you stagger your holes from one side of the crack to another, be sure not to intersect a hole you already drilled. This causes all kinds of problems.

We will talk about flushing drilling dust out of your holes later, but I can’t repeat it enough. If you want a successful injection job you have to flush the drilling dust out of the holes from the back. Otherwise, the dust will form a paste that gets forced into the crack and blocks your resin from getting where it needs to be. Splashing water on the front of the hole doesn’t really help. Be sure to get a small hose to the back of the hole and flush it with clean water.

In the next article, we'll take a look at what to do when you inevitably hit the injection contractor's nemesis...rebar!

5 Steps of Crack Injection - Overview
5 Steps of Crack Injection - 1. Drilling Holes
5 Steps of Crack Injection – 1. Drilling Holes (Continued)
5 Steps of Crack Injection – 2. Flushing Holes
5 Steps of Crack Injection – 3. Installing Ports
5 Steps of Crack Injection – 4. Flushing Cracks
5 Steps of Crack Injection – 5. Injecting Resin

Want in-depth info on crack injection procedures and products?

Download an Info-Packed Leak Seal Brochure!

Topics: All Posts, Seal Leaks, Crack Injection

5 Steps of Crack Injection - Sealing Leaks in Concrete

Posted by Stephen C. Barton on Aug 29, 2023 10:00:00 AM

Banner - 5 Steps of Crack Injection - Overview

Body - 5 Steps of Crack Injection - OverviewThere are five basic steps to be done when placing a crack injection. This is crack injection 101. Learn these steps and you will be well on your way to understanding what it takes to seal a water leak in concrete with products such as Spetec PUR F400 and Spetec GT500. In future articles, we will explore every one of these steps in more detail and address the multitude of options (such as port selection, hole spacing, depth, what to do when you hit rebar, etc.) But for right now, we are going to discuss the most basic steps.

Step 1: Drill holes. Use a hammer drill to drill holes in the concrete that intersects the crack. These holes are usually drilled at a 45-degree angle to intersect the crack halfway through the structure so that the resin is forced toward the front and back of the crack.

Step 2: Flush the holes. When you drill, you create concrete dust. If you don’t flush this dust out of the holes, it will be forced into the crack during injection and may clog the crack, preventing the resin from getting where it needs to go. Put a flexible hose all the way to the back of the hole so that water flushes the dust from the back of the hole to the surface of the concrete. Flush until clean water is flowing.

Step 3: Install your injection port. The port is what seals the hole and gives the injection pump a direct connection to the crack.

Step 4: Flush the crack. Unless the water is pouring out of the crack, you will need to inject clean water through the injection port and into the crack. This serves several purposes:

  • Cleans the crack of dirt and other contaminants to allow the resin to flow freely.
  • Gives you an idea of how far and how easily the resin will flow into the crack when you start injecting the foam.
  • Helps to open areas where the resin wouldn’t otherwise flow. Water is thinner than resin and will penetrate deeper and into tighter areas.
  • Ensures the resin will have enough moisture to react with.

Step 5: Inject the resin. Always use the lowest pressure that will continuously feed resin into the crack. Slowly turn up the pressure as necessary to get the resin flowing. My rule of thumb is to keep injecting even if resin starts to flow out of the crack. As long as more resin is going in than is coming out, you are improving your chances of success. When the resin isn’t moving further along the crack, move to the next port.

Sounds simple, right? Well, it is and it isn’t, as we will discover in the next several chapters of this blog series...

5 Steps of Crack Injection - Overview
5 Steps of Crack Injection - 1. Drilling Holes
5 Steps of Crack Injection – 1. Drilling Holes (Continued)
5 Steps of Crack Injection – 2. Flushing Holes
5 Steps of Crack Injection – 3. Installing Ports
5 Steps of Crack Injection – 4. Flushing Cracks
5 Steps of Crack Injection – 5. Injecting Resin

Want in-depth info on crack injection procedures and products?

Download an Info-Packed Leak Seal Brochure!

Topics: All Posts, Seal Leaks, Crack Injection

Sealing Leaks in Cold Weather

Posted by Stephen C. Barton on Nov 17, 2022 10:00:00 AM

Banner - Sealing Leaks in Cold Weather 2022

Body - Sealing Leaks in Cold Weather 2022It's that time of year again. As temperatures drop, take a moment to review this previously posted article packed with cold-weather tips.

There are plenty of leak seal jobs that need to be done in the winter. So let's take a look at those cold-weather markets. We'll also review some special considerations for conditioning leak seal material and equipment. Then we’ll leave you with a few cold temperature leak seal application tips.

Cold Weather Markets

You have a variety of options for seeking jobs that are inside, and out of the elements, during the winter months.  Hopefully, these ideas will spark more brainstorming on your part. First up we have tunnels, both pedestrian and vehicle. Tunnels often leak, sometimes significantly enough to result in quite a big job. Aquariums are another possibility. As you can imagine, there are infinite potential leak problems in a structure holding that much water. Other possible large jobs could include mines and water treatment plants (which have plenty of interior spaces with potential leak issues). On the smaller side, there are utility vaults, lift stations, manholes, and elevator pits.

If you’re still up for working outside during the winter months, you’re in luck because concrete contracts during colder weather. The contraction makes cracks open wider. Wider cracks make leaks more apparent to the property owner and make them easier to repair.

Conditioning Materials and Equipment

One important point to understand is that cold weather requires you to make an extra effort to keep your materials and equipment warm. Cold material reacts slower and gets thicker. Be sure to store your materials and equipment in a heated room the night before the job. When on the job site, there are many ways to keep everything warm. Use an enclosed vehicle, like a box truck, enclosed trailer, or pickup truck with a camper top or bed cover. Keep as much material and equipment inside the vehicle as possible when working. Use a portable heater to maintain a warm temperature. You can also use electric pail heaters to keep your resin ready for action.

Remember that it won’t do you any good to heat the resin if you’re pumping it through cold equipment. The cold steel inside the pump and the cold hose will literally suck the heat out of the resin before it gets where it needs to be. This will increase the viscosity, making it harder to mix with the water and it will slow down the reaction dramatically. So don’t neglect the equipment side of the equation!

Cold Temperature Application Tips

If you’re using a product with an accelerator, you may need to use a faster accelerator or increase your percentage. Also, bring lots of oakum. You may have to use more if the cold temperature slows down the material or the contracted concrete has made the cracks wider.

If your job requires you to inject into a structure underwater (and the water’s cold), you can use a technique called twin streaming. In this approach, you hook two valves together in a parallel fashion – then inject warm water along with the resin to kick-start its reaction before hitting the cold water.

Conclusion

I hope this overview has helped spark some ideas on your part for finding leak seal work during the winter months. Just remember to keep your materials and equipment conditioned and you should be fine. Have more questions about polyurethane leak seal in cold weather? Call us at 404-618-0438.

Want more in-depth info on polyurethane leak sealing?

Download an Info-Packed Leak Seal Brochure!

Topics: Equipment & Accessories, All Posts, Seal Leaks, Business Tips