Looking for a Contractor?

Alchatek Blog

Andy Powell

Recent Posts

Alchemy Polymers Featured on SprayFoamInsider.com

Posted by Andy Powell on Dec 5, 2016 2:30:00 PM

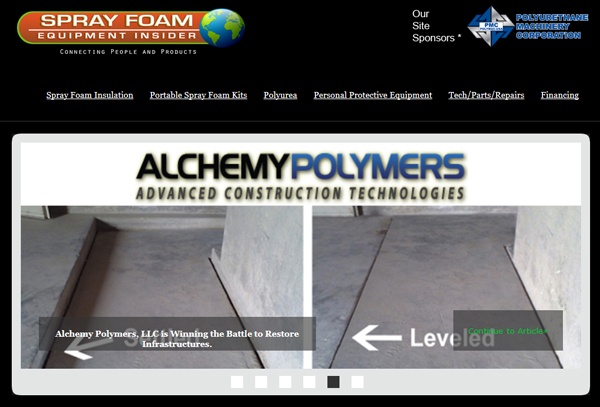
We're happy to announce that Alchemy Polymers has been profiled in a feature article on SprayFoamInsider.com. This is a good match, since we get a lot of interest from spray foam professionals looking to expand their skill set into slab lifting and other forms of concrete repair. After doing a fair amount of background research, Editor Jay Davidson has written an overview of our company's mission and the solutions we offer for critical concrete infrastructure issues.

The article opens as follows...

Alchemy Polymers, LLC is comprised of combat veterans when it comes to battling the elements and saving valuable infrastructures with their polyurethane resins. Contractors can even “sign up” for “boot camp” training to learn the valuable secrets of polyurethane applications from those who have literally been in the trenches. Their winning polymer injection solutions have a highly successful track record for repairing and restoring sea walls, retaining walls, tunnels, bridges, dams, concrete slabs, highways, pipelines, railways, sink holes, homes, buildings, subways and other below ground structures.

You can read more in Jay Davidson's piece Alchemy Polymers, LLC is Winning the Battle to Restore Infrastructures.  Needless to say, we're happy to see Alchemy Polymers featured on SprayFoamInsider.com.

Alchemy Polymers Featured on SprayfoamInsider.com

Want additional in-depth info on Alchemy Polymers products and procedures?

Download the Info-Packed Geotech Product Catalog!

Download the Info-Packed Leak Seal Product Catalog!

Topics: Repair Seawalls, All Posts, Lift Slabs, Seal Leaks, Stabilize Soil

Follow Alchemy Polymers On LinkedIn!

Posted by Andy Powell on Dec 2, 2016 11:30:00 AM

As I mentioned in my blog post Use Social Media to Promote Your Contracting Business, LinkedIn isn’t only for job seekers and recruiters. LinkedIn can be an integral part of your business social media strategy. If you aren’t on LinkedIn yet, make sure you read that post. If you ARE on LinkedIn (or when you DO get on), make sure to follow the Alchemy Polymers page immediately! It’s important for you to build your network of companies and individuals in this industry. In addition, we post all of our educational blog articles to the Alchemy Polymers LinkedIn page. Following our page is one more way to make sure you don’t miss valuable content.

Get Connected-1.jpg

Follow us on LinkedIn NOW!

Click here:
https://www.linkedin.com/company/alchemy-polymers

Want more info on marketing your contracting business?

Download an Info-Packed Contractor Marketing Brochure!

Topics: All Posts, Business Tips

Polyurethane Seawall Repair - Essential Blog Posts

Posted by Andy Powell on Nov 11, 2016 11:30:00 AM

Polyurethane Seawall RepairIn this post, I'd like to highlight a couple of our earlier articles on seawall repair.

I wrote the first one as an introduction to the causes of seawall erosion, the outward signs that erosion is taking place and the product we recommend for repair.  Read it for background on why damage occurs and how to spot it. 

Stephen Barton wrote the next one on the polyurethane seawall repair process. Read it for a good step by step overview.

Stop Erosion Through Your Seawall with Polyurethane

When it comes to seawalls, there is a lot more to learn than meets the eye. A seawall is like a living, breathing thing: especially in the way that they are designed to function. But like all living breathing things, they have a finite lifespan. For many of them, it's a mere 20 – 30 years. Depending on where you live, replacing a seawall can cost anywhere from $150 to $500 per foot. That's enough for some homeowners to choose to move instead of rebuilding their seawalls. Today however, signs of seawall distress can be solved before they get too bad through the application of polyurethane grouts to seal leaks, fill voids, and stabilize the surrounding soils.

Although seawalls are found around lakes and rivers, it is around the ocean that they are put to the most difficult test. Salt corrosion, tidal action, currents, boat wakes, storm surges and sometimes hurricanes all deliver a constant beating on the seawall. But many of the forces are also coming from the landward side of the wall. Every time it rains or the irrigation system runs, and every time the tide goes out; all of the groundwater above the waterline has to vent or equalize. Tremendous pressures can build up if that water is trapped and cannot make its way into the sea or the storm water system.

Read more in the post Stop Erosion Through Your Seawall with Polyurethane.

Leaking Seawalls: Soil Loss Prevention and Remediation

As tidal flows rise and fall, water pushes its way in through cracks, joints, and defects in seawalls. The water pushes in on incoming tides and flows out on outgoing tides. As the water flows out, it carries sand and soil with it which causes undermining of the structure, voids to form, and deteriorates the structural integrity of the seawall. This cycle is exacerbated during periods of heavy rain which continue the outflow of soil.

Read more in the post Leaking Seawalls: Soil Loss Prevention and Remediation.

Want more in-depth info on polyurethane seawall repair?

Download an Info-Packed Seawall Repair Brochure!

Topics: Repair Seawalls, All Posts

Soil Stabilization Products - Essential Blog Posts

Posted by Andy Powell on Nov 9, 2016 11:30:00 AM

Soil Stabilization ProductsIn this post we'll take a look at a couple of important, early articles we posted on soil stabilization.

The first article is an overview of the causes of unstable soil.  I wrote this post as an introduction to a multi-part series on the subject.  A thorough understanding of why soil becomes unstable is helpful for anyone looking at soil stabilization products and trying to determine which one is appropriate for a particular job.  Study this subject if you want to deepen your understanding on the subject of soil stabilization in general.

The other article is about stabilizing soil in wet environments.  Not every stabilization product is designed to work properly in wet soil.  Read this article for brief breakdown on the matter. 

The Causes of Unstable Soil: A Brief Overview

Unstable soil can be defined as soil that will not stay in place on its own, and therefore requires extra support. It should be noted that unstable soil can threaten the stability, security, and safety of infrastructure and can damage, degrade, and even destroy a number of structures, such as buildings, bridges, and roads.

There are a variety of factors that can cause unstable soil, including:

  • Erosion
  • Poor Compaction
  • Freeze/Thaw
  • Decomposition

Erosion refers to processes in which external elements (wind, water, etc.) remove soil or rock from a certain location and transport it to another location. There are a variety of different erosion types, including river and gull erosion, wind erosion, and erosion attributed to human activity. Erosion ultimately destabilizes soil and can lead to landslides and sinkholes.

Read more in the post The Causes of Unstable Soil: A Brief Overview.

Soil Grouting - Polyurethane vs. Water

Not all two component polyurethane lifting and stabilizing foams are specifically designed for wet environments.  In most situations when you are injecting polyurethane foam into the ground, there is a high probability that the environment is going to be wet.  You need to be confident that the foam will react and retain the desired properties in these wet environments.  If the foam you are using is not specifically designed for wet environments, then you may be cheating yourself and your customer out of the best possible results.

Read more in the post Soil Grouting - Polyurethane vs. Water.

Want more in-depth info on soil stabilization products and procedures?

Download an Info-Packed Soil Stabilization Brochure!

Topics: All Posts, Stabilize Soil

Polyurethane Leak Seal - Essential Blog Posts

Posted by Andy Powell on Nov 7, 2016 11:30:00 AM

Polyurethane Leak SealIn this article, I'll highlight a few of our most informative blog posts on the subject of polyurethane leak seal.  

Alchemy Polymers founder Stephen Barton wrote an extremely educational multi-part series on concrete crack injection.  These articles provide detailed instruction on sealing leaks with polyurethane grout.  We'll start with an excerpt from the first post in that series.  This is a great subject to explore if you're new to polyurethane leak seal or want a thorough refresher course.

Next, we'll take a look at an excerpt from a 3 part series I wrote about sealing leaks on remote job sites.  Not every job is set in an ideal, easy to access setting.  Look into this subject if you want to prepare yourself for the inevitable, out of the way, difficult leak seal job.

Lastly I'm including an excerpt from a dramatic case study, written by Stephen Barton, in which Orange County, FL municipal workers tried AP Fill 700 for the first time.  Much to their surprise, they quickly stopped a gushing leak in record time - saving 90% of their usual material usage in the process!  Read this article for a true story about our powerful polymers, being applied with painless procedures, to achieve the rapid results most contractors, property owners and engineers want from a polyurethane leak seal product.

5 Steps of Concrete Crack Injection - Overview

There are five basic steps to be done when injecting a crack in concrete that is leaking water. This is crack injection 101. Learn these steps and you will be well on your way to understanding what it takes to seal a water leak in concrete. In the rest of this series, we will explore every one of these steps in more detail and address the multitude of options (such as port selection, hole spacing, depth, what to do when you hit rebar, etc.) But for right now, we are going to discuss the most basic steps.

Step 1: Drill holes. Use a hammer drill to drill holes in the concrete that intersect the crack. These holes are usually drilled at a 45 degree angle to intersect the crack halfway through the structure so that the resin is forced towards the front and back of the crack.

Step 2: Flush the holes. When you drill, you create concrete dust. If you don’t flush this dust out of the holes, it will be forced into the crack during injection and may clog the crack preventing resin from getting where it needs to go. Put a flexible hose all the way to the back of the hole so that water flushes the dust from the back of the hole to the surface of the concrete. Flush until clean water is flowing.

Step 3: Install your injection port. The port is what seals the hole and gives the injection pump a direct connection to the crack.

Read about steps 4 and 5 in the post 5 Steps of Concrete Crack Injection - Overview.

Sealing Leaks on Remote Job Sites

Hopefully these tips on overcoming obstacles on remote job sites will be of assistance on your next out of the way project. Last summer I had the opportunity to repair pipe penetrations of aerial manholes along a drainage basin in SW Atlanta. Aerial manholes are typically found in low spots next to creeks and rivers. They are usually connected by steel or ductile iron sewer pipes that are above ground and thus, so are the penetrations.

The conditions of the job site were unique as there was no access to the individual manholes except by foot. This particular project covered a winding 1-1/2 miles through ravines and involved several crossings of the stream. The goal was to seal the 18” and 22” pipe penetrations that were leaking raw sewage down the faces of the manholes located along the creek. In this report I will let you know how we got started in preparation for the unique set of challenges this project presented.

Read more in the post Sealing Leaks on Remote Job Sites – Part 1.

AP Fill 700 Saves Orange County 90%

We were asked to do a demonstration for the Utilities division of Orange County, FL (which includes Orlando). They have a crew that does infiltration grouting among other things.

We were supposed to demonstrate our product on a fairly slow leak in a manhole. Not by design, but this was the leak they were scheduled to fix in the time frame we had scheduled the demo. Originally, they asked me to bring 5 pails of AP Fill 700. I also brought both our slow and our fast catalyst.

When I showed up in the morning, they told me they found a different leak which was a gusher. They asked if I had about 10 pails. I told them I only brought five. They said “we’ll try your stuff first, then finish up the leak with the current product we are using.”

We showed up to the jobsite and Tom, who has been doing leak seal for many years, said basically the same thing. “That’s all you brought?” Tom was quite a skeptic - at first.

Read more in the post AP Fill 700 Saves Orange County 90%.

Want more in-depth info on polyurethane leak seal?

Download an Info-Packed Leak Seal Brochure!

Topics: All Posts, Seal Leaks

Concrete Leveling with Polyurethane - Essential Blog Posts

Posted by Andy Powell on Nov 4, 2016 11:30:00 AM

Concrete Leveling with PolyurethaneOver the past few years, we've published quite a few blog posts on the subject of slab lifting.  In this post, I'm going to highlight a few of our earlier articles covering some of the most common questions people tend to ask on the subject. Contractors who are considering getting into the business often wonder about the strength of polyurethane foam, where to look for lifting jobs, and how to estimate the amount of material they may need for a particular job.  Fortunately, we have thorough blog posts on each of those subjects.  

Slab Jacking with Polyurethane Foam – How Strong is Strong Enough?

When pumping a light-weight material beneath a slab, you need the confidence that it is strong enough for the application. How strong is strong enough? This is a commonly asked question by contractors that are new to slab jacking with polyurethane (poly lifting). Alchemy Polymers structural foams only need to be as strong as dirt, but they're actually stronger than crystalline bedrock.

Slab lifting foams are rated on density (weight per cubic feet) and compressive strength. This testing and rating is based on the foam in a free rise state; the parts A and B are mixed together and allowed to expand freely. Our AP Lift 430 and AP Lift 475 structural lifting foams, for example, will weigh 2.75 – 3.25 lbs (AP Lift 430) to 4.75 – 5 lbs (AP Lift 475) per cubic foot. But they have a compressive strengths of 50 psi and 100 psi in a free rise state. That's equal to 7,200 to14,000 lbs per square ft of support, just in a free rise state.

Read more in the post Slab Jacking With Polyurethane Foam – How Strong is Strong Enough?.

Identifying Common Markets for Slab Jacking with Polyurethane

Three main markets we will take a look at today include Residential, Commercial / Industrial, and Transportation.

The residential market offers tremendous opportunities for the slab lifting contractor. Obviously there are driveways and foundations. These can all sink for various reasons such as water runoff, excess weight, and poor compaction. But look a little further; this year alone we have had calls concerning the following areas: Patios, Outbuildings, Pools, and Porches. And don't think residential only includes houses. I'm not saying that construction companies that build condos and apartments would bury trash that would later cause settling issues; I'm just saying....

Read more in the post Identifying Common Markets for Slab Jacking with Polyurethane.

Estimating Materials for Slab Jacking

Jeff Foxworthy often asks if you are smarter than a fifth grader. Well if you're not, don't worry about it; you're probably still capable of estimating the amount of foam needed to raise a concrete slab. Through a combination of easy calculations, product information, and some site considerations, you should be able to estimate your slab lifting materials without too much trouble.

First of all you need to think about the basic volume calculation. How many square feet of slab are you jacking, how much do you need to lift it, and is it the whole slab being lifted or is it just one end of it? Calculate the volume (length x width x depth), adjust for the percentage of the slab being lifted, then compare it to the expansion properties of the injection foam in order to determine how much you need.

Beyond the geometry required to estimate lifting the slab, you must now take into account some job specific considerations. This is where it becomes critical to qualify the volume of material included in your proposal. And just as important, this is where you need to make sure you have included enough so you get the job done right and don't have to go back to the customer asking for more money. Sometimes that's unavoidable if you encounter surprises; but by keeping a few considerations in mind this can often be avoided.

Read more in the post Estimating Materials for Slab Jacking.

Want more in-depth info on concrete leveling?

Download an Info-Packed Slab Lift Brochure!

Topics: All Posts, Lift Slabs