
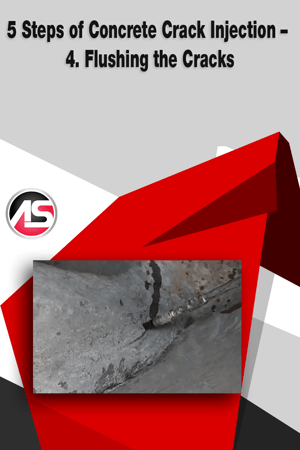
 All cracks that aren’t actively leaking at the time you are sealing them need to be flushed out with water. Flushing them gives you several advantages:
- Let’s you know whether your drill holes have intersected the crack.
- Flushes dirt and debris out the surface of the crack so your resin has a cleaner internal surface to bond to.
- Reveals how far you can expect the resin to travel so you know if your drilled holes are close enough together.
- The water will help open up tight cracks that the thicker resin may not otherwise have been able to penetrate.
- Ensures that the resin has sufficient moisture to react with.
Start at the lowest point in the crack and flush clean water through your injection ports. It is best to have at least two pumps onsite. One for pumping water and one for pumping resin. Use the same type of high pressure pump that you use for resin. You can use a smaller pump if you like, as long as it is capable of generating between 2,800 and 3,500 p.s.i.
BE CAREFUL when flushing tight cracks! The low viscosity of water coupled with the high pressure of the pump can shear the concrete. The water can push into tight cracks and capillaries and all at once split your concrete. You can also shear concrete with resin, but it is more likely to happen with water because you are testing your crack and trying to open it up.
Always start every port with the lowest pump pressure and slowly turn it up as necessary. Also, slowly crack the valve open when you are first injecting water or resin. This is a critical moment in the process. If you forget to turn the pump pressure down after each port, you risk blasting high pressure into the port all at once which can result in shearing of the concrete or blowing out the port.
Keep injecting water as long as it is flowing through the port and moving further and further along the crack. Monitor the water coming out of the crack. Notice if it is clean or cloudy. Keep injecting until it comes out clean.
If the project is big enough, you can have one technician injecting water and another injecting resin right behind. Personally, I like to do both steps myself. That way I know what to expect when injecting the resin. In any case, keep the water pump nearby. Many times you will have to pop another hole in the wall here and there to completely seal the crack with resin.
Click below to read the previous articles in this series if you missed them:
5 Steps of Concrete Crack Injection - Overview
5 Steps of Concrete Crack Injection - 1. Drilling Holes
5 Steps of Concrete Crack Injection – 1. Drilling Holes (Continued)
5 Steps of Concrete Crack Injection – 2. Flushing the Holes
5 Steps of Concrete Crack Injection – 3. Installing the Ports
Click below to read next articles in this series:
5 Steps of Concrete Crack Injection – 5. Injecting the Resin
Want in-depth info on crack injection procedures and products?

